Repository navigation
Trip Tags
Tags provide reusable labels for organizing trips. A tag can be global or scoped to a particular vehicle, and its color helps distinguish it in the interface.
- Open Settings → Trip Tags.
- Choose Global or a specific Vehicle.
- Enter Tag Name and choose Color.
- Choose Save Trip Tag.
- Review the saved list; use Refresh Lists if needed.
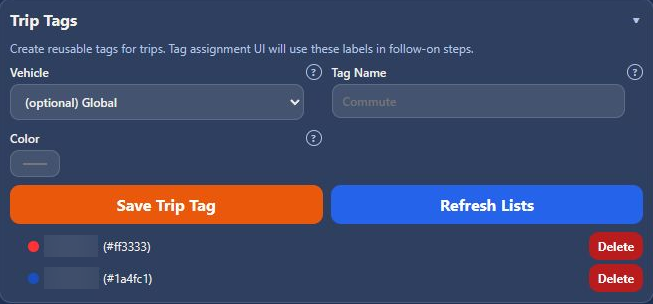
The blur hides the names of the installation's existing tags. The field labels, color indicators, and action buttons are unchanged.
- In Trips, expand a month and day, then select a trip. Scroll below that day's trip rows to reach its tag controls.
- Wait for its saved metadata to load.
- Choose the label in Add Tag.
- Choose Add.
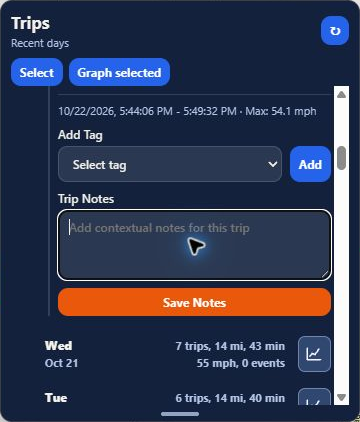
Use a small, consistent set of labels so equivalent trips can be compared. Trip Notes is the separate place for free-form context; choose Save Notes after editing it.
Open Stats → Reports and choose a Tag filter where available, then run the report. Check the vehicle and date range alongside the label. See Reports for available report types and exports.
Deleting a reusable label is a separate action from adding it to a trip. Review the intended label and the application's confirmation before deleting it.