Repository navigation
Map and Vehicle Status
The wide workspace combines the map with movable Trips, Notifications, and Vehicle Status panels. On a phone, use the bottom navigation and sheets described in the Mobile guide.
Open Devices to choose trackers. A checkbox controls map visibility; selecting a name chooses the device for inspection. The wide Devices list shows about two rows at once and scrolls for additional trackers.
Use + and − to zoom. The wide map toolbar below them contains:
| Control | Purpose |
|---|---|
| Information circle | Open connection Status to the left of the button. |
| Named places pin | Show or hide named places. |
| Fit arrows | Resume automatic zoom and fit visible map data. |
| Settings gear | Open Settings above the workspace panels. |
| Import/export arrow | Open raw-position export and CSV restore tools. |
| Reset windows arrow | Return floating panels and keys to their default positions. |

Connection Status reports application progress and the Traccar API state. Choose the information icon again, its ×, or Escape to close it.
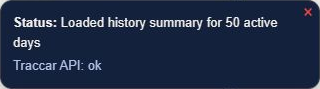
On a phone, the visible map has zoom and fit/follow controls; use More for the other destinations.
The Vehicle Status card shows the selected point's telemetry. Use + to expand it and − to collapse it. Check the point timestamp and age: selecting a historical trip or point can show historical values.
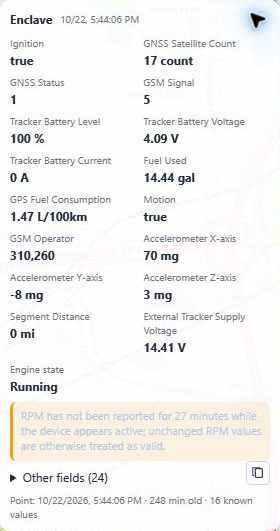
Other fields expands the point's attribute data. Its copy button copies that data to the clipboard. Available fields depend on the tracker, recorded values, assigned protocol profile, and vehicle field preferences. A missing RPM or temperature value alone does not prove a fault.
Administrators choose card and popup fields in Settings → Vehicle Catalog. Green field labels there mark measurements found in that vehicle's history; Show only received fields filters the available choices. See Vehicle Catalog.
Speed bands explains route colors. Double-click it to reach its editor. Track locations explains configured track-marker colors.
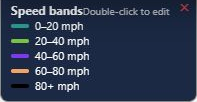
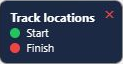
Drag a panel by its heading or drag area. Trips and Notifications have lower height-resize handles. Keys have close controls; Reset windows to original positions restores the hidden keys and their default placement.
The default wide layout puts Trips below Devices at the upper left and Notifications below Trips. Speed bands and Track locations sit at the bottom left; Vehicle Status starts near the upper right. Resetting uses these anchors rather than an old screen's bottom coordinates.
See Map point telemetry for point selection and Trips for routes, notes, and graphs.