Connecting to the Server Using Windows_11436087
Created by Unknown User (moham727), last modified by Jimmy Issa on Dec 20, 2022
Accessing a Unix shell like Bash on Windows has become substantially easier and simpler in recent years. In 2017, Microsoft released the Windows Subsystem for Linux (WSL), eliminating the need for using third-party applications like MobaXterm. In 2019, WSL2 was released, enabling the installation of a native Linux subsystem onto your (otherwise) Windows computer.
Prerequisites:
- Windows 10 or Windows 11
- Make sure all recent updates are installed. Go to Settings, search Windows Update settings, check for updates and install any available.
The steps for installing WSL2 are as follows:
- Open the Command Prompt in Administrator mode. (If you don't know how to do this, go to the Windows search box, type in 'Command Prompt', and the application should show up. Right-click on it and click on 'Run as administrator'.)
- Run the following command: wsl --install
- Restart your computer. You're done.
You should now be able to search for the Bash terminal (by just searching 'Bash') in the Windows search box. If you know anything about Linux, you might be wondering which Linux distro you installed when you ran wsl --install. You installed Ubuntu, Ubuntu is the most widely-used Linux distro because it is also the simplest one. (While it is possible to specify a different distro with the wsl command, I don't see the actual need for using any other distro for the purpose of bioinformatics. Not only that, but if you do something like install Arch instead of Ubuntu without already being a power-user, you will suffer.)
Now that you can access a terminal like Bash, go to the other Wiki page "Connecting to the server" and you can follow the exact same instructions that everyone else follows to connect to the server. But basically you just run this:
ssh -v utorid@hpcnode1.utm.utoronto.ca
And of course replacing 'utorid' with your personal utorid.
Tips
You may also be prompted for your utor password upon getting into the server. I recommend using a private key so that you don't need to enter your password each time you get into the server, as well as adding an alias for the ssh command above into your ~/.bashrc file so you don't need to remember how to type the whole thing every time you want to get into the server. Personally I've added this alias to my bashrc file:
alias utmssh="ssh -v utorid@hpcnode1.utm.utoronto.ca"
So I just type and enter 'utmssh' into Bash to enter the server.
- Take pride in the fact that you did not succumb to the Mac influence by purchasing an overpriced shiny piece of metal. Consumerism? Not today.
- Connect to the vpn by following the instructions on here: http://vpn.utoronto.ca/win_install
- Download MobaXterm Home edition (Portable edition). This allows you
to have a shell to work out of, similar to the built-in terminal you
would find on a Mac.
http://mobaxterm.mobatek.net/download-home-edition.html - Once you click on the application, a message will appear that you will need to extract all files before running it. Select “OK”
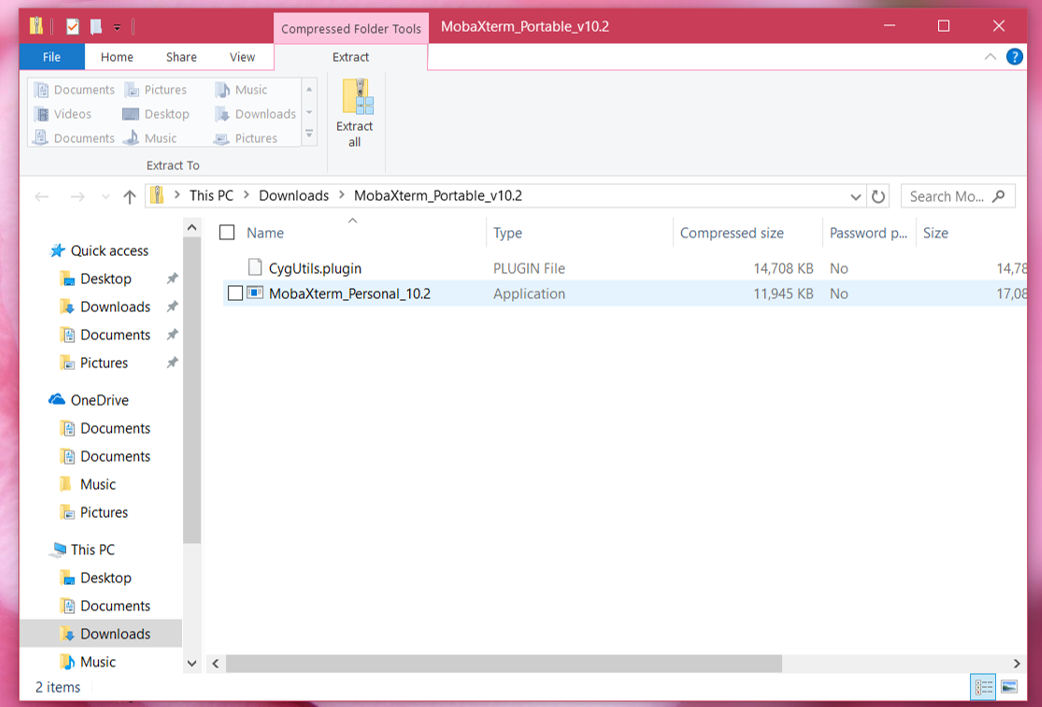
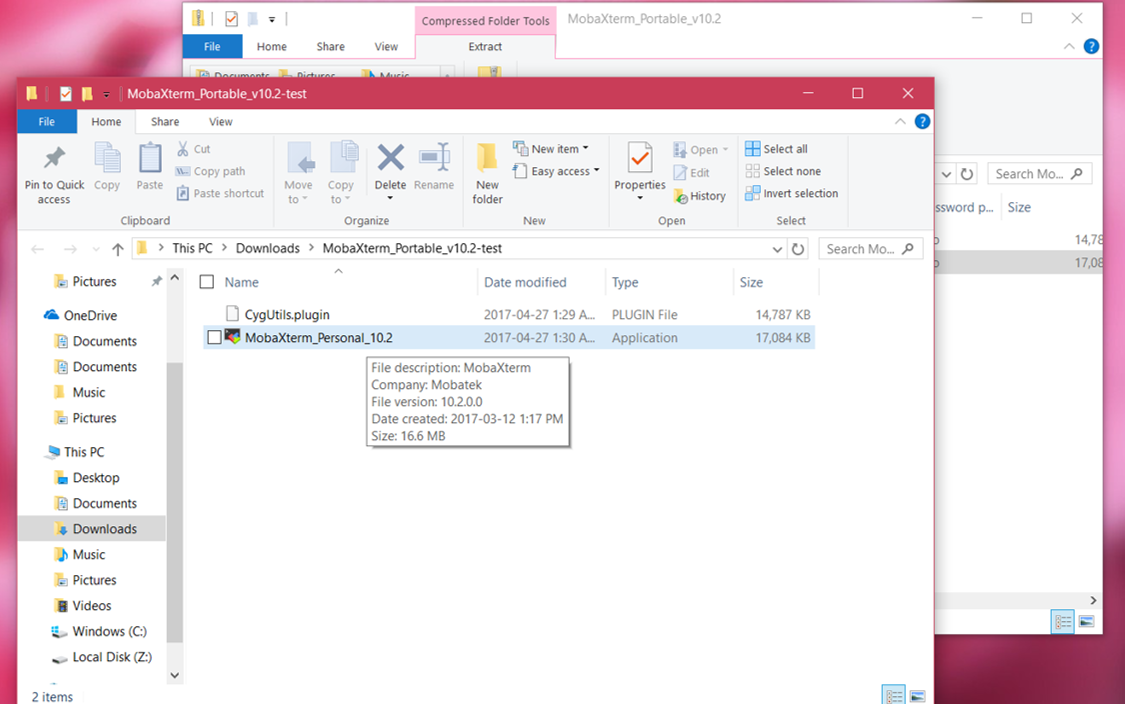
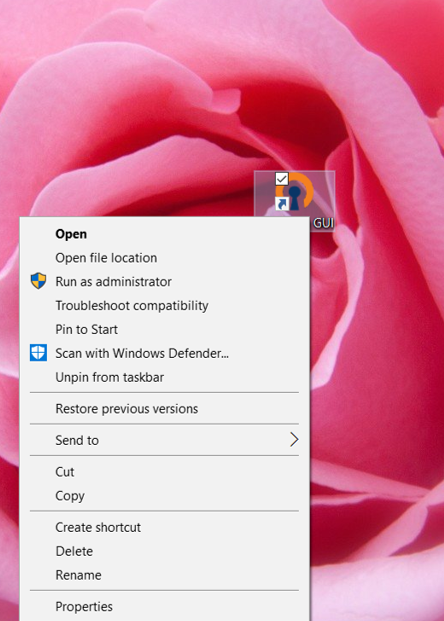
5. Run OpenVPN as an administrator and login with your UTORid and password when it prompts.
6. Open Mobaxterm and where it says “Find existing session” or server name, begin typing the name of the server “hpcnode..”. Once you start typing, it gives you a drop-down menu. If you have previous sessions, these will appear here. Since this is the first time connecting, you will have to make a new session, so click on that option.
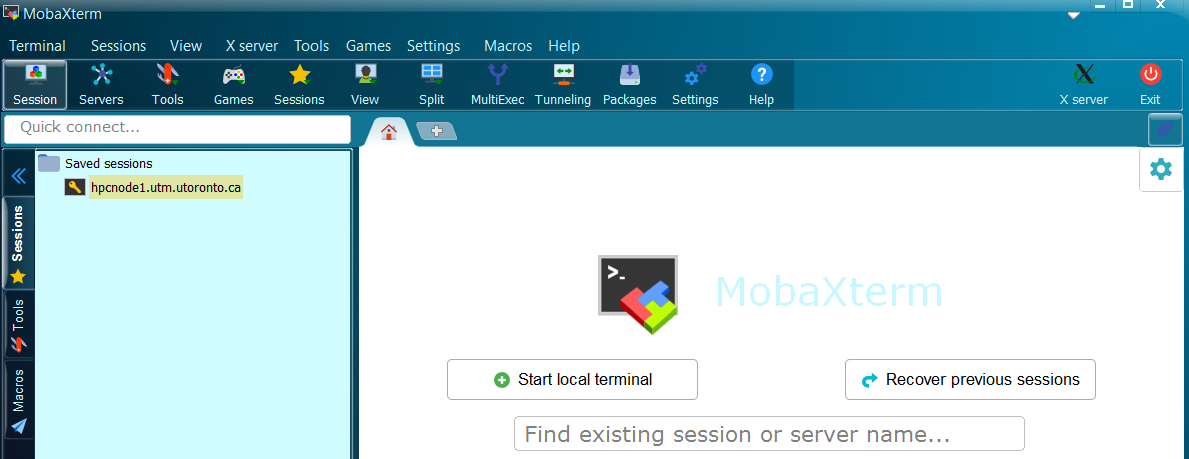
7. Where it says select session type, choose the SSH option.
8. Type in **“hpcnode1.utm.utoronto.ca” **in the space where it says "Remote host". If you’d like, you can also check off the “specify username” box and type in your utorid there as well. This makes it so that you do not need to enter your password with each subsequent login.
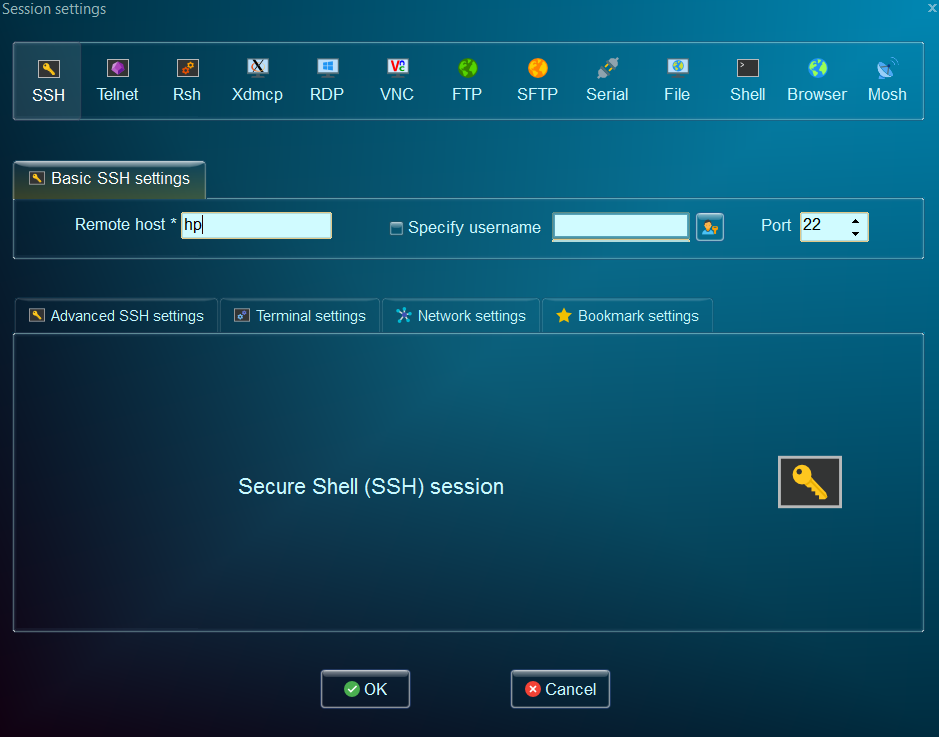
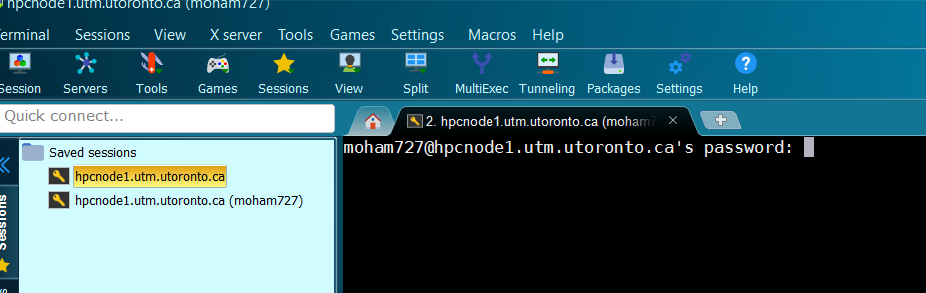
9. Once that’s done, click OK and it will ask for your password in the main window.
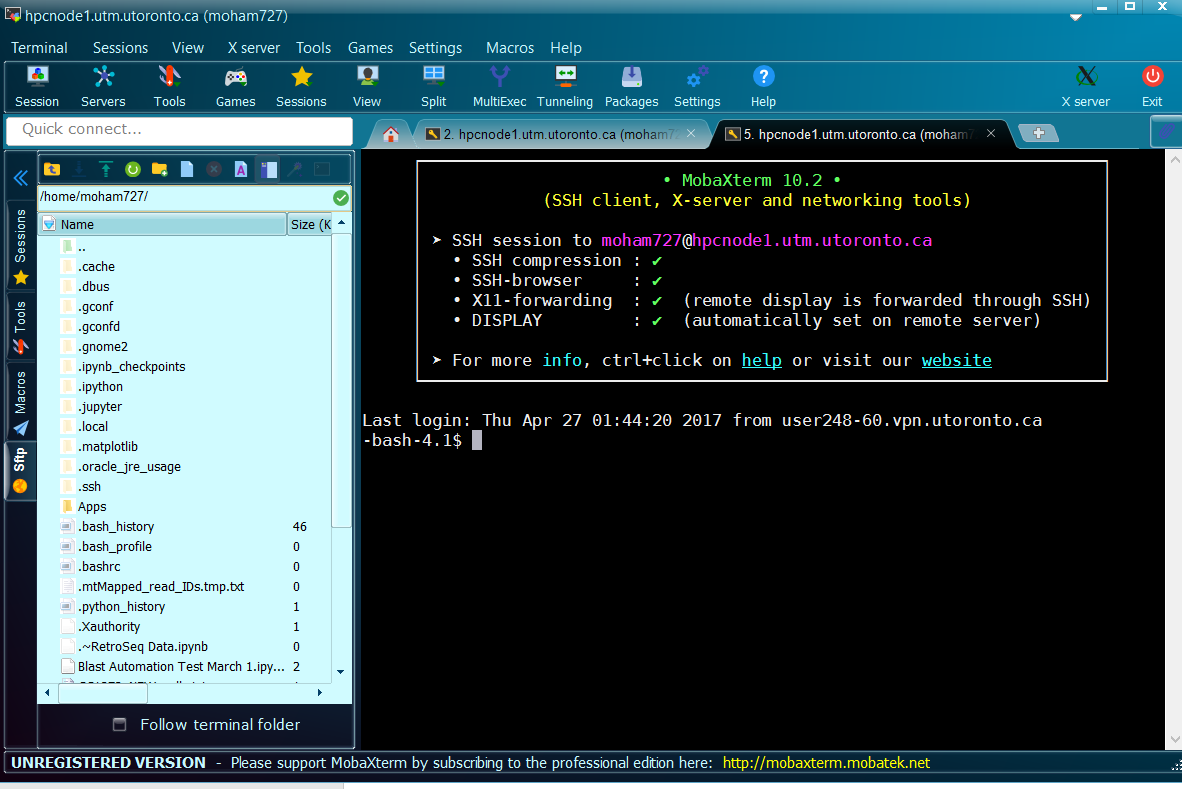
10. This is what the interface looks like once you’re connected to the
server. The pane on the left lets you navigate through the directories
as well as create files/folders (kind of like the Transmit app on Macs
except that it is a built-in feature). This makes it easy to upload and
download files by dragging and dropping. That's it! The Ness lab
initiation is complete 
 [p4.2.png](attachments/11436087/11436085.png) (image/png)
[p4.png](attachments/11436087/11436086.png) (image/png)
[p5.png](attachments/11436087/11436079.png) (image/png)
[p6.png](attachments/11436087/11436080.png) (image/png)
[p8.png](attachments/11436087/11436081.png) (image/png)
[p9.png](attachments/11436087/11436082.png) (image/png)
[p10.png](attachments/11436087/11436083.png) (image/png)
[p4.2.png](attachments/11436087/11436077.png) (image/png)
[p4.png](attachments/11436087/11436078.png) (image/png)
[adminvpn pic.PNG](attachments/11436087/11436084.png) (image/png)
[p4.2.png](attachments/11436087/11436085.png) (image/png)
[p4.png](attachments/11436087/11436086.png) (image/png)
[p5.png](attachments/11436087/11436079.png) (image/png)
[p6.png](attachments/11436087/11436080.png) (image/png)
[p8.png](attachments/11436087/11436081.png) (image/png)
[p9.png](attachments/11436087/11436082.png) (image/png)
[p10.png](attachments/11436087/11436083.png) (image/png)
[p4.2.png](attachments/11436087/11436077.png) (image/png)
[p4.png](attachments/11436087/11436078.png) (image/png)
[adminvpn pic.PNG](attachments/11436087/11436084.png) (image/png)
Document generated by Confluence on May 22, 2024 11:44