Watch Complications
Put a child's chores on their wrist. TaskMate gives every child a small watch sensor ("3 left", "All done") and a complete next chore action, sized for Apple Watch complications and Wear OS complications and tiles. This page has copy-paste templates for both.
New in v6.0.0
Watch faces aren't built by TaskMate itself. They're set up in the Home Assistant companion apps, using the sensor and action below.
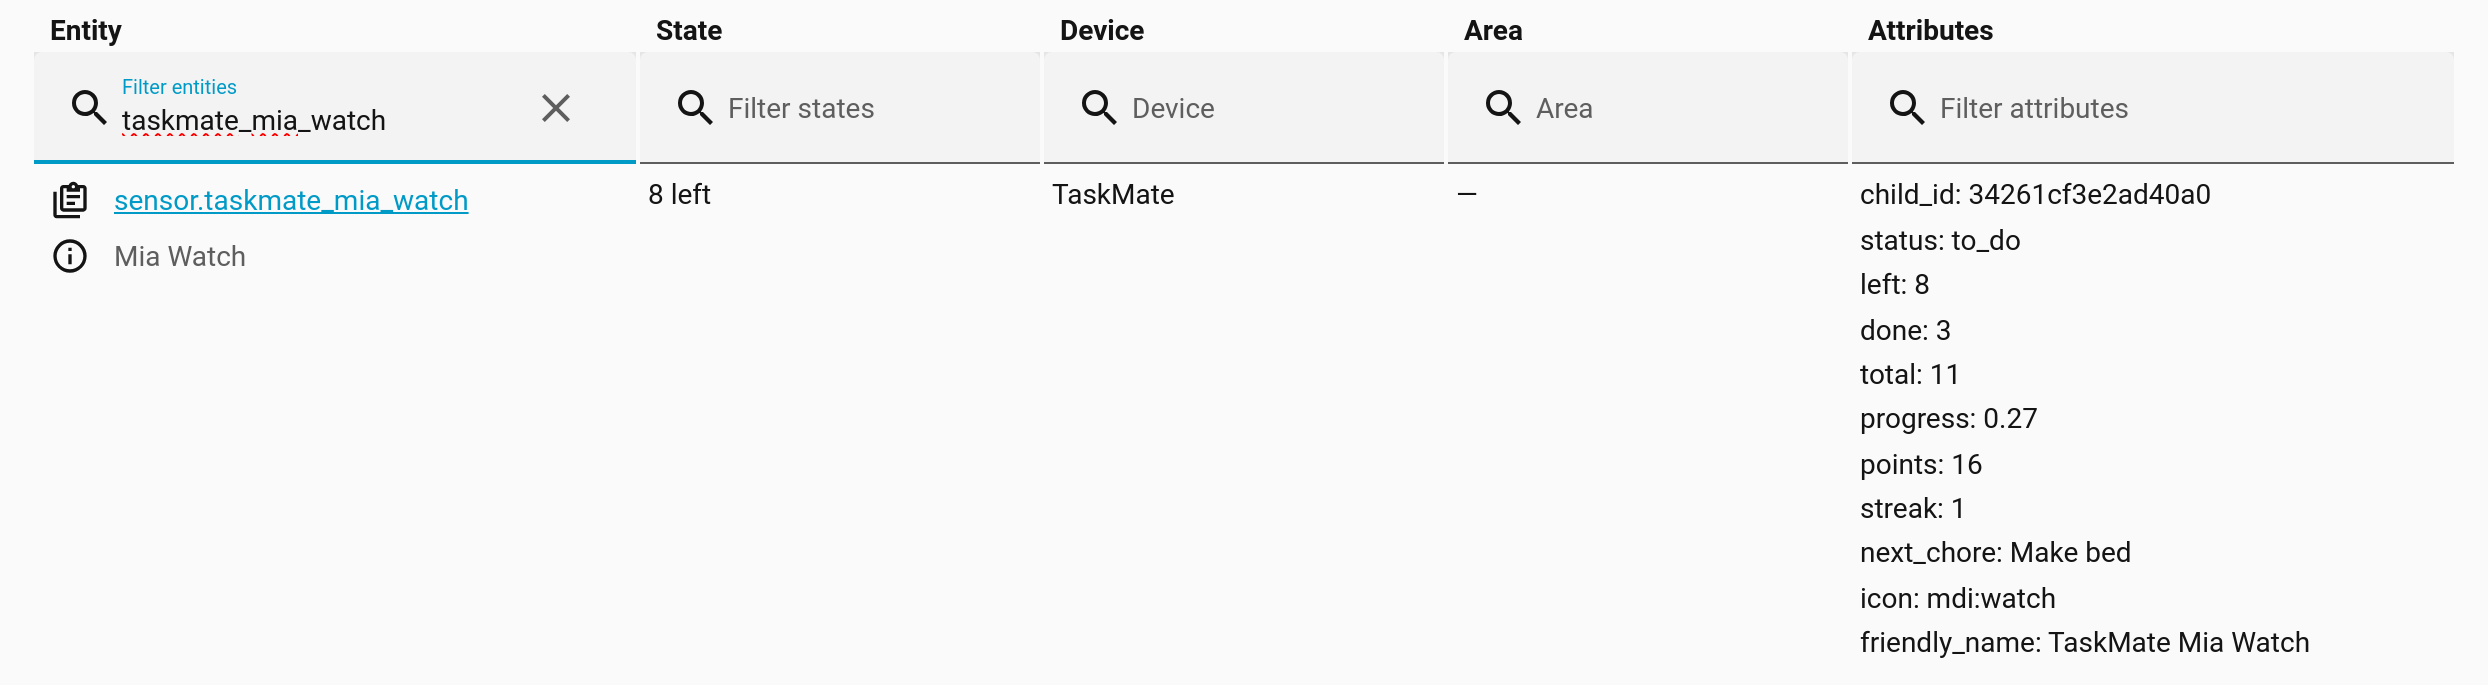
Every child gets sensor.taskmate_<child>_watch, for example sensor.taskmate_mia_watch.
A short phrase that fits on a complication, in your Home Assistant server's language:
| State | When |
|---|---|
3 left |
Chores still to do today (the number changes) |
All done |
Everything for today is done |
No chores |
Nothing was due today |
| Attribute | Example | Description |
|---|---|---|
child_id |
34261cf3e2ad40a0 |
The child's ID, for the action below |
status |
to_do |
to_do, all_done or no_chores. The same in every language, so use this in templates rather than the state text. |
left |
3 |
Chores still to do today |
done |
4 |
Chores done today, including ones waiting for approval |
total |
7 |
Chores due today |
progress |
0.57 |
done / total, from 0 to 1. Ready for a gauge or ring. 1.0 when nothing was due. |
points |
126 |
Current points |
streak |
5 |
Current streak in days |
next_chore |
Make bed |
The chore complete next chore would tick off. Only present when there is one. Clipped to 40 characters. |
The counts use the same definition as the Today page in the TaskMate panel. left includes chores that need a photo or a timer; next_chore skips them (see below).
Replace mia with your child's name in every template on this page.
taskmate.complete_next_chore ticks off the child's next outstanding chore. It's made for a watch button.
| Field | Required | Description |
|---|---|---|
child_id |
Yes | The child's ID (the child_id attribute of their watch sensor) |
- "Next" is the order the child sees on their card: their own custom order first, then the default order.
- Skipped: chores a single tap can't finish: photo proof, open-ended, timed and teamwork chores.
- Normal rules apply: approval, points and notifications behave exactly as if the child had tapped the chore on their card.
- Nothing left? It quietly does nothing, so a button pressed once too often doesn't raise an error.
- Linked accounts: it follows the same rule as ticking a chore. If the child is linked to a Home Assistant user, the watch has to be signed in as that user (or an admin).
Watches run scripts, so create one per child. Settings → Automations & scenes → Scripts → Add script → Edit in YAML:
alias: Mia – next chore done
icon: mdi:check-circle-outline
mode: single
sequence:
  - action: taskmate.complete_next_chore
    data:
      child_id: "{{ state_attr('sensor.taskmate_mia_watch', 'child_id') }}"
Reading the ID from the sensor means you never have to look it up.
You need watchOS 9 or later, and you must be a Home Assistant admin to create complications.
- On your iPhone, open the Home Assistant app's settings and go to the Apple Watch section → Complications.
- Add a complication and pick a family and template (see below).
- Paste the templates into the text, gauge or ring fields, and save.
- On the watch, long-press the watch face → Edit → pick the Home Assistant complication.
For the Modular face (watchOS 9 and later), choose Circular or Rectangular from the Graphic section.
Gauge and ring fields need a number from 0.0 to 1.0. That's exactly what the progress attribute gives you.
For a one-line complication (such as the text along the top of the face):
{% set w = 'sensor.taskmate_mia_watch' %}
{% if is_state_attr(w, 'status', 'to_do') %}{{ state_attr(w, 'left') }} left · {{ state_attr(w, 'next_chore') or '' }}{% else %}✓ {{ states(w) }}{% endif %}
Shows 3 left · Make bed, or ✓ All done.
For the shortest possible text, just use the state:
{{ states('sensor.taskmate_mia_watch') }}Pick a Graphic → Circular template with a gauge or ring.
Gauge / ring value:
{{ state_attr('sensor.taskmate_mia_watch', 'progress') | float(0) }}Centre text: how many are left:
{{ state_attr('sensor.taskmate_mia_watch', 'left') | int(0) }}…or done out of total:
{% set w = 'sensor.taskmate_mia_watch' %}{{ state_attr(w, 'done') | int(0) }}/{{ state_attr(w, 'total') | int(0) }}The ring fills as the day's chores get done, and is full once everything is ticked off.
Pick a Graphic → Rectangular template. Fill as many lines as the template offers.
Header:
Mia's choresLine 1:
{{ states('sensor.taskmate_mia_watch') }}Line 2: the next chore, or the state when there isn't one:
{% set w = 'sensor.taskmate_mia_watch' %}{% set nxt = state_attr(w, 'next_chore') %}{{ ('Next: ' ~ nxt) if nxt else states(w) }}Line 3 (or a second text field): points and streak:
{% set w = 'sensor.taskmate_mia_watch' %}⭐ {{ state_attr(w, 'points') | int(0) }} · 🔥 {{ state_attr(w, 'streak') | int(0) }}Gauge (on templates that have one): use the progress template above.
In the iPhone app's Apple Watch section, open Configuration, add the Mia – next chore done script, then Save. Reload the Home Assistant app on the watch. The script now shows as a button in the watch app.
Apple Watch complications refresh roughly every 15 minutes (around :00, :15, :30 and :45), at a time chosen by watchOS. So a completed chore can take a few minutes to show on the face.
You need the Home Assistant app on the watch, signed in through a paired Android phone.
The simplest option, and it needs no template.
- On the watch, long-press the watch face → Customise → pick a complication slot.
- Choose Home Assistant → Entity state.
- Pick
sensor.taskmate_mia_watch.
It shows the sensor's state: 3 left, All done or No chores. You can optionally show the entity's name too.
This has to be set up on the watch itself, not in the watch app on the phone. The complication updates when the screen turns on and roughly every 15 minutes, and you can tap it to update it straight away.
A tile with more detail. The template is set from the Android companion app on the phone (the Wear OS settings), then the tile is added on the watch.
{% set w = 'sensor.taskmate_mia_watch' %}
<b>{{ states(w) }}</b><br>
{% if state_attr(w, 'next_chore') %}Next: {{ state_attr(w, 'next_chore') }}<br>{% endif %}
<font color='#ffc107'>⭐ {{ state_attr(w, 'points') | int(0) }}</font> · 🔥 {{ state_attr(w, 'streak') | int(0) }}
Template tiles understand a few HTML tags: <b>, <i>, <big>, <br> and <font color='…'>. Set the tile's refresh interval to every few minutes so it keeps up.
Add the Mia – next chore done script as a shortcut:
- On the watch, open the Home Assistant app → Settings → the Shortcuts tile.
- Add the script. A Shortcuts tile holds up to 7 shortcuts.
- Add the Shortcuts tile to your tiles.
One tap on the tile ticks off the next chore. You can also add the script to the app's Favourites.
- Test your templates first in Home Assistant's Developer tools → Template tab. Paste one in and check the output before putting it on the watch.
-
Use
status, not the state text, iniftests. The state is translated, andstatusis not. - A child sharing a parent's phone? Point the complication at their own watch sensor, and use a separate script per child.
- Sensor Reference — all TaskMate sensors
- Services — full service reference
- Voice Assistants — another hands-free way to tick off chores
- Children — linking a child to a Home Assistant user