MCP Setup
This page explains how to connect an AI assistant to your TREK instance. TREK supports three authentication methods: OAuth 2.1 with browser consent (recommended for interactive clients), machine clients with no browser login (recommended for AI agents and scripts), and static API tokens (deprecated).
Cloudflare users: If your TREK instance is proxied through Cloudflare, Bot Fight Mode and Super Bot Fight Mode will block MCP requests from ChatGPT. Claude.ai is not affected. See Troubleshooting → MCP requests blocked by Cloudflare WAF for the fix.
OAuth 2.1 is the preferred connection method. You grant specific scopes during the consent step and no token management is required afterward — TREK issues short-lived access tokens and automatically rotates refresh tokens.
Claude.ai (web) supports native MCP connections — no JSON config file required:
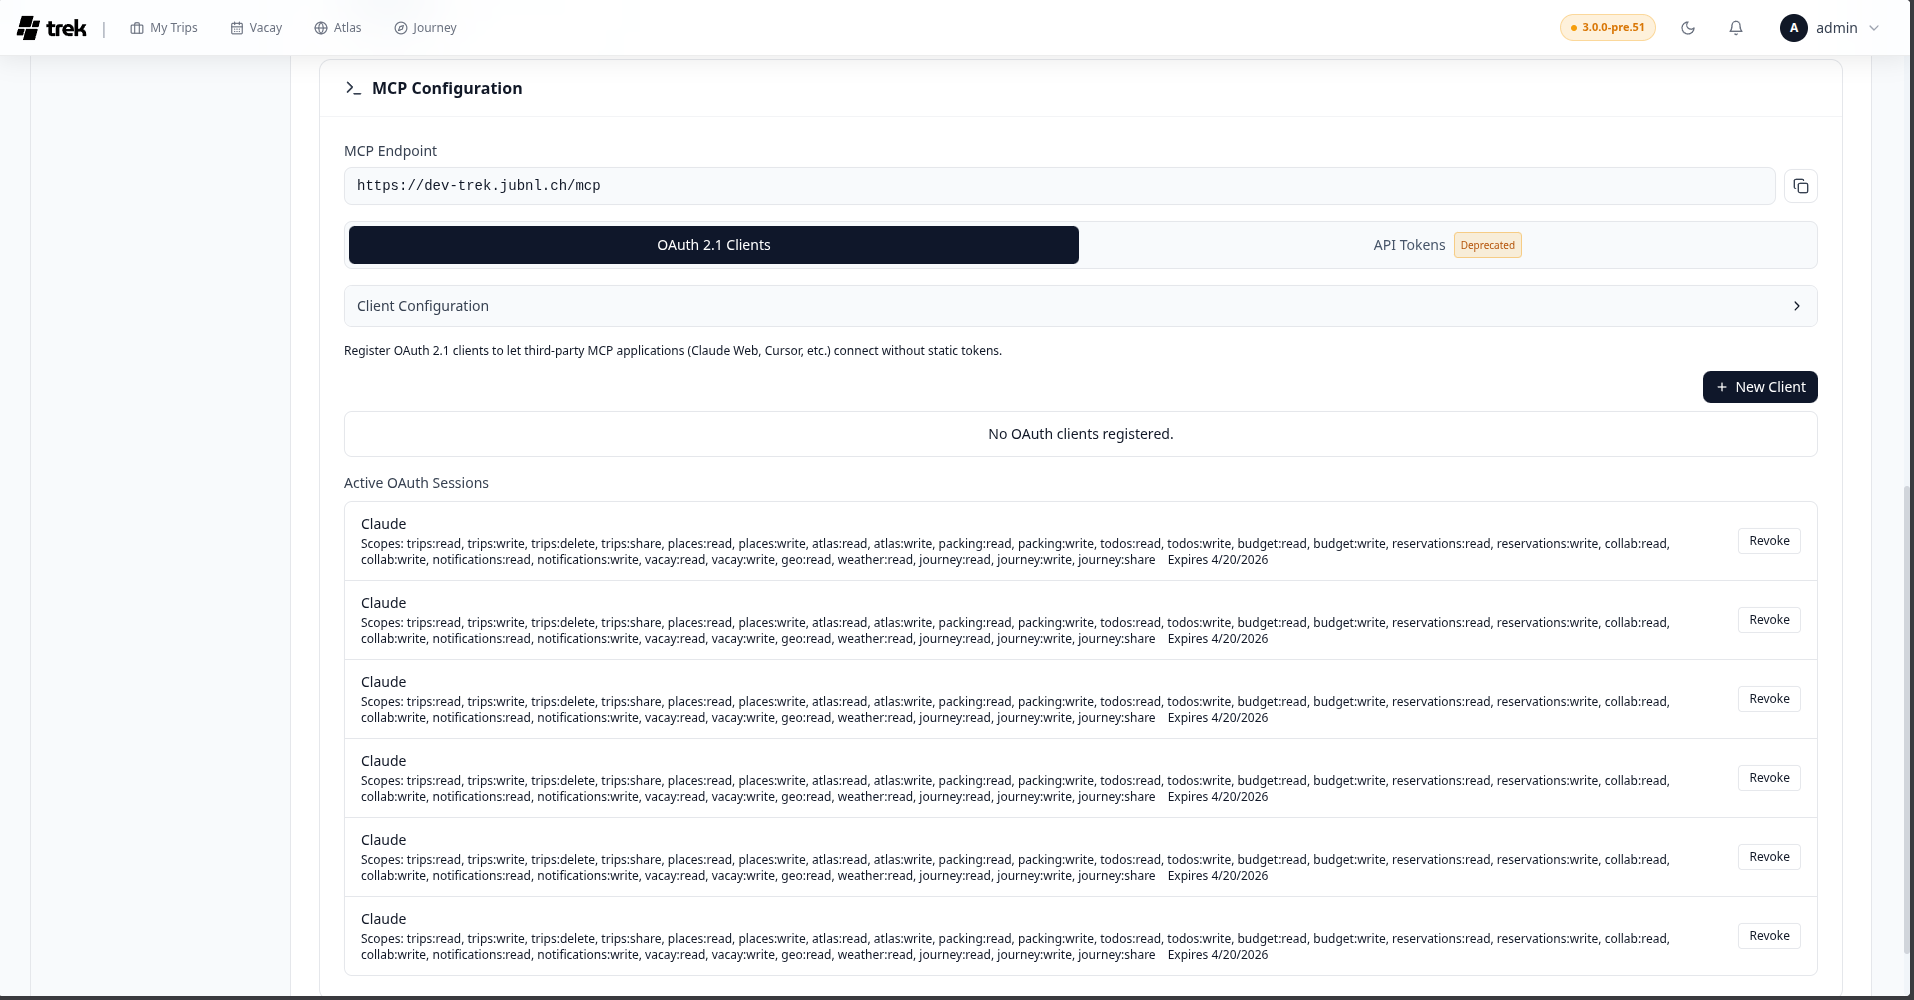
- In TREK, go to Settings → Integrations → MCP → OAuth Clients and click Create.
- Select the Claude.ai preset. This fills in the redirect URI (
https://claude.ai/api/mcp/auth_callback) and a default scope set. - Give the client a name, adjust scopes if needed, and save. Copy the client ID and client secret (
trekcs_prefix) — the secret is shown only once. - In Claude.ai, open the MCP settings and add a new server using your TREK URL (
https://<your-trek-instance>/mcp). Claude.ai will open your browser to complete the OAuth consent flow.
Claude Desktop supports native MCP connections — no JSON config file required:
- In TREK, go to Settings → Integrations → MCP → OAuth Clients and click Create.
- Select the Claude Desktop preset. This fills in the redirect URI and a default scope set.
- Give the client a name, adjust scopes if needed, and save. Copy the client ID and client secret — the secret is shown only once.
- In Claude Desktop, open Settings → MCP and add a new server using your TREK URL (
https://<your-trek-instance>/mcp). Claude Desktop will open your browser to complete the OAuth consent flow.
Clients that support mcp-remote can connect in one of two ways.
Option 1 — dynamic registration (no pre-created client needed):
{
  "mcpServers": {
    "trek": {
      "command": "npx",
      "args": [
        "mcp-remote",
        "https://<your-trek-instance>/mcp"
      ]
    }
  }
}
When the client starts, it fetches TREK's OAuth discovery document (/.well-known/oauth-authorization-server), registers itself automatically, and opens your browser to the TREK consent screen. You choose scopes there.
Option 2 — pre-created OAuth client:
Create a client in TREK using the appropriate preset (Cursor, VS Code, Windsurf, or Zed — all use http://localhost as redirect URI), then pass the credentials via --static-oauth-client-info:
{
  "mcpServers": {
    "trek": {
      "command": "npx",
      "args": [
        "mcp-remote",
        "https://<your-trek-instance>/mcp",
        "--static-oauth-client-info",
        "{\"client_id\": \"<your_client_id>\", \"client_secret\": \"<your_client_secret>\"}"
      ]
    }
  }
}
On Windows,
npxmay need a full path, for exampleC:\PROGRA~1\nodejs\npx.cmd.
Requirement:
APP_URLmust be set on the server for OAuth discovery to work.
Settings → Integrations → MCP → OAuth Clients lets you create named OAuth clients before connecting. This gives you:
- A fixed, named scope list defined up front
- A client secret (
trekcs_prefix, shown once) for confidential client mode - Preset buttons for Claude.ai, Claude Desktop, Cursor, VS Code, Windsurf, and Zed that fill in the correct redirect URIs and a sensible default scope set
Each user can have up to 10 OAuth clients.
Use this when your AI agent or automation script needs to authenticate silently without any browser interaction. Instead of going through an OAuth consent flow, the client exchanges a client_id and client_secret directly for an access token (RFC 6749 §4.4 — Client Credentials grant).
Why this exists: browser-based OAuth flows break when an AI agent runs unattended. The agent may fire multiple concurrent token refreshes, causing replay detection to invalidate the session and open browser windows. Machine clients sidestep this entirely — there is no refresh token and no rotation race.
How it works: the token acts as its owner (the user who created the client), scoped to the permissions chosen at creation. All TREK permission checks still apply — the AI agent can only access what you can access, narrowed further to the selected scopes.
- Go to Settings → Integrations → MCP → OAuth Clients and click New Client.
- Tick Machine client (no browser login). The redirect URI field disappears — machine clients don't need one.
- Give it a name, select scopes, and click Register Client.
- Copy the
client_idandclient_secretshown — the secret is displayed only once.
Your AI client uses the client_id and client_secret to request a token directly from TREK (POST /oauth/token with grant_type=client_credentials). Tokens are valid for 1 hour. When one expires, the client requests a new one silently — no browser window, no user action, no consent screen. This is handled entirely by the client.
Machine clients are designed for AI agent frameworks and custom MCP client implementations that can call the token endpoint themselves and handle renewal programmatically. TREK advertises client_credentials in its OAuth discovery document (/.well-known/oauth-authorization-server), so any compliant client can discover and use it automatically.
mcp-remoteusers:mcp-remoteimplements the browser-basedauthorization_codeflow only — it does not supportclient_credentials. If you usemcp-remote, stick with Option A and use the preset for your client. The machine client option is not applicable.
Deprecated: Static tokens will stop working in a future version of TREK. Migrate to OAuth 2.1 or machine clients.
Static tokens grant full access to all tools and resources with no scope restrictions. Sessions using a static token will receive deprecation warnings in the AI client on every tool call.
- Go to Settings → Integrations → MCP, open the API Tokens sub-tab, and click Create New Token.
- Give the token a name and copy it immediately — it is shown only once. The token starts with
trek_. - Pass the token as a header in your client config:
{
  "mcpServers": {
    "trek": {
      "command": "npx",
      "args": [
        "mcp-remote",
        "https://<your-trek-instance>/mcp",
        "--header",
        "Authorization: Bearer trek_your_token_here"
      ]
    }
  }
}
Each user can create up to 10 static tokens.
| Method | Grant | Token prefix | Access level | Expiry |
|---|---|---|---|---|
| OAuth 2.1 — browser consent | authorization_code |
trekoa_ |
Scoped (per-consent) | 1 hour; auto-refreshed via 30-day rolling refresh token (trekrf_) |
| Machine client — no browser | client_credentials |
trekoa_ |
Scoped (per-client), acts as owner | 1 hour; re-request silently, no refresh token |
| OAuth client secret | — | trekcs_ |
Used to authenticate the client at the token endpoint | No expiry (revoke via UI) |
| Static API token | — | trek_ |
Full access | No expiry — deprecated |