Repository navigation
Library
The Library is where every clip and screenshot Flashback saves shows up, already sorted by game. You can watch, search, tag, filter, sort, rename, trim and clean up captures without leaving the app. This page walks through each part.
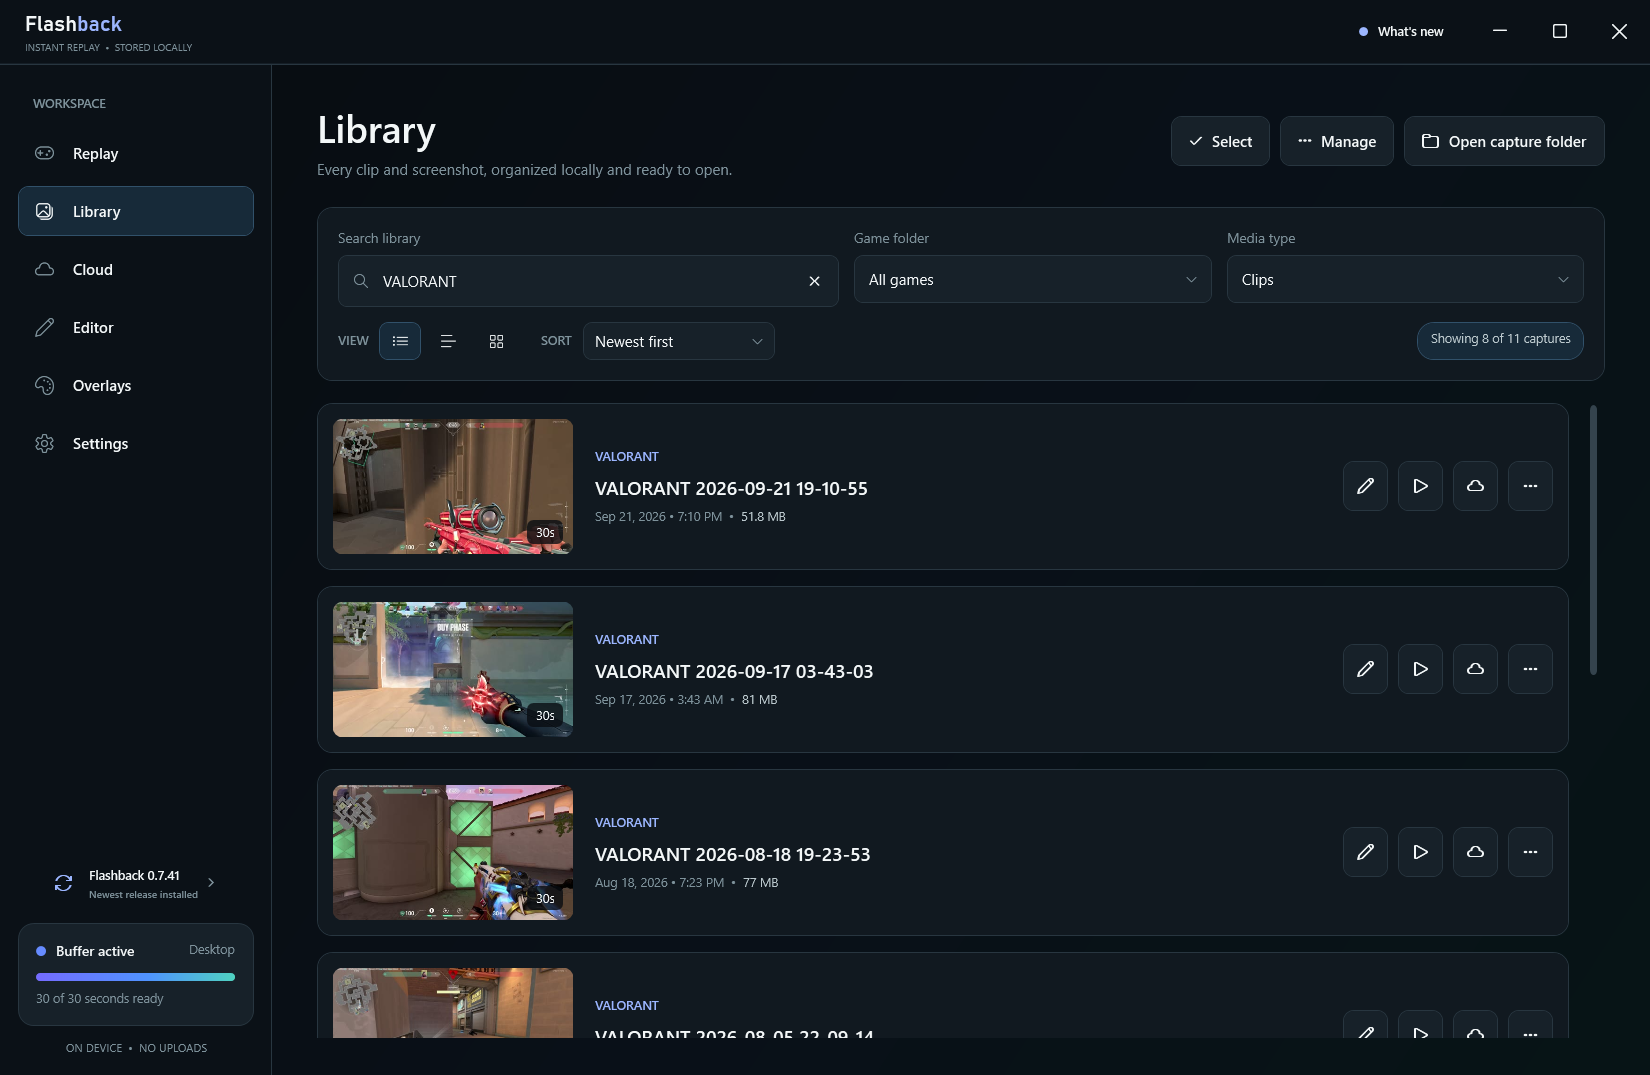
The Library, shown on Flashback 0.7.41.
The Library reads your clip folder (%USERPROFILE%\Videos\Flashback by default, including its game subfolders) and shows the clips and screenshots Flashback saved there. Loading happens without interrupting the replay buffer, and if the folder can't be read, Flashback says so and offers Try again, Open folder or Choose another folder while recording carries on.
Thumbnails are made in memory. Flashback doesn't write preview images or sidecar files into your capture folders, so they stay clean.
Each capture shows when it was recorded. Dates include the year for captures from another year, and times follow the 12- or 24-hour clock from your Windows regional format. A capture you copied or moved keeps the date it was recorded, and times follow a time zone change without restarting Flashback.
A clip saved with the input overlay turned on is marked EDITABLE OVERLAY (or EDITABLE), which means the overlay can still be added or removed when you export it. A capture with a copy on Flashback Cloud shows an uploaded badge, and its tags show on its card.
| View | Best for |
|---|---|
| Comfortable list (default) | Big thumbnails with details at a glance |
| Compact list | Long libraries, scanning names quickly |
| Grid | Browsing visually |
Switch views with the three buttons under VIEW. Your choice is remembered.
Under SORT, pick one of:
- Newest first (default)
- Oldest first
- Largest first: handy when you're freeing up space
- Smallest first
- Name A–Z
Two filters narrow the list:
- Game folder: show one game's captures, or All games.
- Media type: All captures, Clips or Screenshots.
If nothing matches, the Library tells you and offers Clear filters to bring everything back.
Type in Search library to filter as you type.
- Every word you type must match a capture's name, game or tags.
boss fightfinds captures that match both words. - Type
#tagto show only captures with that tag, for example#clutch. - Click the clear button to reset the search.
Search, the game filter and the media filter work together, so you can look for #ace in one game's clips only.
Tags are short labels you add to captures to find them later. They're local: they're kept in Flashback's private clip metadata on your PC (%LOCALAPPDATA%\Flashback\ClipMetadata), not written into the video file, and they're never uploaded unless you keep them in the upload dialog when you share a clip to Flashback Cloud.
To add or change tags, open a capture's ... menu and choose Tags..., then type tags separated by commas. Leaving the box empty clears them.
| Tag rule | Details |
|---|---|
| How many | Up to 10 per capture |
| Length | Up to 32 characters each |
| Characters | Letters, digits, - and _
|
| Tidying | Tags are lowercased, a leading # is dropped, and spaces become hyphens, so Boss Fight becomes boss-fight
|
Because the rules match Flashback Cloud's, a tag you keep on your PC uploads unchanged.
Point at a capture's thumbnail and a play mark appears (an open mark on screenshots). Click the thumbnail to play the clip or open the screenshot. In selection mode the mark is hidden, so a click selects instead.
Hover a capture to see Play clip (or Open screenshot), Edit clip (or Edit screenshot) and Upload to Cloud. The ... button opens the rest:
| Action | What it does |
|---|---|
| Capture health | Checks the clip's frame timing and audio alignment without changing the file. Useful if a clip looks or sounds off. |
| Rename | Renames the capture without touching its contents. |
| Tags... | Adds or changes local tags. |
| Compress for Discord | Makes a separate copy that fits Discord's upload limit. See Editor and Montage. |
| Upload to Cloud | Names the capture and uploads a copy to Flashback Cloud. The original stays on your PC. See Sharing and Visibility. |
| Show in folder | Opens File Explorer with the file selected. |
| Copy file path | Copies the full path, ready to paste. |
| Delete capture | Permanently deletes the file. |
Play clip and Open screenshot open the file in your default Windows app. Edit clip opens the video in the Editor's Trim mode, even if you used Montage last, to trim it, watch it fullscreen or make a Discord copy. Edit screenshot opens the crop editor.
- Click Select to enter selection mode.
- Click captures (or focus one and press Space) to select them. Select all shown selects everything the current filters show, and Ctrl+A does the same.
- Choose what to do:
- Make montage: opens the selected videos in the Editor's montage mode, in the Library's current order. Screenshots are left out, and you need at least two videos. See Editor and Montage.
- Delete selected (or press Delete): review the list, then permanently delete.
- Press Esc or Cancel to leave selection mode.
The Manage button holds actions that affect everything:
- Delete all clips...
- Delete all screenshots...
Both ask you to confirm twice. Open capture folder opens the folder in File Explorer.
Deletes from the Library are permanent; Flashback doesn't keep a second copy.
- Storage limit: by default Flashback keeps your saved captures within 20 GB. It checks at startup, after each save and when you apply settings, and removes the oldest Flashback captures only when you're over budget, so lowering the limit can remove older captures straight away. It never touches other files in the folder, and Unlimited turns removal off. The newest item and the clip open in the Editor are always safe. Details on Storage Limit.
- Storage review: Review under Storage intelligence in Settings > Storage & shortcuts finds your largest captures, old ones and exact duplicates, with live progress for each stage. It's read-only and never deletes anything by itself; press Esc to cancel a scan.
Editor and Montage · Screenshots · Naming and Organization · Storage Limit