4WD_MiniQ_Cherokey_(SKU_ROB0111)

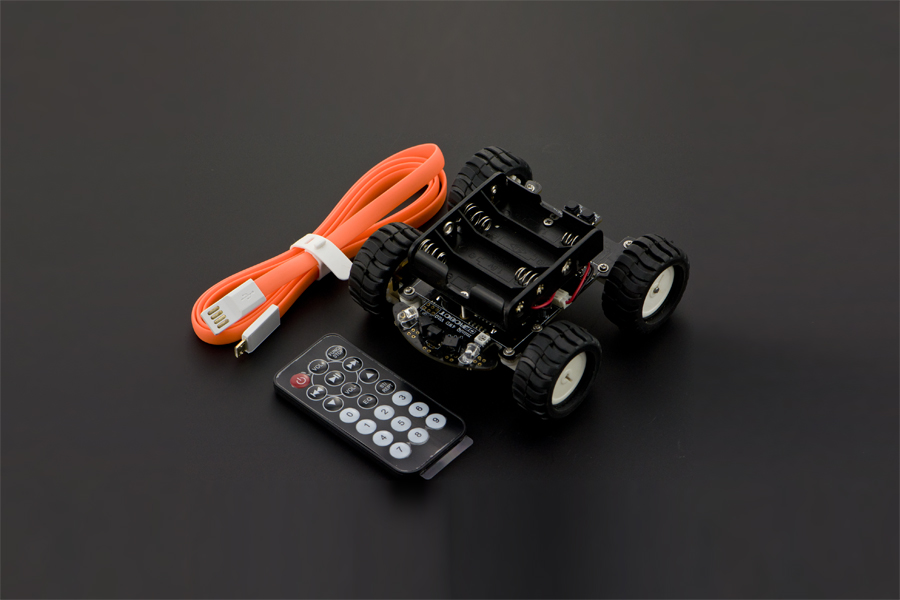
4WD MiniQ mobile robot is especially designed for learning purpose. It comes fully assembled and all your need is a PC with Arduino IDE and 4xAA battery. This upgraded version of MiniQ 4WD Kit comes with new Arduino Leonardo controller (ATmega32u4), and also integrates such modules as 1 RGB, LED, photosensitive diode, 2 infrared trasmitter, 1 infrared receiver, two light sensors, 5 buttons and 1 buzzer.
| NOTE: |
MiniQ 4WD Cherokey is diffenrent from MiniQ 4WD:
- Adjust the clearance between chassis and ground from 9mm to 25mm.
- Cancel the 5 line_follow sensors under the chassis.
- If you want to add the feature, you could buy the digital tracking sensor, remember it is a digital module while the sample sketch is for analog one which is the component on the digital module, it means you could get it off from the module, and solder it on to the chassis.
Thus it improves off-road capacity of Cherokey in complex terrain. |
MiniQ 4WD offers 8 lessons for beginners ,from entry to hunting the line,obstacle avoidance, remote control.Users can easily grasp through
the tutorial.Code Package download,tutorials download.
- lesson1. Get you to know Your Robot
- lesson2. Control Buzzer
- lesson3. Light Direction Indication
- lesson4. Line_follow(Don't support MiniQ 4WD Cherokey)
- lesson5. RGB LED
- lesson6. Obstacle Avoidance
- lesson7. Encoder
- lesson8. IR Remote Control
- Controller: Atmega32U4(Arduino Leonardo)
- Power Supply: 4x AA batteries or Micro-USB
- Working Voltage: 4.5 to 6V
- Driving Mode: 4WD
- Max Speed: 79cm/s
- Size: 115x110x55mm
- Weight:400g
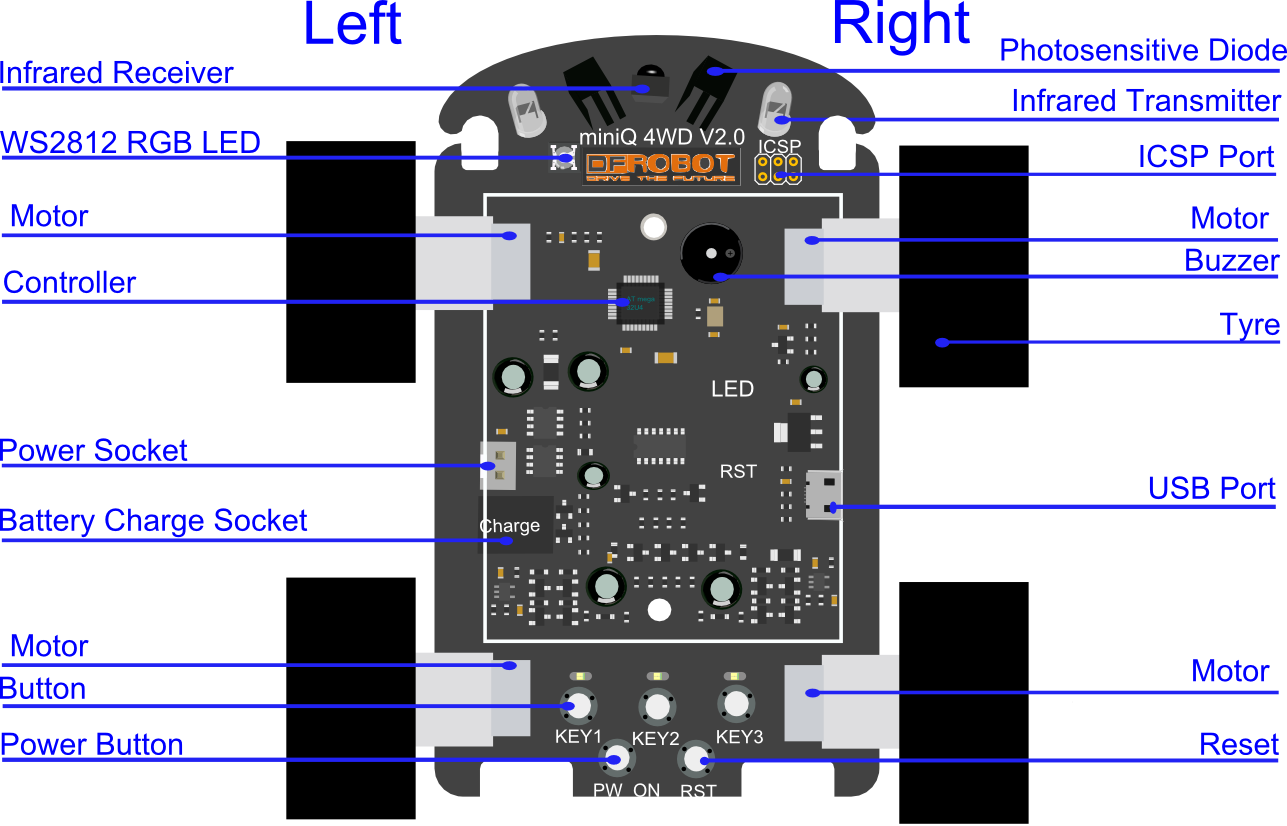
 Function about every component:
- Infrared transmitter:transmit the infrared signal, the signal can be used for detecting obstacles
- Infrared receiver:receive infrared signal, the signal can be used for obstacle avoidance
- Photosensitive diode:sensitive with the light, so it can help you get some information about the light
- Button:can be programmed for your idea
- RGB LED:you can change its color use your code, it can show as an alarm and other things you want
- USB port:download your code and let your robot talk to your computer
- Buzzer(passive):be an alarm bell or sing a simple song
- Controller:runs your code
- Motor:can be controlled to run forward or backward, so that the car can turn left or right freely
- Reset button;Reset the robot, the program in the robot will runs again from its initiation
- Power switch:power switch of the robot
- Power port:power provided from this port
- Charge port: if your batteries can be charged, you can charge them from this port thus they can be hold in the car
- Follow light: A5
- Motors
D5-- PWM control from left motor, D12--EN1 direction control from left motor
D6-- PWM control from right motor, D7--EN2 direction control from right motor
- RGB LED : D10
- Infrared obstacle avoidance:
Transmitter:D13—IRL left transmitter sensor, D8—IRR right transmitter sensor
Receiver: D17—IRS receiver sensor
- Button:D4
- Encoder:
D0--INT2 Right Motor
D1--INT3 Left Motor
- Buzzer
D16(MOSI)— Buzzer
 get it from dfrobot store or dfrobot distributor.