Rain_bucket_SKU_SEN0186

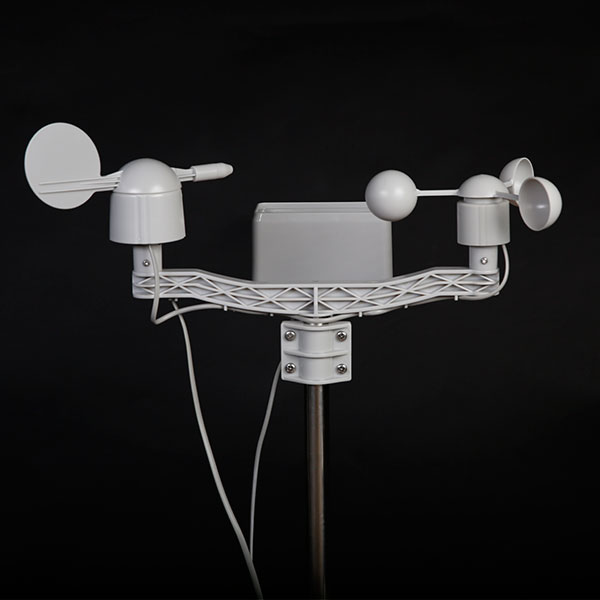
Ever want to build your own weather station? This weather station kit includess anemometer, wind vaneRain and rain bucket. The serial communication method provides good compatibility and makes it easy to use. Together with other components, this anemometer can be widely used in measureing wind/rain in areas such as engineering, railways, docks, power plants, meteorological, cableway, environment study, agriculture, energy monitoring, health study with corresponding signal output. Also, it is compatible with Arduino device.
 Version Update 2016/3/28: Upgrade the Temperature and Humidity sensor that the range and accuracy were improved.
- Operating voltage: 5V
- Temperature range: -40~80℃
- Humidity range: 0~99%
- Package Dimension: 20*18*30 CM
- Weight: 4480g
- Weather station
- Weather monitor
image:SEN0186_Data_interface updated.JPG|Weather Station board, updated from Mar.2016 image:SEN0186_Data_interface.png|Weather Station board, older version
There are two data ports on the board * Data: 2400bps interval: 1s
- TXD : 9600bps interval: 1s
c000s000g000t086r000p000h53b10020
It outputs 37 bytes per second, including the end CR/LF.
Data Parser:
- c000:air direction, degree
- s000:air speed(1 minute), 0.1 miles per hour
- g000:air speed(5 minutes), 0.1 miles per hour
- t086:temperature, Fahrenheit
- r000:rainfall(1 hour), 0.01 inches
- p000:rainfall(24 hours), 0.01 inches
- h53:humidity,% (00%= 100)
- b10020:atmosphere,0.1 hpa
 NOTE: The board will make a hardware self-check before it works, it will output “...” when it doesn’t detect the related devices. For example, If the temperature & humidity sensor and barometer are not installed or broken, it will output: '''c000s000g000t...r000p000h..b..... '''
STU LED: flash with sensor status Link LED: flash with Data output

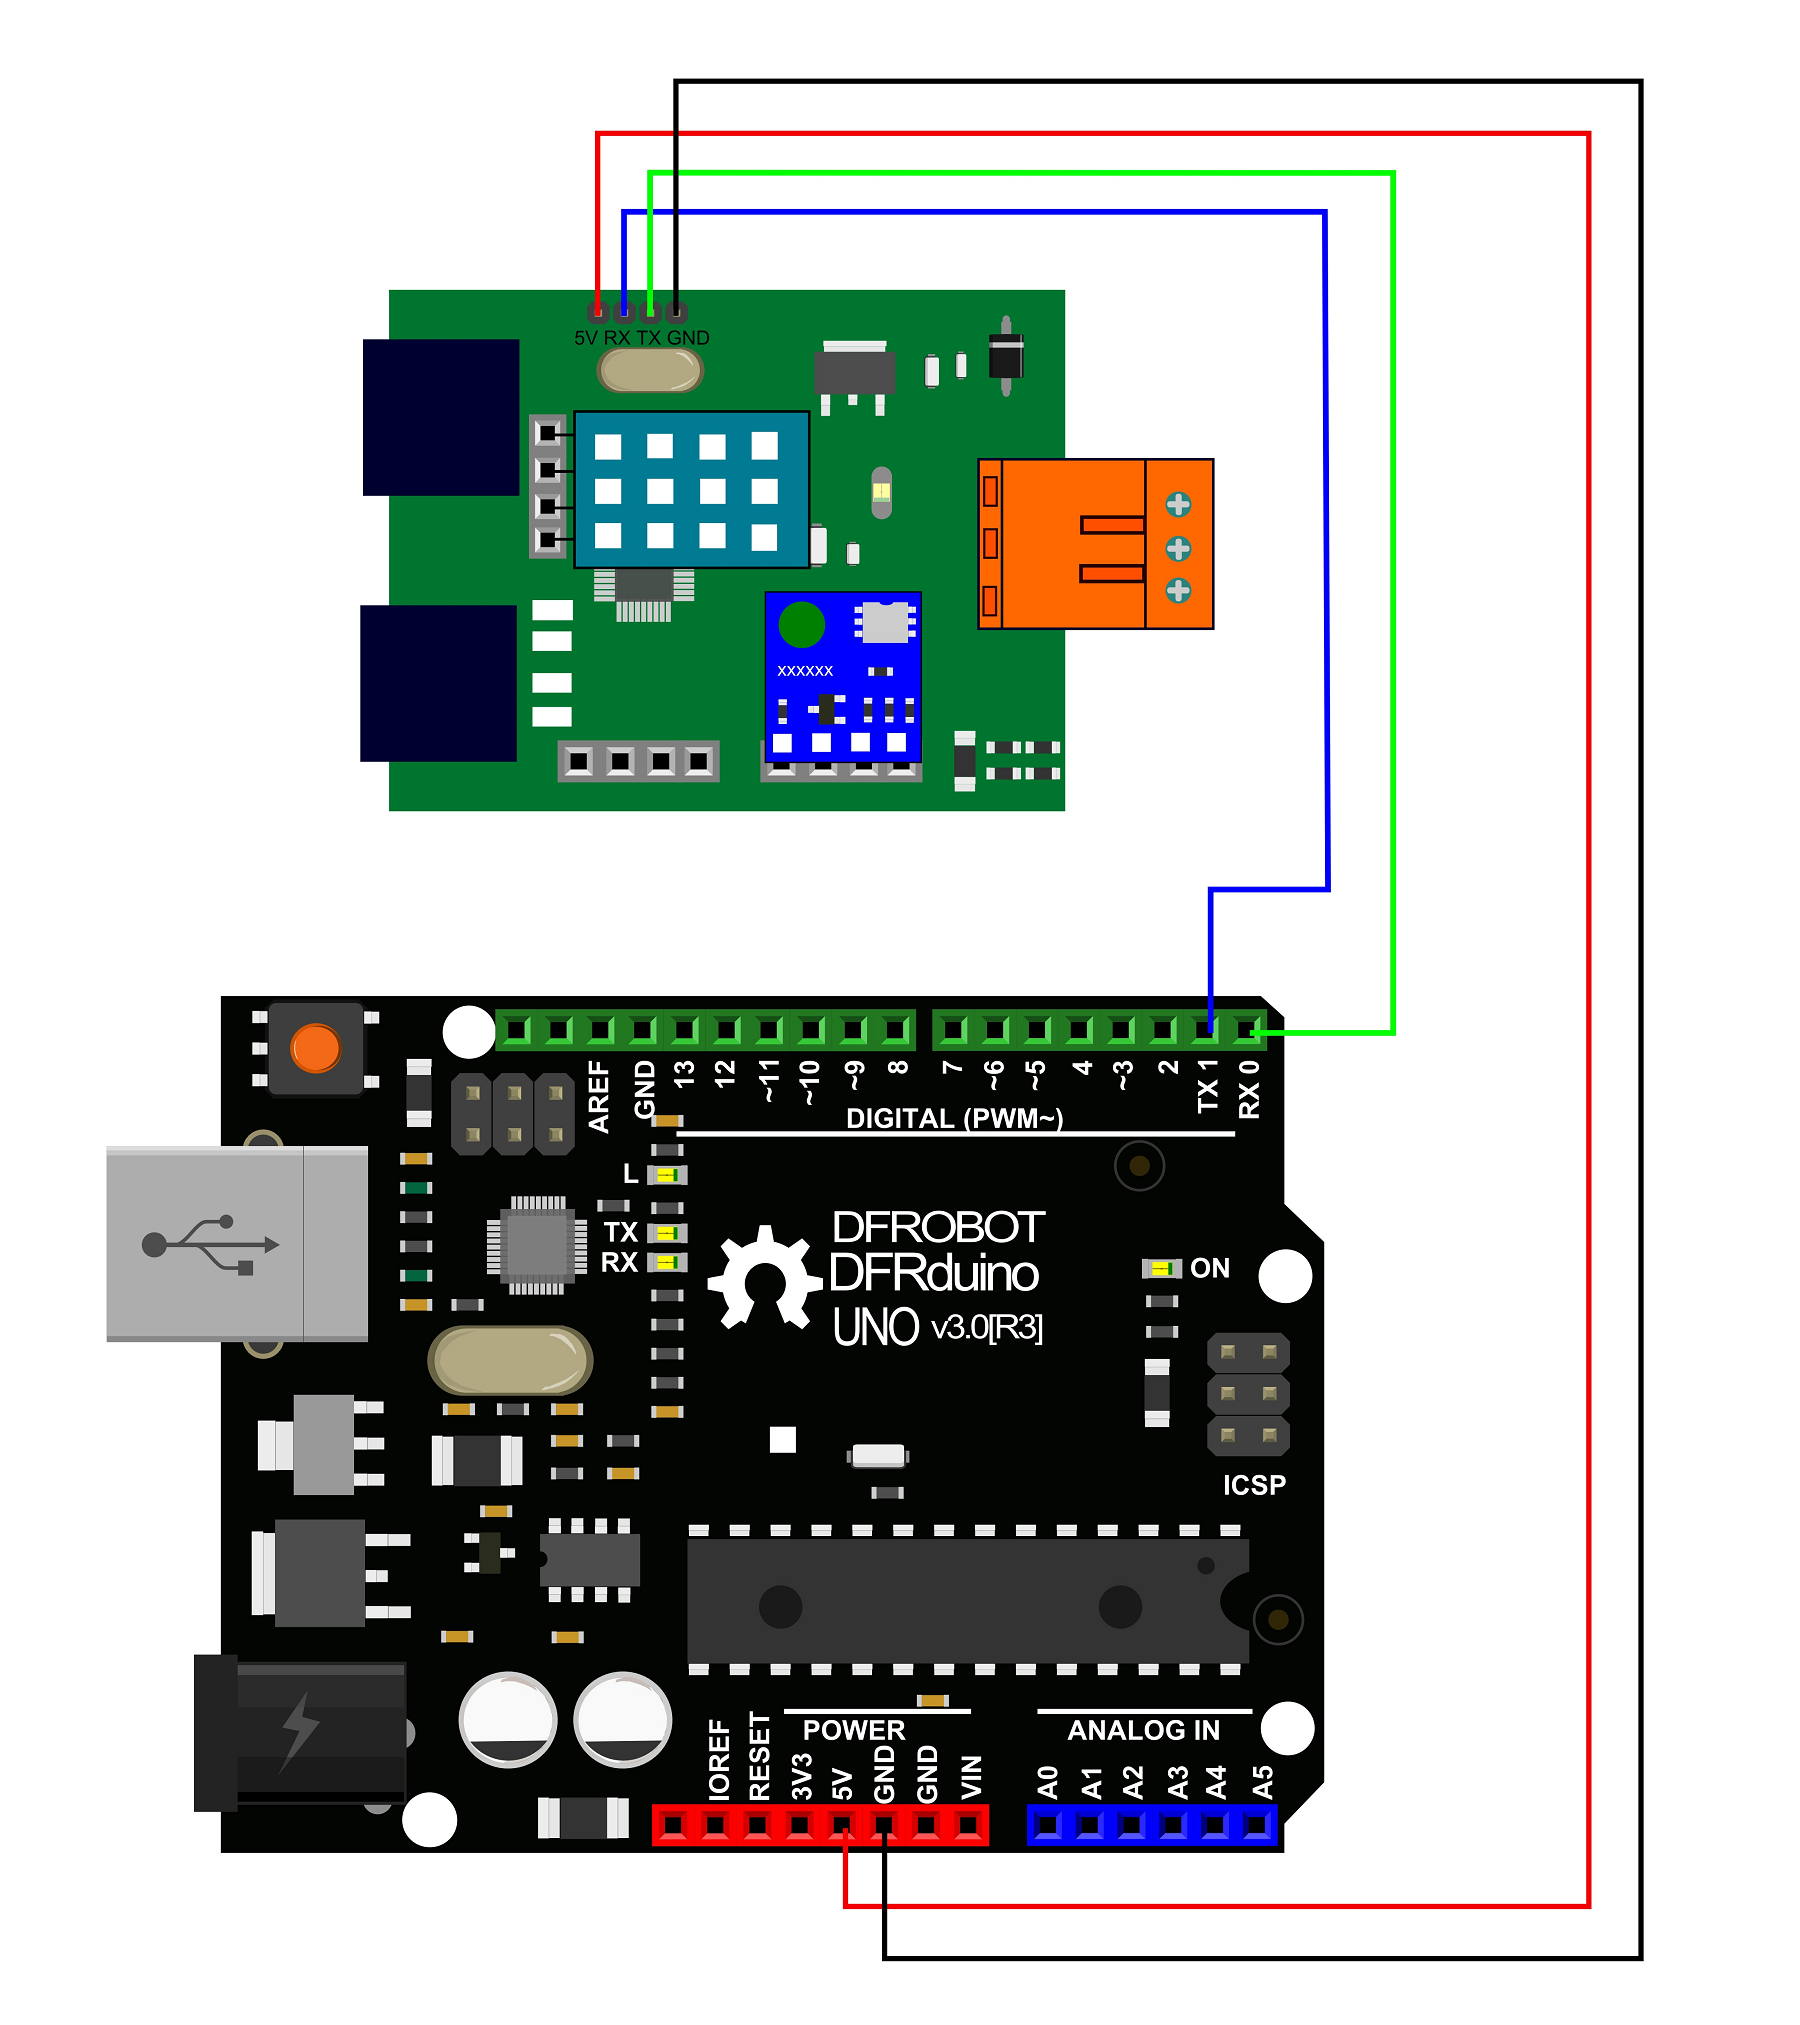
Please unplug the cable on the TX&RX interface, or it will interfere with the sketch uploading.
char                 databuffer[35];
double               temp;

void getBuffer()                                                                    //Get weather status data
{
  int index;
  for (index = 0;index < 35;index ++)
  {
    if(Serial.available())
    {
      databuffer[index] = Serial.read();
      if (databuffer[0] != 'c')
      {
        index = -1;
      }
    }
    else
    {
      index --;
    }
  }
}

int transCharToInt(char *_buffer,int _start,int _stop)                               //char to int)
{
  int _index;
  int result = 0;
  int num = _stop - _start + 1;
  int _temp[num];
  for (_index = _start;_index <= _stop;_index ++)
  {
    _temp[_index - _start] = _buffer[_index] - '0';
    result = 10*result + _temp[_index - _start];
  }
  return result;
}

int WindDirection()                                                                  //Wind Direction
{
  return transCharToInt(databuffer,1,3);
}

float WindSpeedAverage()                                                             //air Speed (1 minute)
{
  temp = 0.44704 * transCharToInt(databuffer,5,7);
  return temp;
}

float WindSpeedMax()                                                                 //Max air speed (5 minutes)
{
  temp = 0.44704 * transCharToInt(databuffer,9,11);
  return temp;
}

float Temperature()                                                                  //Temperature ("C")
{
  temp = (transCharToInt(databuffer,13,15) - 32.00) * 5.00 / 9.00;
  return temp;
}

float RainfallOneHour()                                                              //Rainfall (1 hour)
{
  temp = transCharToInt(databuffer,17,19) * 25.40 * 0.01;
  return temp;
}

float RainfallOneDay()                                                               //Rainfall (24 hours)
{
  temp = transCharToInt(databuffer,21,23) * 25.40 * 0.01;
  return temp;
}

int Humidity()                                                                       //Humidity
{
  return transCharToInt(databuffer,25,26);
}

float BarPressure()                                                                  //Barometric Pressure
{
  temp = transCharToInt(databuffer,28,32);
  return temp / 10.00;
}

void setup()
{
  Serial.begin(9600);
}
void loop()
{
  getBuffer();                                                                      //Begin!
  Serial.print("Wind Direction: ");
  Serial.print(WindDirection());
  Serial.println("  ");
  Serial.print("Average Wind Speed (One Minute): ");
  Serial.print(WindSpeedAverage());
  Serial.println("m/s  ");
  Serial.print("Max Wind Speed (Five Minutes): ");
  Serial.print(WindSpeedMax());
  Serial.println("m/s");
  Serial.print("Rain Fall (One Hour): ");
  Serial.print(RainfallOneHour());
  Serial.println("mm  ");
  Serial.print("Rain Fall (24 Hour): ");
  Serial.print(RainfallOneDay());
  Serial.println("mm");
  Serial.print("Temperature: ");
  Serial.print(Temperature());
  Serial.println("C  ");
  Serial.print("Humidity: ");
  Serial.print(Humidity());
  Serial.println("%  ");
  Serial.print("Barometric Pressure: ");
  Serial.print(BarPressure());
  Serial.println("hPa");
  Serial.println("");
   Serial.println("");
}
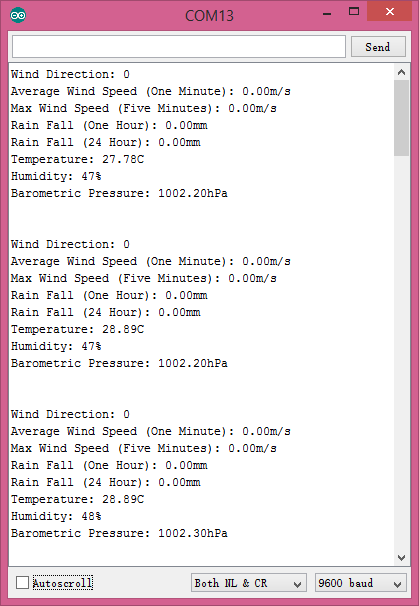
There is no wind inside, so every parameter about "wind" will be zero.
| '''Q1. '''Some general Arduino Problems/ FAQ/ Tips, very good to know. |
'''A1. '''Clike the topic link on DFRobot Forum.
| '''Q2. '''Where can I place the green controller board? The Weather Station is installed outdoor and I don't see any case or housing. |
'''A2. '''Sorry, you have to DIY something to make a waterproof case for the board.
| '''Q3. '''The RF Module and RF Transmitter wasn't included in the package, so how can I get the data wirelessly? |
'''A3. '''Since the kit doesn't include any wireless module, you have to install bluetooth, Xbee, RF modules onto Arduino to make it work wirelessly, all the modules mentioned here are available in our store.

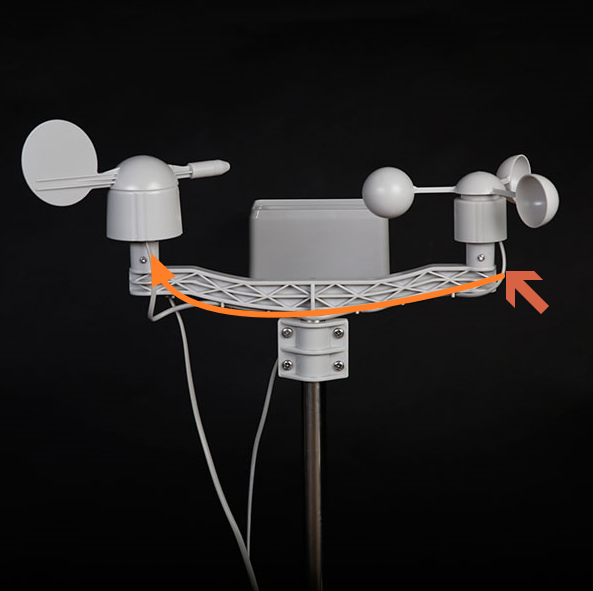
| '''Q4. '''About the module assembly: I only found there are only two installation blocks for the different modules on the Converter Board, but there are three modules: Anemometer, Wind vane and Rain bucket to be installed on the Converter Board. How come? |
A4. As the picture shows, the Anemometer was connected to Wind vane module but not to Converter board.
 For any question/advice/cool idea to share, please visit DFRobot Forum.
 shopping from dfrobot store or dfrobot distributor.
category: Product Manual category: SEN Series category: Sensors