6_Dof_Shield_(DFR0209)
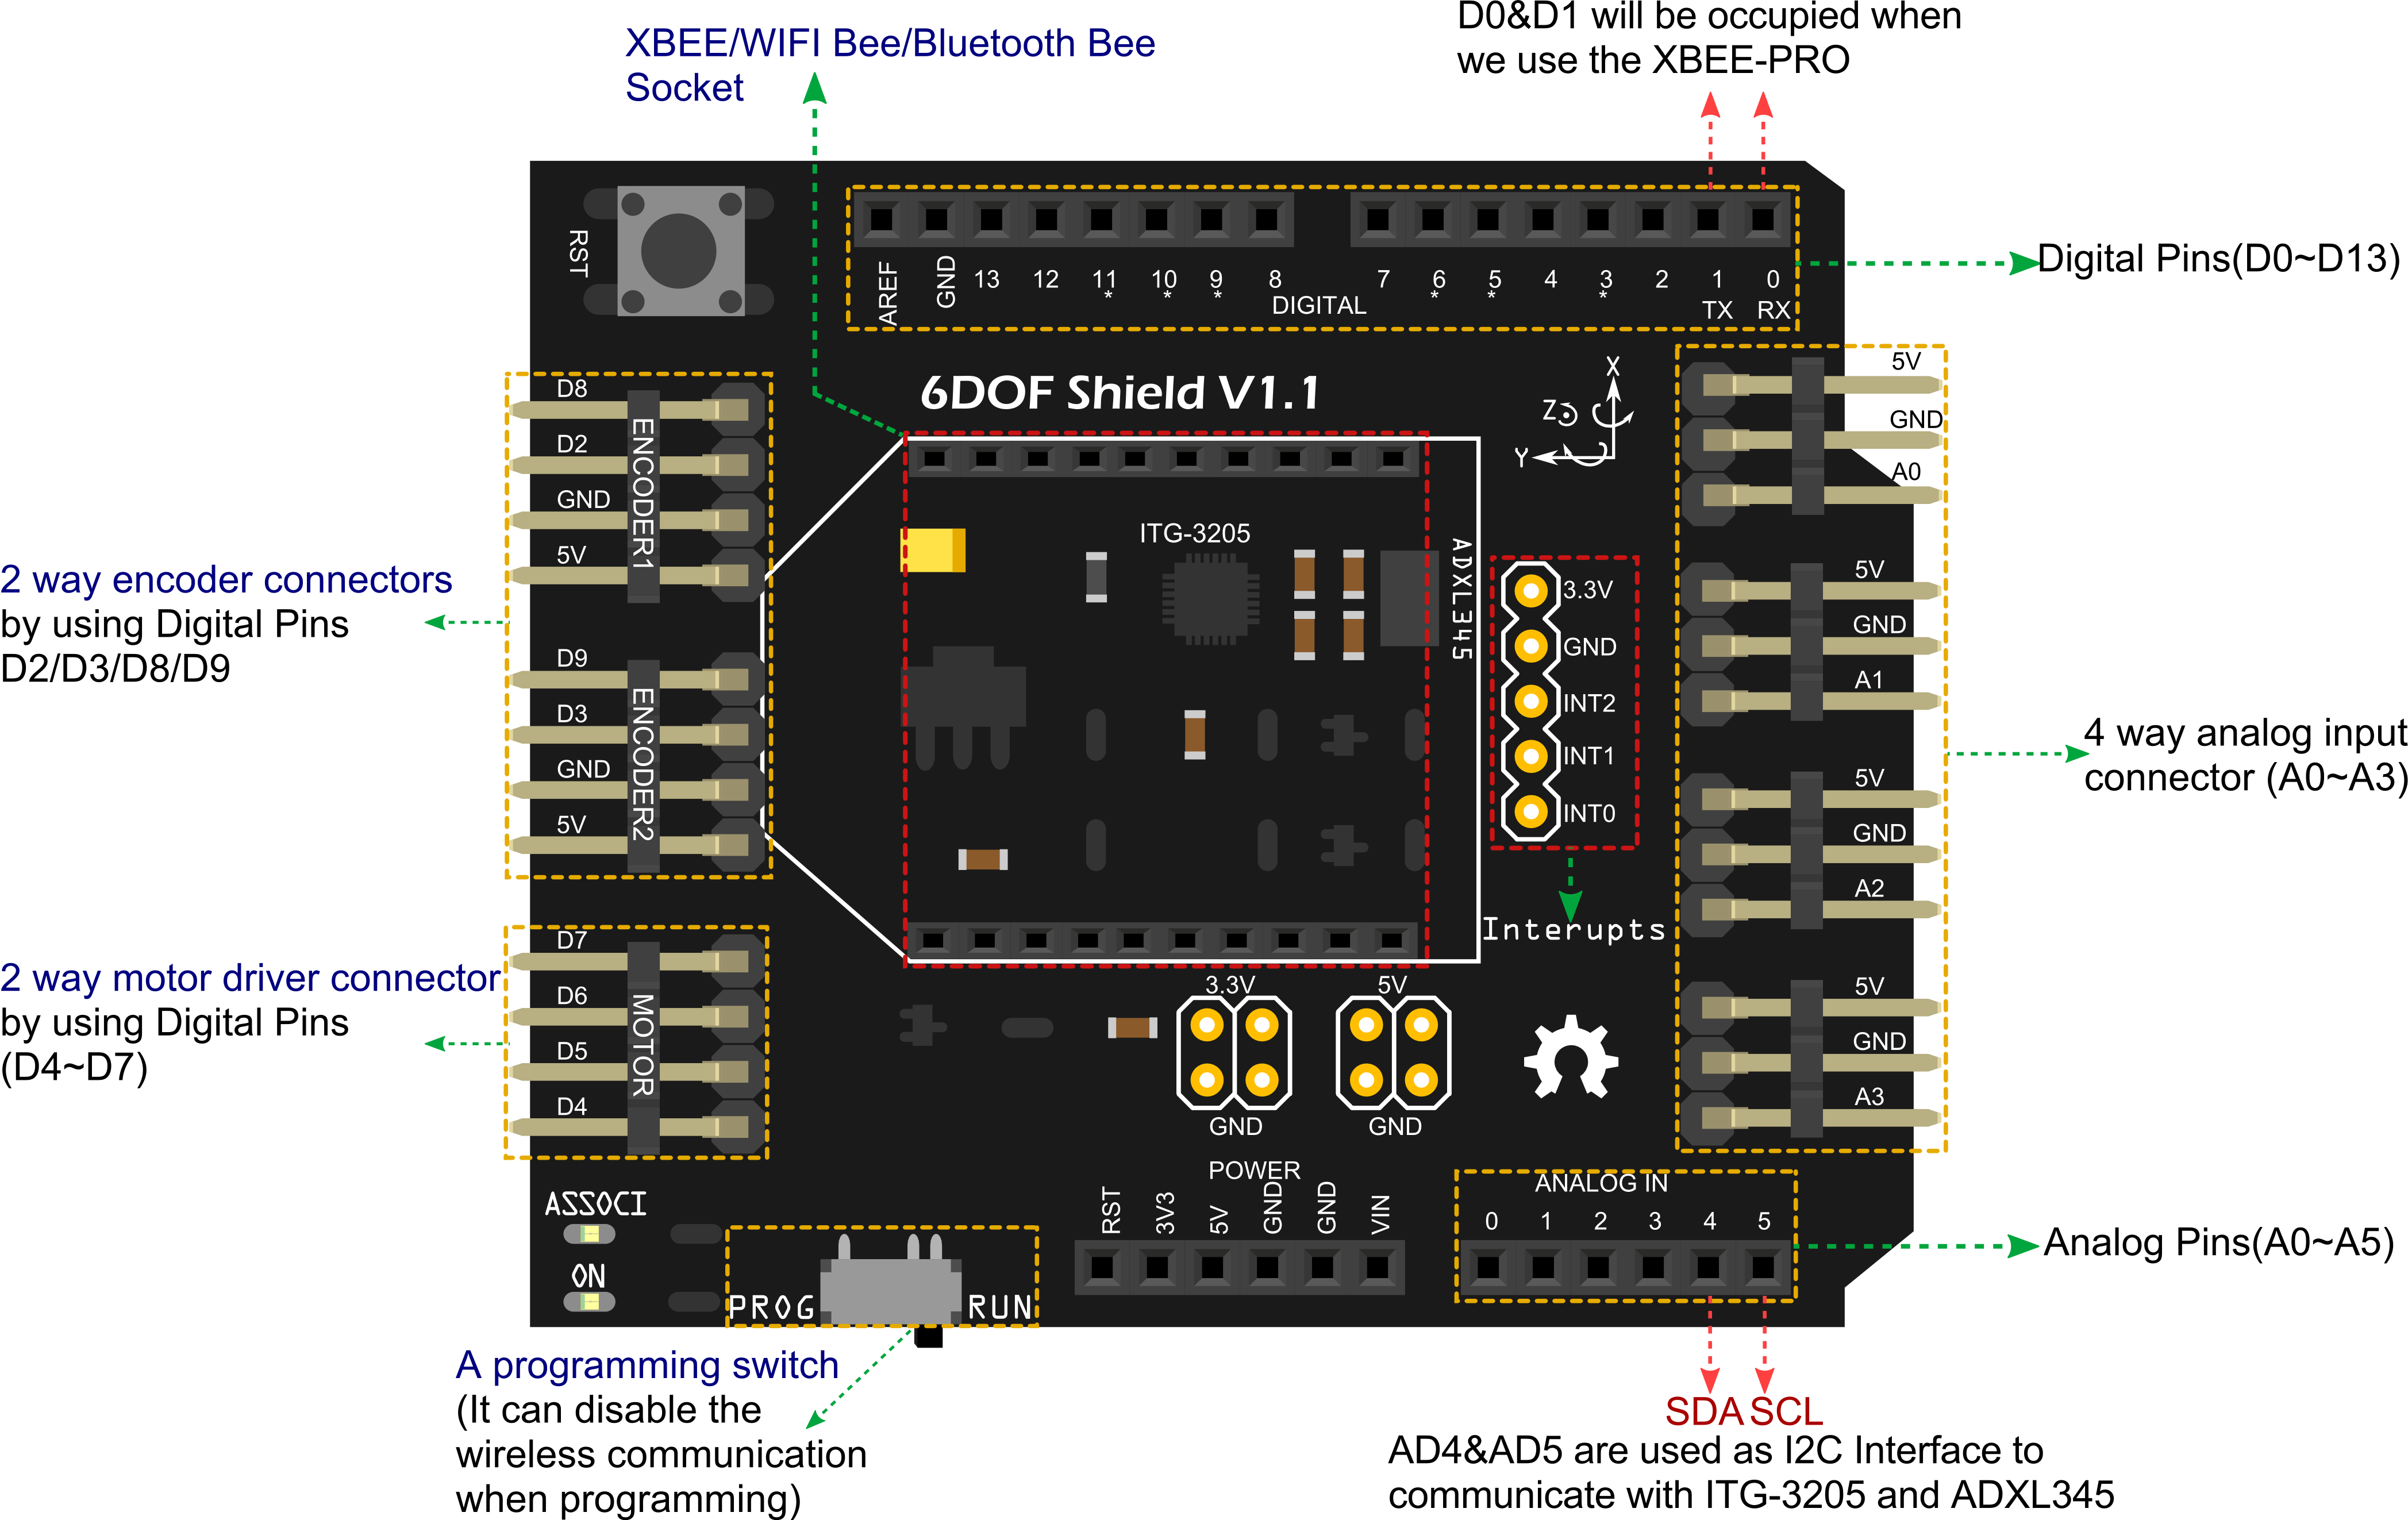
This is a 6 Dof shield for Arduino, using the ADXL345 accelerometer and the ITG-3200 gyro.This IMU Combo shield also embeded a xbee sockets. So it's suitable for the projects that need bluetooth, wifi or Zigbee wireless communication.And the shield extends a pair of the encoders, the motor driver interface and 4 analog input connectors.
It's aimed to run on the balancing robots or mobile platforms. The encoder and motor driver interfaces are the necessary parts of the your robots. Plugin the rotation sensors to the analog connectors, then you get the most easy way to adjust the system parameters and debug the platform.
- Working voltage: 5v and 3.3v
- Interface: I2C(SCL,SDA)
- Connecters:
- 2 way encoder connectors by using D2,D3,D8,D9
- 2 way motor driver connector by using D4,D5,D6,D7
- 4 way analog input connector (A0~A3)
- Embeded the ADXL345 accelerometer and the ITG-3200 gyro
- Directly support Xbee and XBee form factor wifi,bluetooth and RF modules
- Compatible with Arduino Uno DFRduino UNO
- A programming switch used to disable wireless communication when programming
- Size: 65x55x20mm

Please download and install the library first.
// # Editor     : Roy from DFRobot
// # Date       : 10.12.2013
// # Product name: 6 Dof shield for Arduino
// # Product SKU : DFR0209
// # Version     : 0.1
// # Description:
// # The sketch for driving the 6 Dof shield for Arduino via I2C interface

#include <FreeSixIMU.h>
#include <FIMU_ADXL345.h>
#include <FIMU_ITG3200.h>

#include <Wire.h>

int16_t angle[2]; // pitch & roll

// Set the FreeSixIMU object
FreeSixIMU sixDOF = FreeSixIMU();
int rawSixDof[6];
void setup()
{
  Serial.begin(9600);
  Wire.begin();

  delay(5);
  sixDOF.init();                        //begin the IMU
  delay(5);
}

void loop() {

  sixDOF.getRawValues(rawSixDof);
  for (int i=0; i<6; i++)              //output the raw data
  {
    switch (i)
    {
        case 0:
      Serial.print("Acc.x :");
      break;
      case 1:
        Serial.print("Acc.y :");
        break;
      case 2:
        Serial.print("Acc.z :");
        break;
      case 3:
        Serial.print("gyro.x :");
        break;
      case 4:
        Serial.print("gyro.y :");
        break;
      case 5:
        Serial.print("gyro.z :");
      break;
        default:
            Serial.print("Err");
    }
    Serial.println(rawSixDof[i]);
  }
  Serial.println("");
  angle[0] = _atan2(rawSixDof[0],rawSixDof[2]);
  angle[1] = _atan2(rawSixDof[1],rawSixDof[2]);

  Serial.print("X:");              //pitch & roll
  Serial.println(angle[0]/10.0);
  Serial.print("Y:");
  Serial.println(angle[1]/10.0);
  Serial.println("");
  delay(1000);
}

int16_t _atan2(int32_t y, int32_t x)   //get the _atan2
{
  float z = (float)y / x;
  int16_t a;
  if ( abs(y) < abs(x) )
  {
    a = 573 * z / (1.0f + 0.28f * z * z);
    if (x<0)
    {
    if (y<0) a -= 1800;
    else a += 1800;
    }
  }
  else
  {
    a = 900 - 573 * z / (z * z + 0.28f);
    if (y<0) a -= 1800;
  }
  return a;
}
Revision V1.2 updates the pin connection for latest boards. If you want to use this shield with an older board, use some wires to connect the new pins to the old pins:
* pin SCL from the 6DOF shield V1.2 to pin A5
- pin SDA from the 6DOF shield V1.2 to pin A4
 shopping 6 dof imu shield
category: Product Manual category: DFR Series category: Sensors category: Shields