-
Notifications
You must be signed in to change notification settings - Fork 5
Auto_flower_watering_kit(SKU_KIT0003)
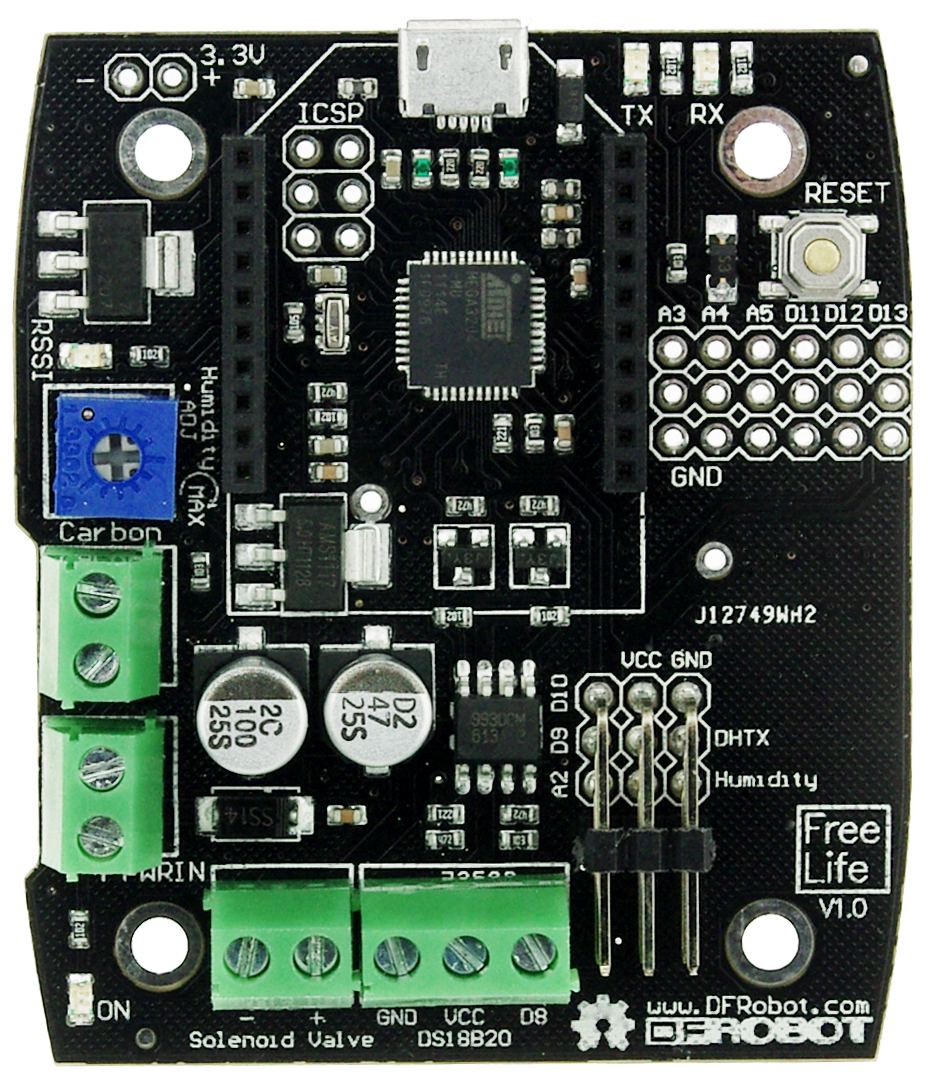
EcoDuino is designed by DFRobot to help you grow plants. By using a series of microcontrollers, sensors and actuators, the EcoDuino system can make your plants growing work much easier. In this system, sensors are used to collect data which can show you plant conditions like temperature, humidity, light intensity, etc... If you want, EcoDuino can message you and tell you how your plants are doing through wireless communications. It will also water your plants automatically when they are thirsty, or at a pre-determined interval. The only thing you may need to do is manage your EcoDuino system through a PC with a graphic user interface. The cool thing about the EcoDuino is that it is developed based on Arduino which means you can not only program EcoDuino in Arduino IDE environment but also use any Arduino compatible hardware in your EcoDuino system.
- Board power supply: 6~12V DC
- Micro controller: Atmega328
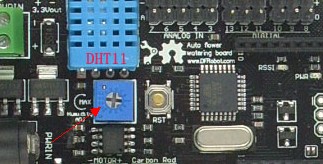
- DHT11 temperature and humidity sensor integrated
- Terminal for interfacing a carbon rod(Soil moisture sensor)
- Terminal for interfacing a motor or a solenoid valve
- Potentiometer to set the threshold soil moisture value of watering
- 5 analog I/O ports, 6 digital I/O ports
- Xbee slot
- FTDI interface
- DC 2.1 and terminal power interface
- Board dimensions: 66x42mm
- Board weight: 15g
- Diving pump power supply: 3.5~12V DC
- Pumping head: 220cm
- Flow capacity: 100-350L/H
- Power range: 0.5W-5W
- Pump dimensions: 38x38x29mm
- Pump weight: 125g
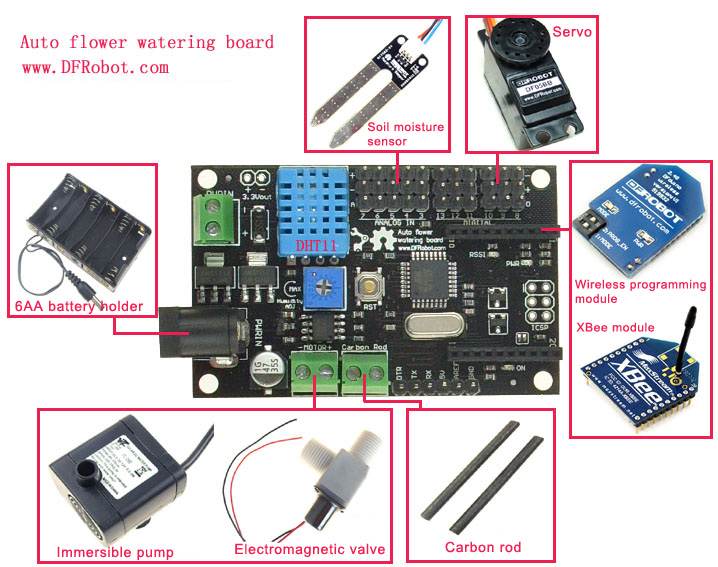
Required parts list:
- EcoDuino-AFWS controller (with a DHT11 sensor) x1
- FTDI programmer x1
- Mini USB cable x1
- Soil moisture Sensor x1
- Immersible pump x1
- 6AA battery holder x1
- Water tube x1
- XBee(sold separately) x2
- XBee adapter (sold separately) x1
Instructions:
- Download your code or the sample code we provide to the AFWS controller board.
- Connect the soil moisture sensor to the analog input used in the code on the AFWS controller board. In our sample code, we use the analog pin3 as the soil moisture sensor input. And insert the soil moisture sensor into the soil.
- Connect the pump to the motor terminal on the board (purple to Motor+, blue to Motor-). Plug one side of the water tube to the water outlet of the pump, and set the other side on the top of the flower pot in order to let water flow into it.
- Set a bucket or other container full of water near the flower pot, and put the pump in the bottom of the bucket.
- Get a pair of XBee module, plug one of them into the XBee slot on the board, and plug the other into an XBee adapter which is connected to your PC through a mini USB cable.
- Check all connections. If there is no problem, power the board.
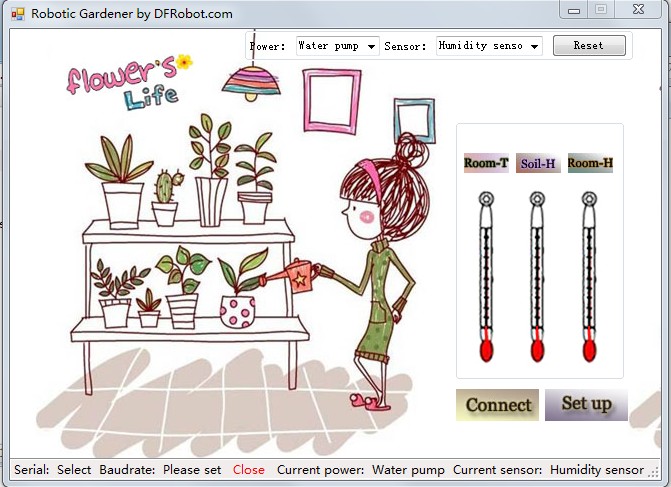
- Run the “Flower's life” software in your PC and you can get a user interface below.
- Click “Settings” and configure each item according to the configuration of the hardware.
- Click “Connect” then you can manage the Auto flower watering system.
Note: This client software can automatically collect data transmitted from sensors through the serial port. You can modify settings yourself. 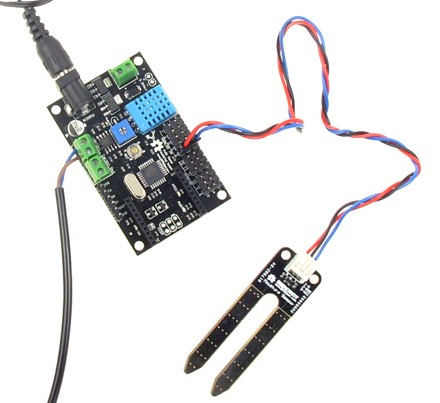
Required parts list:
- EcoDuino-AFWS controller (with a DHT11 sensor) x1
- FTDI programmer x1
- Mini USB cable x1
- Soil moisture Sensor x5
- Immersible pump x1
- 6AA battery holder x1
- Water tube x1
- HS-311 Servo (sold separately) x1
- XBee (sold separately) x2
- XBee adapter (sold separately) x1
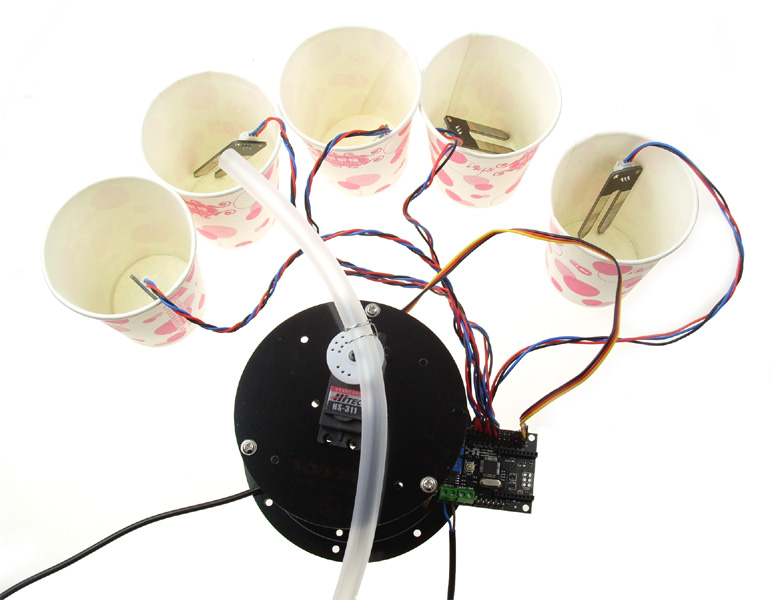
Instructions: There are five analog inputs on this AFWS controller board which means you can connect up to five soil moisture sensors to it. In order to automatically water five pots of flower, we have to use a servo as a rotating platform which the water tube is fixed on.
- Download your code or the sample code we provide to the AFWS controller board.
- Connect five soil moisture sensors to the analog inputs on the AFWS controller board. And plug each soil moisture sensor into soil in different pots.
- Fix the water tube on the horn of the servo, and the servo is mounted on a platform which lies a proper distance to the flower pots. When any one of them needs water, the tube outlet will turn to it and water it.
//Compatible with Arduino IDE 22/23
#include <sunflower.h>     //library
#define MoistureSensor 3  // the port moistureSensor connected to
sunflower flower;
void setup()
{
  Serial.begin(115200); //Baudrate 115200
  flower.Initialization(); //Initialization
}
void loop()
{
  flower.SerialSet(MoistureSensor);
//get the settings from the PC software and the moisture value
  flower.process(); //get the temperature and humidity value
  flower.Potentiometer(); //get the watering threshold value
  flower.print();
//output data including temperature, humidity, watering threshold value, moisture value.
  delay(500);
}//Compatible with Arduino IDE 22/23
#include <Servo.h>
#include <sunflower.h>
#include <avr/wdt.h>
sunflower flower;
Servo myservo;
int val1,val2;
float pig1,pig2,pig3,pig4,pig5;
void setup()
{
Serial.begin(115200);
wdt_enable(WDTO_4S);
flower.Initialization();
myservo.attach(9);
myservo.write(36);
delay(100);
}
void loop()
{
val1=0,val2=0;
pig1=0,pig2=0,pig3=0,pig4=0,pig5=0;
delay(100);
val2=flower.process(); //temperature
pig1=flower.moisture(3); // humidity from the sensor connected to analog pin3
pig2=flower.moisture(4); // humidity from the sensor connected to analog pin4
pig3=flower.moisture(5); // humidity from the sensor connected to analog pin5
pig4=flower.moisture(6); // humidity from the sensor connected to analog pin6
pig5=flower.moisture(7); // humidity from the sensor connected to analog pin7
val1=flower.Potentiometer(); // watering threshold value
// val2=flower.process();
if(val2<35)
{
if(pig1<val1)
{
myservo.write(36); //servo position corresponding to the position of pot A
delay(500);
flower.pump(); //start watering
}
else if(pig2<val1)
{
myservo.write(72); // servo position corresponding to the position of pot B
delay(500);
flower.pump();
}
else if(pig3<val1)
{
myservo.write(108); // servo position corresponding to the position of pot C
delay(500);
flower.pump();
}
else if(pig4<val1)
{
myservo.write(144);// servo position corresponding to the position of pot D
delay(500);
flower.pump();
}
else if(pig5<val1)
{
myservo.write(170); // servo position corresponding to the position of pot E
delay(500);
flower.pump();
}
if(pig1>50&&pig2>50&&pig3>50&&pig4>50&&pig5>50) flower.offpump();//stop watering
flower.print();
Serial.print(pig1);
Serial.print(",");
Serial.print(pig2);
Serial.print(",");
Serial.print(pig3);
Serial.print(",");
Serial.print(pig4);
Serial.print(",");
Serial.println(pig5);
delay(500);
}
wdt_reset();//reset
} shopping auto flower watering kit(sku:kit0003)
category: Product Manual category: Robots-kits category: Source category: Diagram
 Sample code