Repository navigation
Clip Extractor Colour Matching
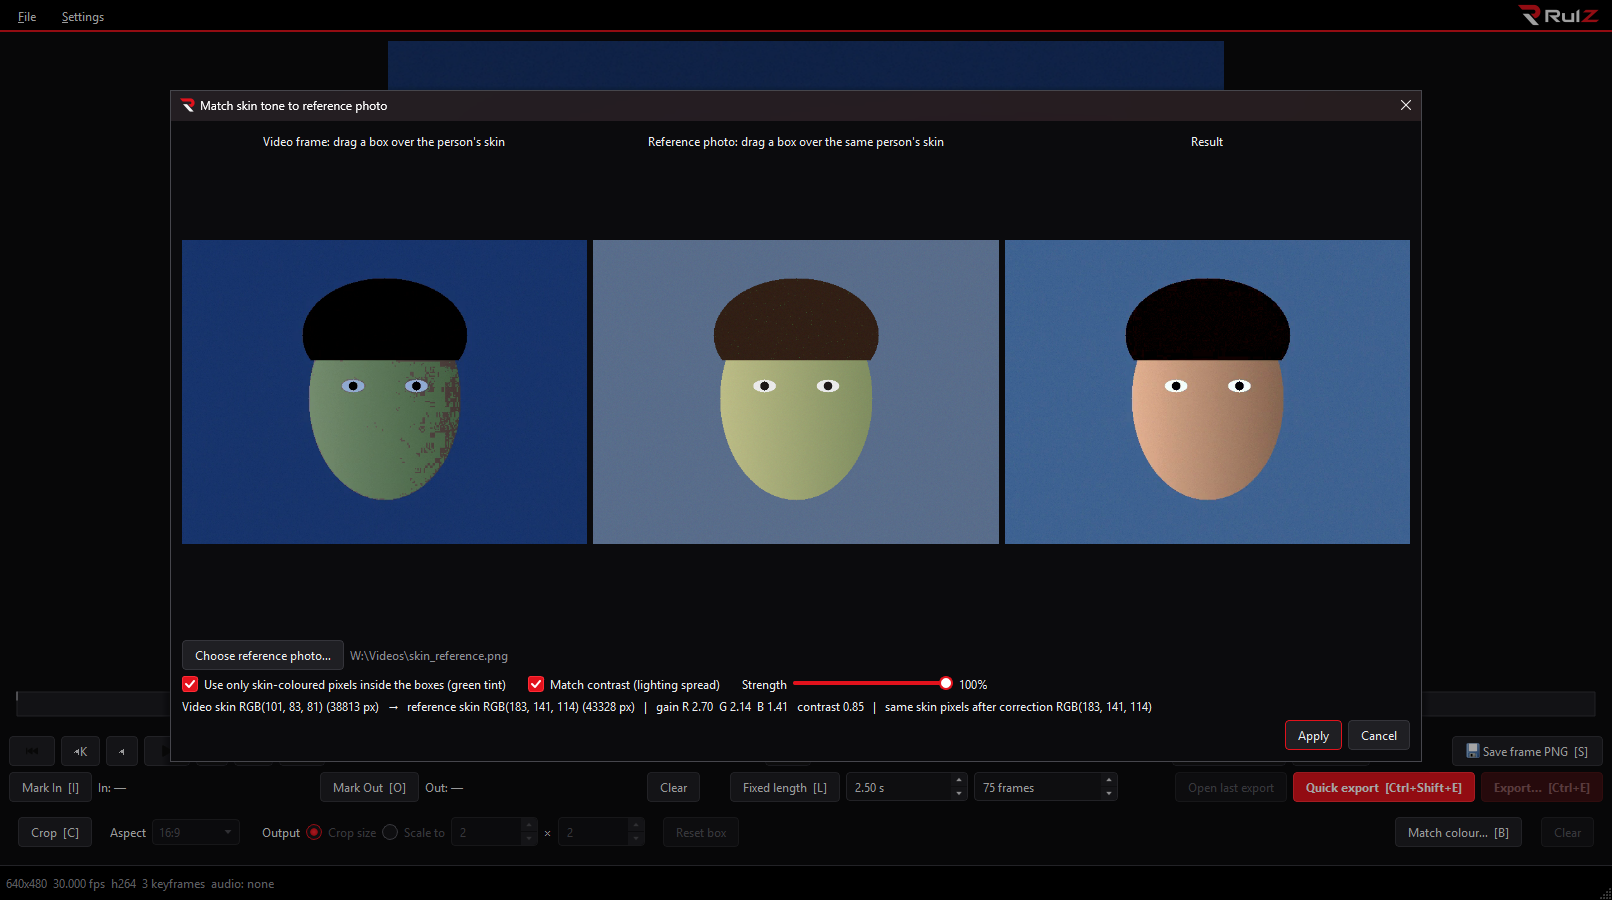
Fix a video with the wrong colour balance or lighting by matching a person's skin tone to a reference photo of the same person.
- Stop on a frame that clearly shows the person.
- Press B, or click Match colour... on the crop row.
- Click Choose reference photo... and pick a photo of the same person. JPEG, PNG, HEIC and most other formats work, and phone rotation is honoured.
- Drag a box over the skin in the video frame, and another over the skin in the photo. A cheek or forehead works well. With no box, the whole image is used.
- Check the Result panel, which updates live.
- Click Apply.
| Option | What it does |
|---|---|
| Use only skin-coloured pixels | Inside each box, only skin-coloured pixels count, shown with a green tint. Hair, eyes, teeth and background are ignored. Untick it to use every pixel in the box. |
| Match contrast | Also matches how spread out the skin's brightness is. Untick to correct colour balance and exposure only. |
| Strength | Blends between the original (0%) and the full correction (100%). |
The line under the images shows the average skin colour in the video, in the photo, and in the video after correction. If a box has too few skin-coloured pixels the app says so and falls back to every pixel in it.
The correction becomes part of the view:
- the preview shows it
- frame PNGs include it
- every export includes it
It is applied through a lookup table that ffmpeg also uses, so an exported clip matches what you saw. Lossless export is unavailable while a correction is active, because the pixels change.
Clear (next to the "colour matched" label) removes it. Opening another video starts clean. The last reference photo is remembered.
It matches the average skin colour and brightness spread. It fixes colour casts, under- or over-exposure and flat lighting across the whole picture.
It does not relight a face: a shadow across the cheek stays a shadow. It also assumes one lighting setup across the frame, so it works best on a shot where the person is lit consistently.
The repository includes samples/skin_cast.mp4, a deliberately blue, under-exposed video, and samples/skin_reference.png, the same scene with correct colour. Open the video, match it to the photo, and the original skin tone comes back.
See Exporting and Playback and Marks.