Repository navigation
Image Preparer Shadow Areas
Paint over a shadow in a picture and RulZ Image Preparer brightens it to match the light around it. Texture, contrast and color are kept, and the edge blends into the rest of the picture.
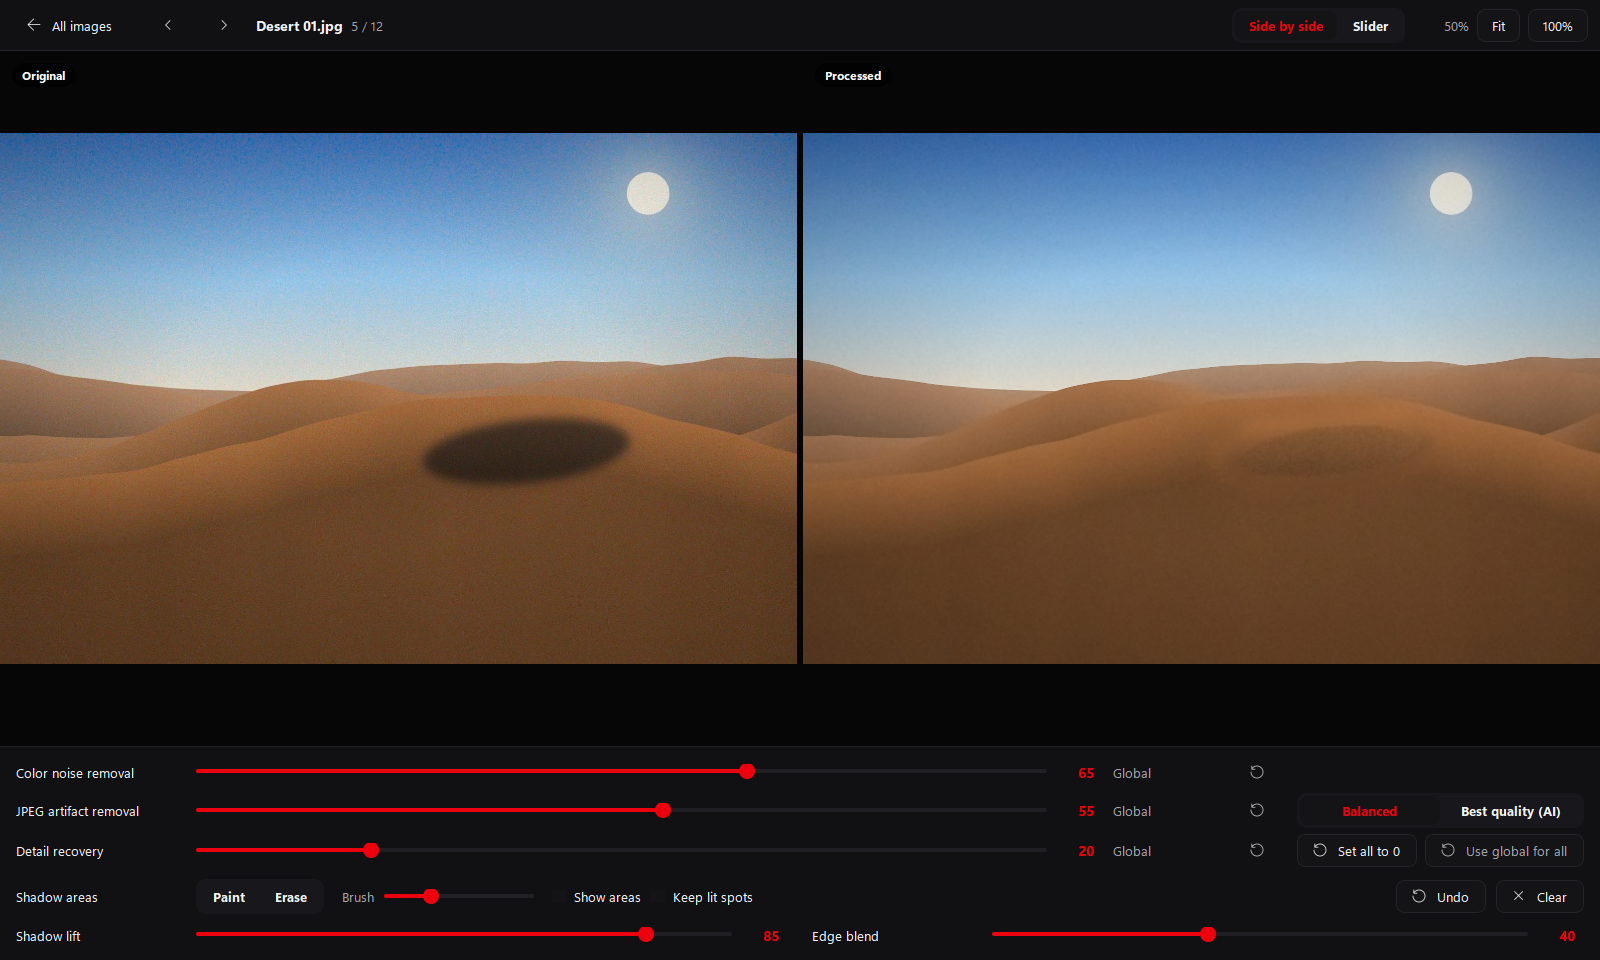
Added in RulZ Image Preparer 0.3.0.
- Click a picture to open it on its own (side by side or slider view).
- Below the sliders, find the Shadow areas row and click Paint (or press
B). - Drag over the shadow on the picture. A circle shows the brush; what you paint is tinted red on the Original side. Paint the whole shadow. Running a little past its edge is fine, because lit parts are left alone.
- Watch the Processed side. It updates a moment after each stroke.
- Adjust Shadow lift and Edge blend until it looks right.
- Click Paint again (or press
Esc) to stop painting.
Save all writes the brightened pictures, and so does Auto crop when Also remove noise and JPEG damage first is ticked.
| Control | What it does |
|---|---|
Paint (B) |
Left-drag to mark a shadow. Right-drag still moves the picture, and the mouse wheel still zooms. |
Erase (E) |
Left-drag to rub out part of what you painted. |
Brush ([ / ]) |
The brush size (1–100, default 40; each key press changes it by 5). It's remembered between sessions. |
| Show areas | Keeps the red tint visible when you're not painting. It's remembered between sessions. |
| Keep lit spots | Leaves lit spots inside the painted shadow lit, such as sun through leaves (see Tips). Off at first. |
Undo (Ctrl+Z) |
Takes back the last stroke. |
| Clear | Removes everything painted on this picture. |
| Shadow lift (0–100, default 70) | How far the shadow is brightened. 100 matches the light around it; lower leaves some of the shadow, which often looks more natural. |
| Edge blend (0–100, default 40) | How softly the brightened area fades into the rest of the picture. Raise it if you see an edge. |
Shadow lift, Edge blend and Keep lit spots belong to the picture you're on, like the painted areas: every picture starts at 70, 40 and off. Setting Shadow lift to 0 turns the brightening off without losing what you painted.
A picture with painted shadows shows Shadows on its card in the grid (in the red Custom badge), and its thumbnail shows the change.
It doesn't just turn up the brightness, which would wash the shadow out and flatten it. Instead:
- The app separates the lighting from the surface detail (the bricks, the grain, the pattern).
- It measures how much darker the painted shadow is than the area just around it.
- It puts that light back, the way an extra lamp would. Everything in the shadow is brightened by the same amount, so a dark tyre stays darker than a bright car door, and texture keeps its contrast.
- Parts you painted that weren't in shadow are left almost unchanged. That includes a lit strip between two shadows, or one cutting into a shadow, and its soft edges (before 0.5.2 a strip narrower than about an eighth of the picture was brightened like a bright object).
- The shadow's soft edge, where the light fades back in, is brightened only as much as it was darkened, so painting past it onto open lit ground leaves no bright ring. (Before 0.5.1 the soft edge got the whole shadow's lift.) A bright thing inside the shadow still gets the full lift, because it's surrounded by shadow. So does a lit spot with shadow all around it, unless Keep lit spots is ticked (see Tips).
- Shadows outdoors are often bluish (lit only by the sky). That tint is matched to the surroundings.
- The edge of the painted area is feathered so there's no visible seam.
- Paint each separate shadow with its own strokes. The depth is measured from everything you painted on the picture, so one deep and one light shadow together are both lifted to about the same degree. If they differ a lot, do the deeper one and save, then the lighter one.
- Paint the soft edge of the shadow too. Any part of the shadow left unpainted stays dark and can show as a darker outline.
- A lit spot with shadow all around it (sun through leaves, light through a window onto a shaded floor) looks just like a bright object in the shadow, so it's brightened too. Not even its colour tells them apart: sunlight is warmer than a shadow's skylight, just as a tan or orange thing is warmer than grey ground. Tick Keep lit spots to leave the lit spots in the painted shadow lit, in any light. While it's on, a thing in the shadow about as bright as the sunlit ground isn't brightened either (a much brighter one still is), so when the shadow holds both, leave it off and rub the spots out with Erase instead. On ground whose own pattern is strong (grass, gravel), it also takes some of the pattern's lighter patches for lit spots and leaves them a little dark, mostly in a faint shadow, beside something dark, or where the shadow also covers smoother ground; if that shows, leave it off there too. Even with it on, some spots come out too bright: with something bright in them (a pale stone, or on strongly patterned ground the pattern's own lighter bits), or narrower than about a fiftieth of the picture. Erase those. The same goes for a lit strip so narrow that its middle is still in the shadows' soft edges, and often for a lit strip in a faint shadow on busy ground (gravel, grass), where the ground's own pattern is about as strong as the shadow. Something bright in a lit strip or where it starts (a white line, a pale stone, a person in the sun) makes the part of the strip near it count as a bright object too, as can lighting that changes a lot across the picture. Erase whatever part of a lit strip still comes out too bright.
- If the brightened area looks flat or too bright, lower Shadow lift to 50–70. This happens most on ground whose brightness changes a lot across the shadow (a dune's slope, a wall lit at an angle): the light level is filled in from around the shadow, so it comes out a little too bright toward the brighter side.
- Painted areas are for this picture only and aren't kept after you close the app.
- Painting over something that is simply dark (a black car, dark hair) where there's no shadow does nothing useful. It works on shadows cast onto surfaces.
See also: Comparing and Saving, Auto Crop.