Repository navigation
Image Grid Building a Grid
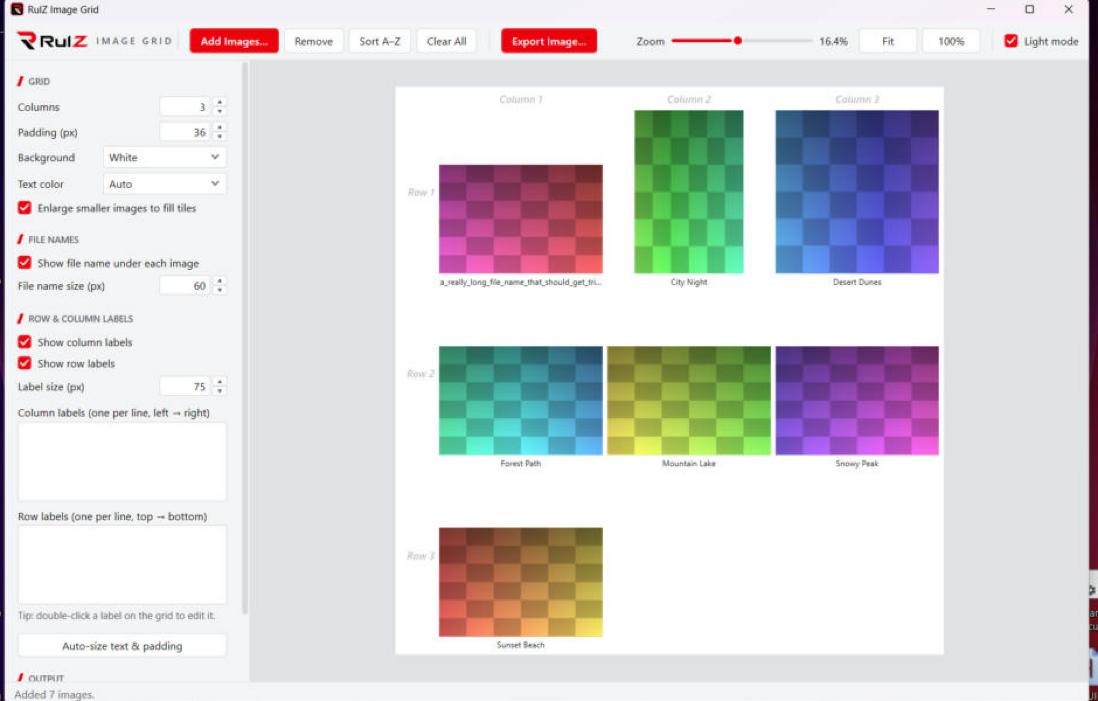
- Add Images… (Ctrl+O) picks files.
- Drag and drop files or folders onto the window. Dropped onto the grid, they go in at that spot; anywhere else, they go at the end.
- Supported: JPG, PNG, BMP, GIF, TIFF, WebP, ICO and JFIF. HEIC/HEIF work when the Windows HEIF extension is installed. Photos taken sideways are turned the right way up automatically.
If some files can't be opened, the app lists them and adds the rest.
- Drag a picture to a new place in the grid. Press Esc while dragging to cancel.
-
Sort A–Z puts them in file-name order, the way people count:
img2comes beforeimg10. - Click a picture to select it. The bar at the bottom shows its name, size and where it is on your PC.
- Remove (or Delete) takes the selected picture out of the grid. Right-click a picture for Remove from grid and Show in File Explorer.
- Clear All empties the grid (it asks first).
Removing a picture only takes it out of the grid. Your files are never changed or deleted.
The Zoom slider in the toolbar changes how big the grid looks on screen; it doesn't change the exported image. Fit shows the whole grid, 100% shows it at full size, and Ctrl + mouse wheel zooms too.
| Setting | What it does |
|---|---|
| Columns | How many pictures across. The rows follow from how many pictures there are. |
| Padding (px) | The space between pictures and around the edge. |
| Background | White, Light gray, Dark gray, Black, or Transparent (PNG only). |
| Text color | Auto picks black or white to stand out on the background, or choose Black, White or Gray. |
| Enlarge smaller images to fill tiles | Every tile is as big as the largest picture. On: smaller pictures are scaled up to fill it. Off: they stay at their own size, centered. |
Show file name under each image shows the name without its extension (portrait_01.png shows as
portrait_01). File name size (px) sets the text size.
- Turn them on with Show column labels and Show row labels.
- Type them in the boxes, one per line: column labels go left to right, row labels top to bottom.
- Or double-click a header on the grid to type its label there.
- Label size (px) sets the text size.
Picks text sizes and padding that suit the size of your pictures. Handy when the pictures are very large or very small and the defaults look wrong.
Shows the tile size and the full-size output in pixels.
Sizes (padding and text) are in pixels of the exported image at 100%. On screen you usually see the grid scaled down, so the text may look smaller than it will be in the file.
Next: Exporting.