Repository navigation
Clip Extractor Distortion Repair
Straighten a bent lens, a leaning building or a tilted horizon once, and every clip and frame you export from that video gets the same fix. The window holds the adjustments of RulZ Image Distortion Repair and shows them on the frame you are looking at.
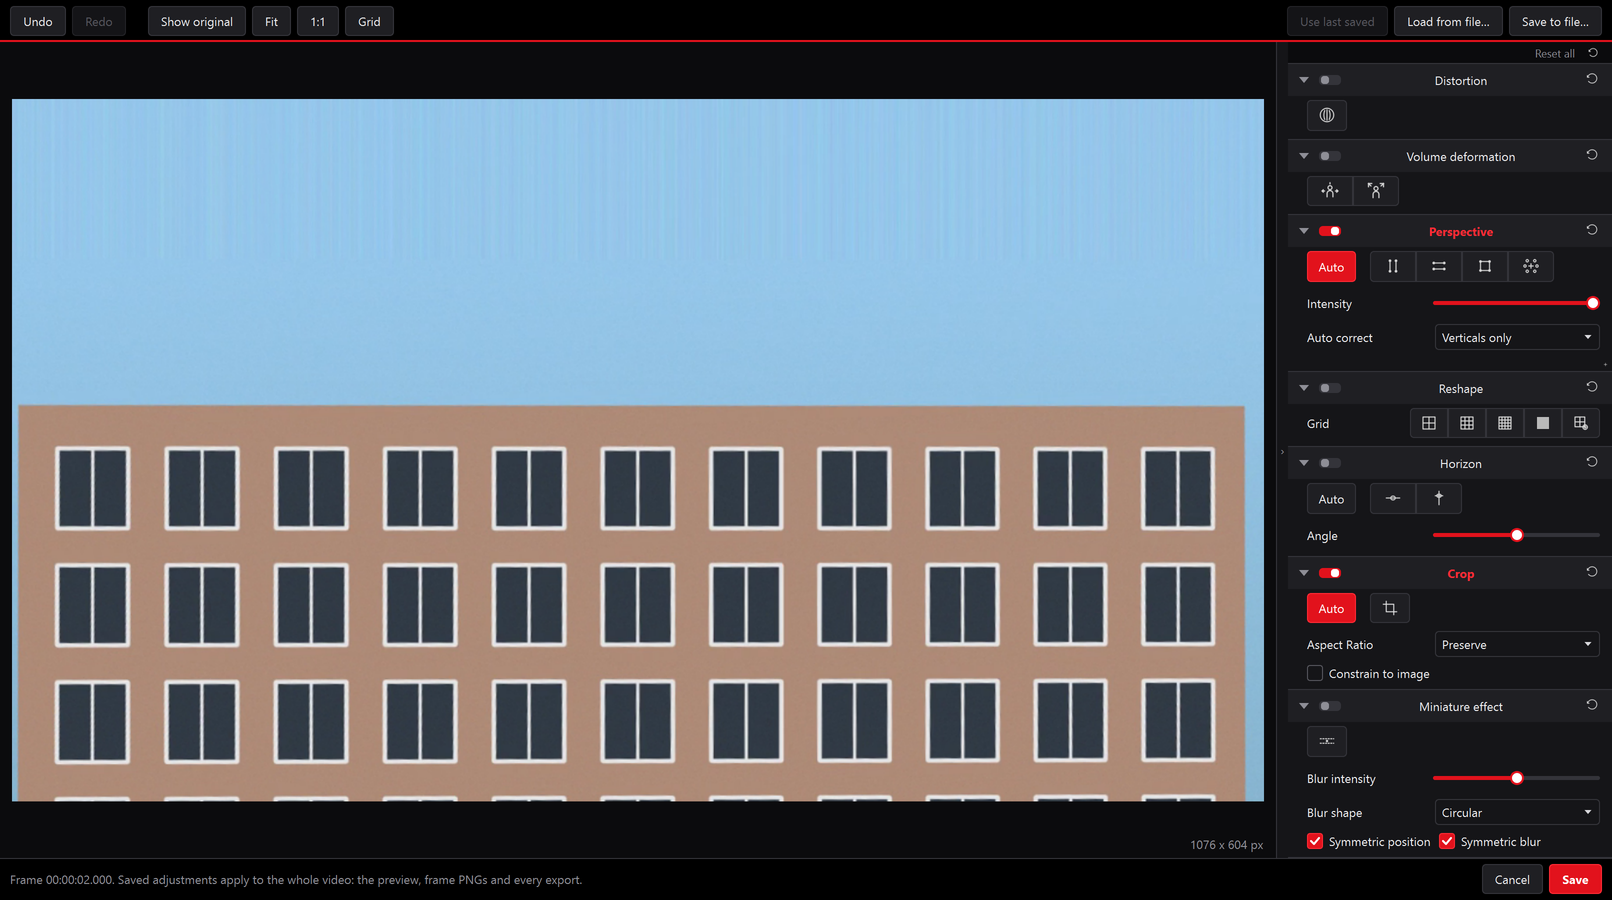
- Go to a frame that shows the problem well (straight lines that should be straight).
- Press D, or click Distortion repair… on the crop row.
- Turn on the panels you need and adjust them. The picture updates as you go.
- Click Save.
From then on the preview (also while playing), frame PNGs, the Export dialog and Quick export all use the adjustments, and a red distortion repaired label appears. Hover over it to see what is on. Press D again to change the adjustments, or Clear to remove them.
Cancel (or Esc) closes the window without saving, and asks first if you changed anything. Opening another video starts clean.
| Panel | What it does |
|---|---|
| Distortion | Manual barrel, pincushion or fisheye correction, intensity 0 to 100 |
| Volume deformation | Corrects the stretched look of wide-angle shots: horizontal/vertical (cylindrical) or diagonal (spherical) |
| Perspective | Auto (verticals and horizontals, verticals only, or horizontals only), or draw 2 verticals, 2 horizontals, a rectangle or 8 points. Then fine-tune intensity, up/down, left/right and the H/V ratio. |
| Reshape | Mesh warp on a 4×4 to 32×32 grid: free transform, perspective and anamorphosis modes |
| Horizon | Auto, or draw a line that should be level (or upright); angle −90° to 90° |
| Crop | Automatic crop to the largest area without empty corners (on by default), or a manual crop with an aspect ratio |
| Miniature effect | Tilt-shift blur with a draggable sharp band, blur intensity and bokeh shape |
The switch in a panel's header turns it on or off, and ↺ resets it. Reset all clears everything. Double-click a slider to restore its default.
Automatic lens-profile correction is not available, because video files carry no lens data. Use the manual Distortion panel instead.
The perspective lines, horizon line, reshape grid, crop and miniature band are drawn on the picture. Their options appear along the bottom of the window.
| Action | Key or button |
|---|---|
| Keep the change | Enter, or Apply |
| Drop the change | Esc, or Reset |
| Undo / redo | Ctrl+Z / Ctrl+Y |
| Fit the picture / view at 100% | Ctrl+0 / Ctrl+1, or Fit / 1:1 |
| Compare with the original | Show original (click again to go back) |
| Grid overlay | Grid |
-
Save to file… writes the adjustments to a
.jsonfile, and Load from file… reads one back. - Use last saved loads whatever you saved most recently, from any video. Handy for a lens correction that suits every clip from one camera.
- Crop box: the main window's crop box works on the corrected picture. When the repair crops away empty corners, the frame gets a little smaller and the crop box is fitted inside it.
- Rotate and flip afterwards: the adjustments stay on the picture they were drawn on. Rotating or flipping later turns the corrected picture as a whole. Reopening the window shows the frame the way it was turned when you made the adjustments.
- Exports are re-encodes: Lossless is greyed out while the repair is on, because every pixel changes. Each frame is corrected on the CPU between two ffmpeg steps and then encoded with NVENC. Cuts, audio, crop, scale, colour match and frame rate work as in any NVENC export.
- Speed: repaired exports are slower than plain ones. 4K runs at about 10 frames a second on a fast PC; smaller video is quicker.
- Variable frame rate: phone video with a variable frame rate comes out at a constant rate (the average rate when the frame rate is "Same as source").
-
File names gain
_repair:<video>_clip_1_00-3_00_repair.mp4,<video>_<time>_f123_repair.png.