Client Portal Registration
Status: Complete. All four registration channels, login, password reset, and the post-login landing page are live. Password reset by email is not yet supported — see Login and Password Reset below.
The Client Portal lets a patient create their own login account for the HMIS web portal, instead of every portal account having to be set up by hospital staff one at a time. Once registered, a patient logs in with their phone number or email plus a password — the same way hospital staff log in today, but as a separate, patient-only account type that has none of the staff menus or permissions.
Registration is designed around one rule: a portal account always attaches to a person who is already known to the hospital, or becomes known to the hospital at the moment of registration. There is no "create an account for a stranger with no visit history" path — every account traces back to a specific patient record.
If you're at the hospital or on the phone with a staff member, they can create your portal account for you directly from their own staff login — no OTP needed, because the staff member verifies who you are in person or by phone.
For staff: this is an internal admin screen, reached via
Administration → Create Client Portal Account (requires the
ClientPortalCreateAccount privilege — see
For Administrators below). Search for the patient by
phone number, PHN, or name, select them from the results, then set a
password on their behalf:
| Step 1 — search and select | Step 2 — set password |
|---|---|
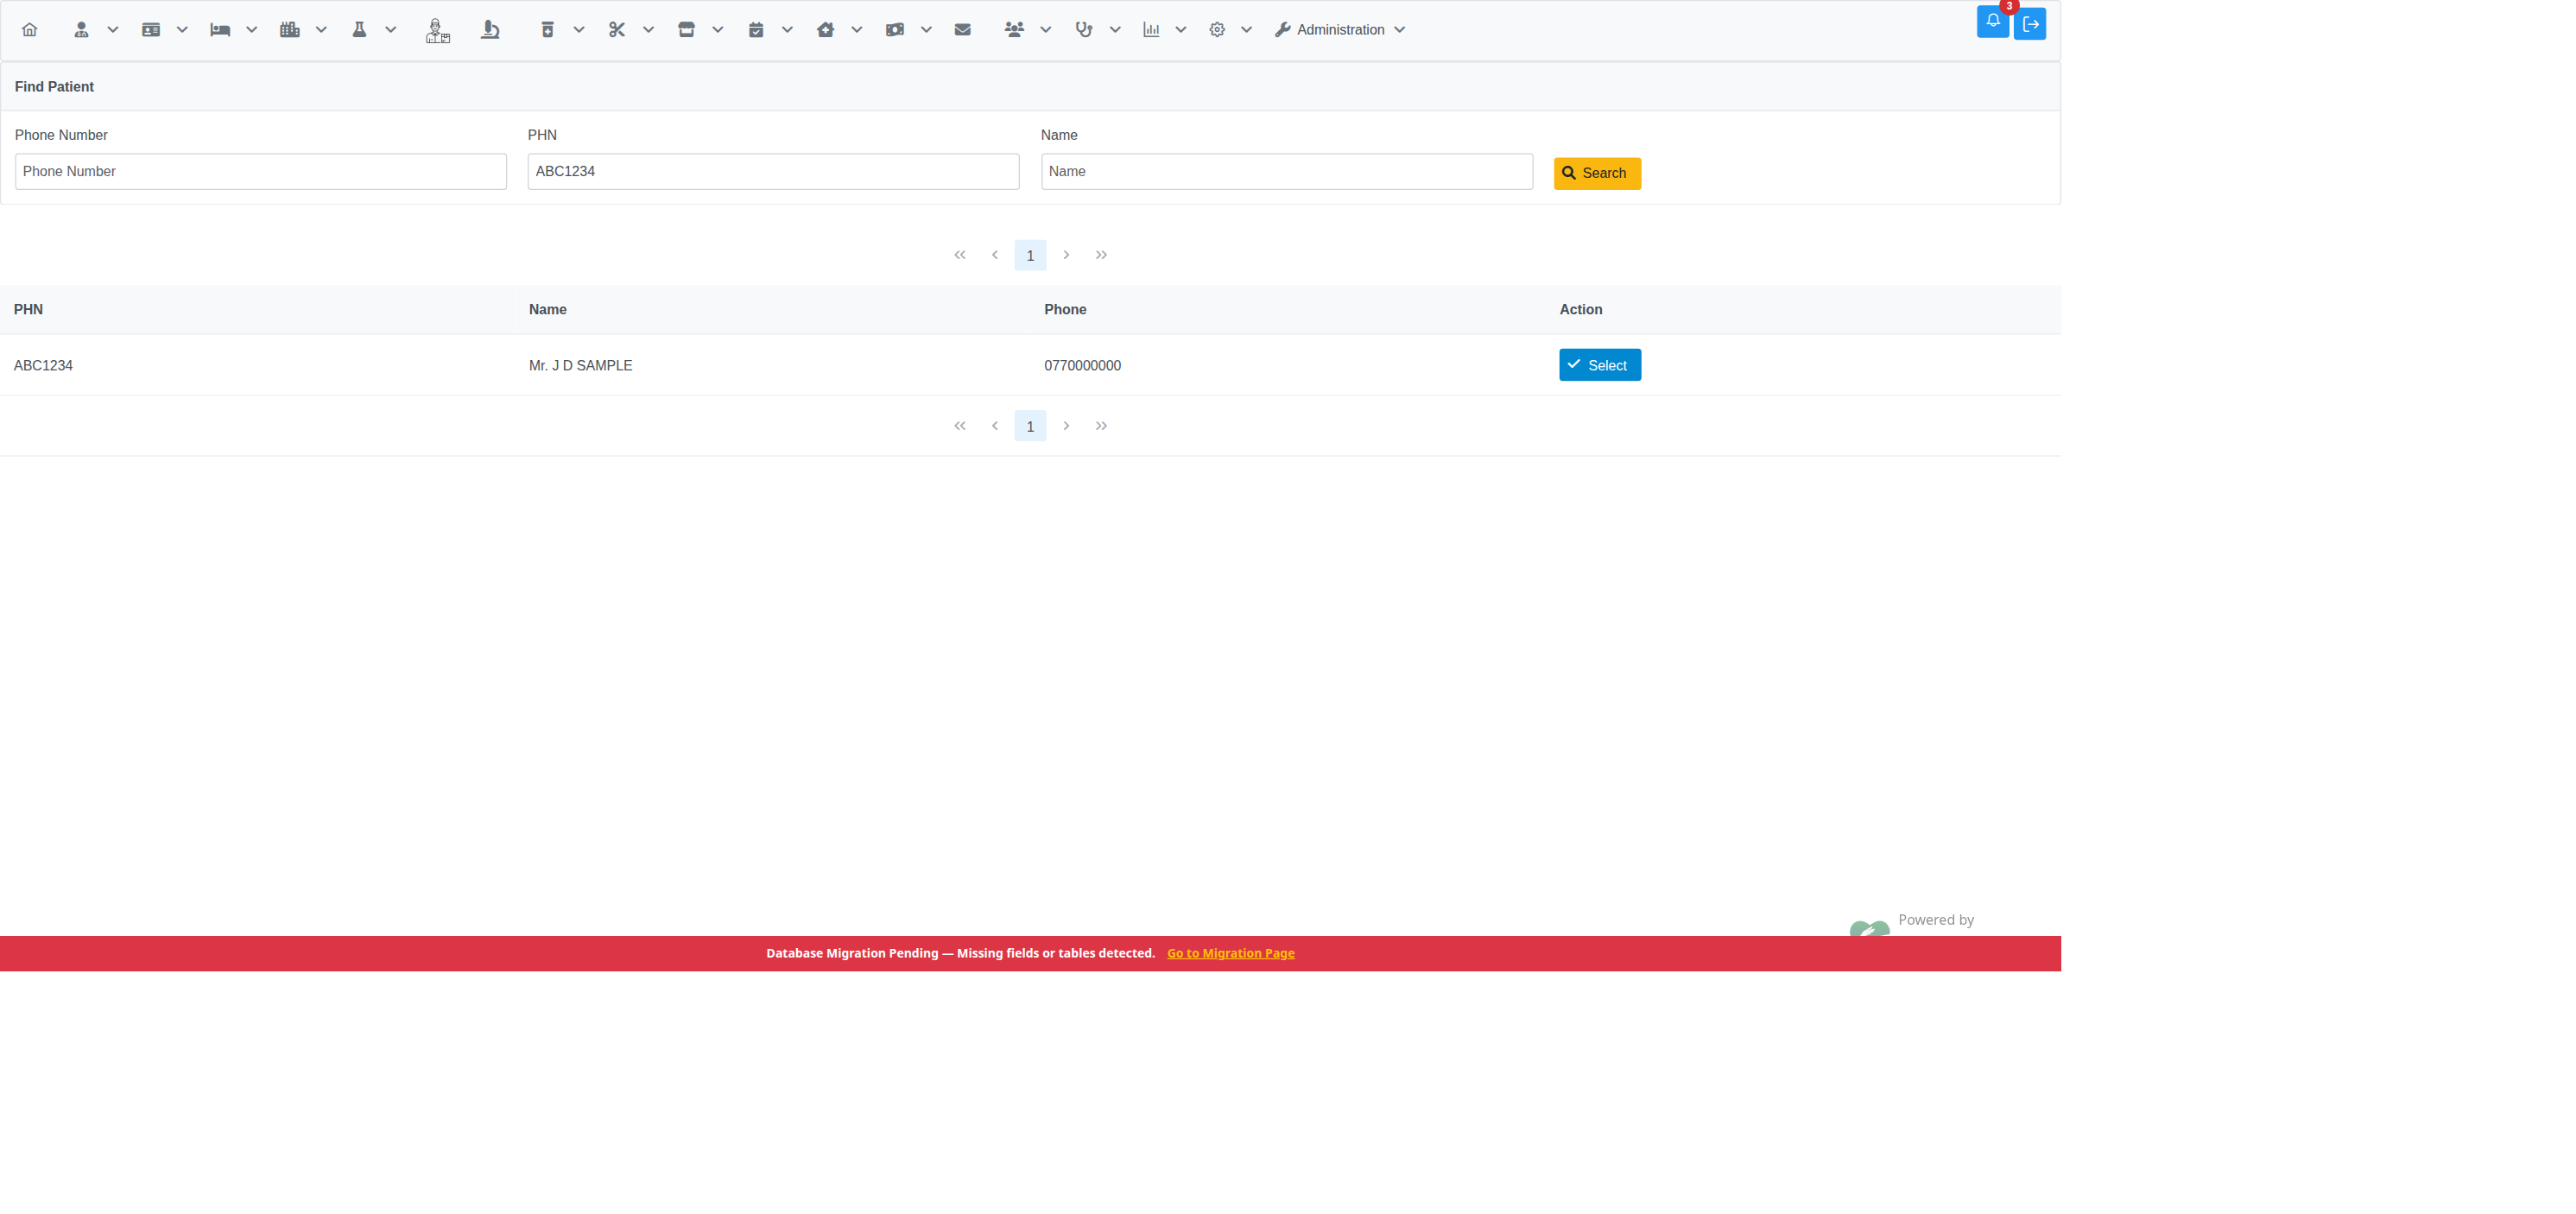 |
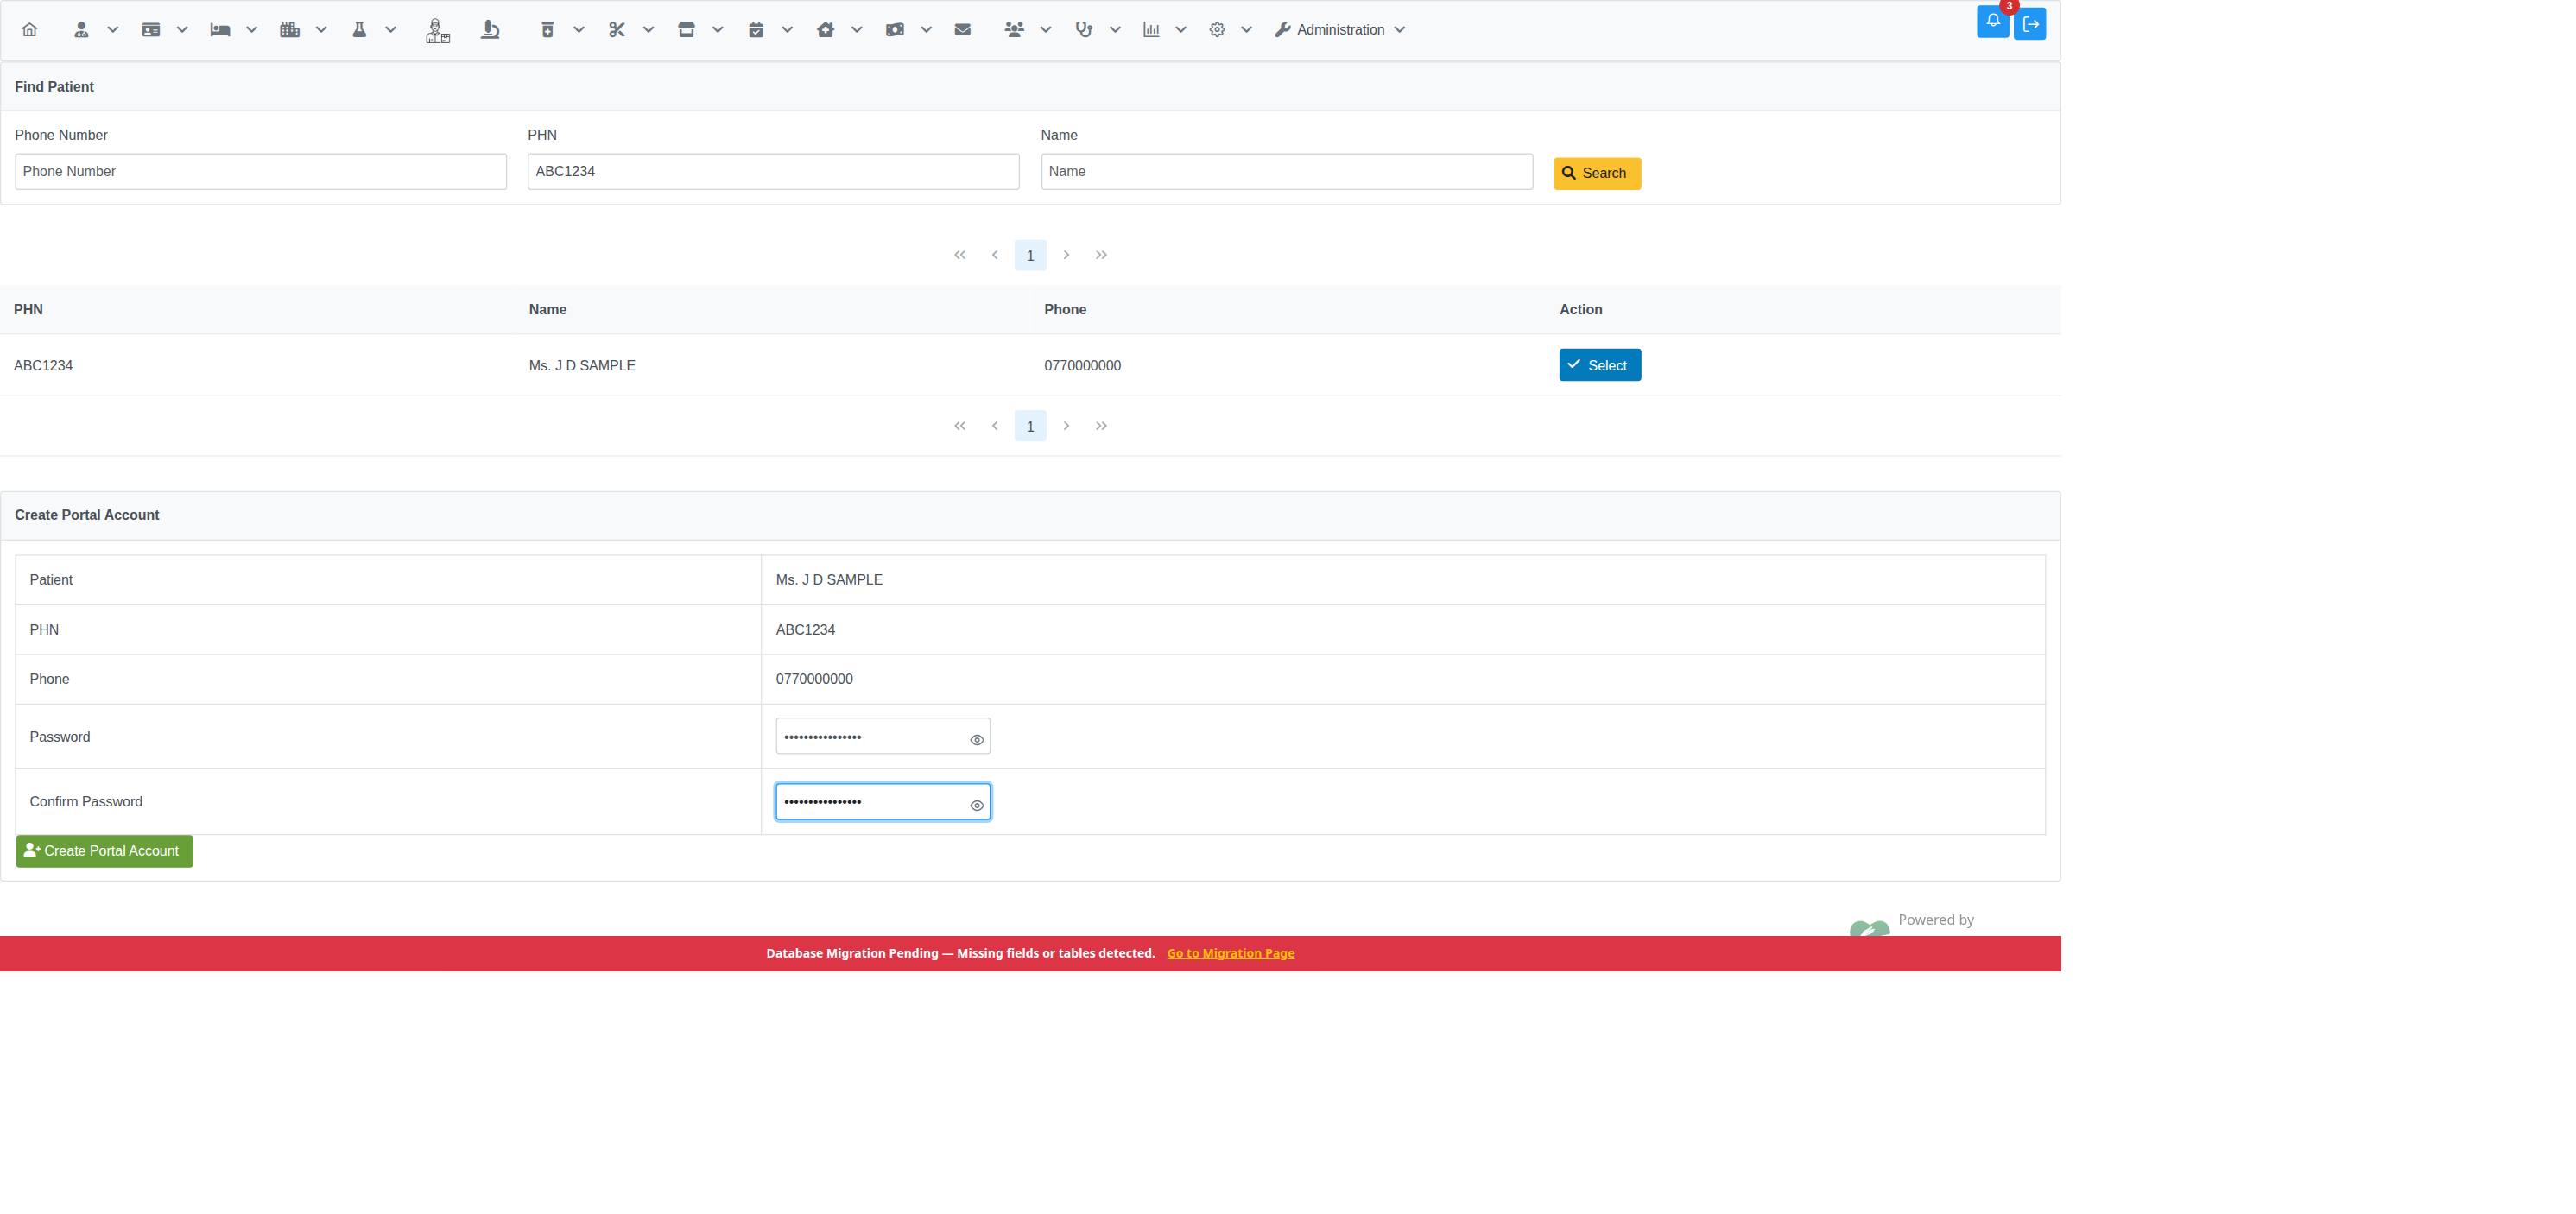 |
| Step 3 — confirmation |
|---|
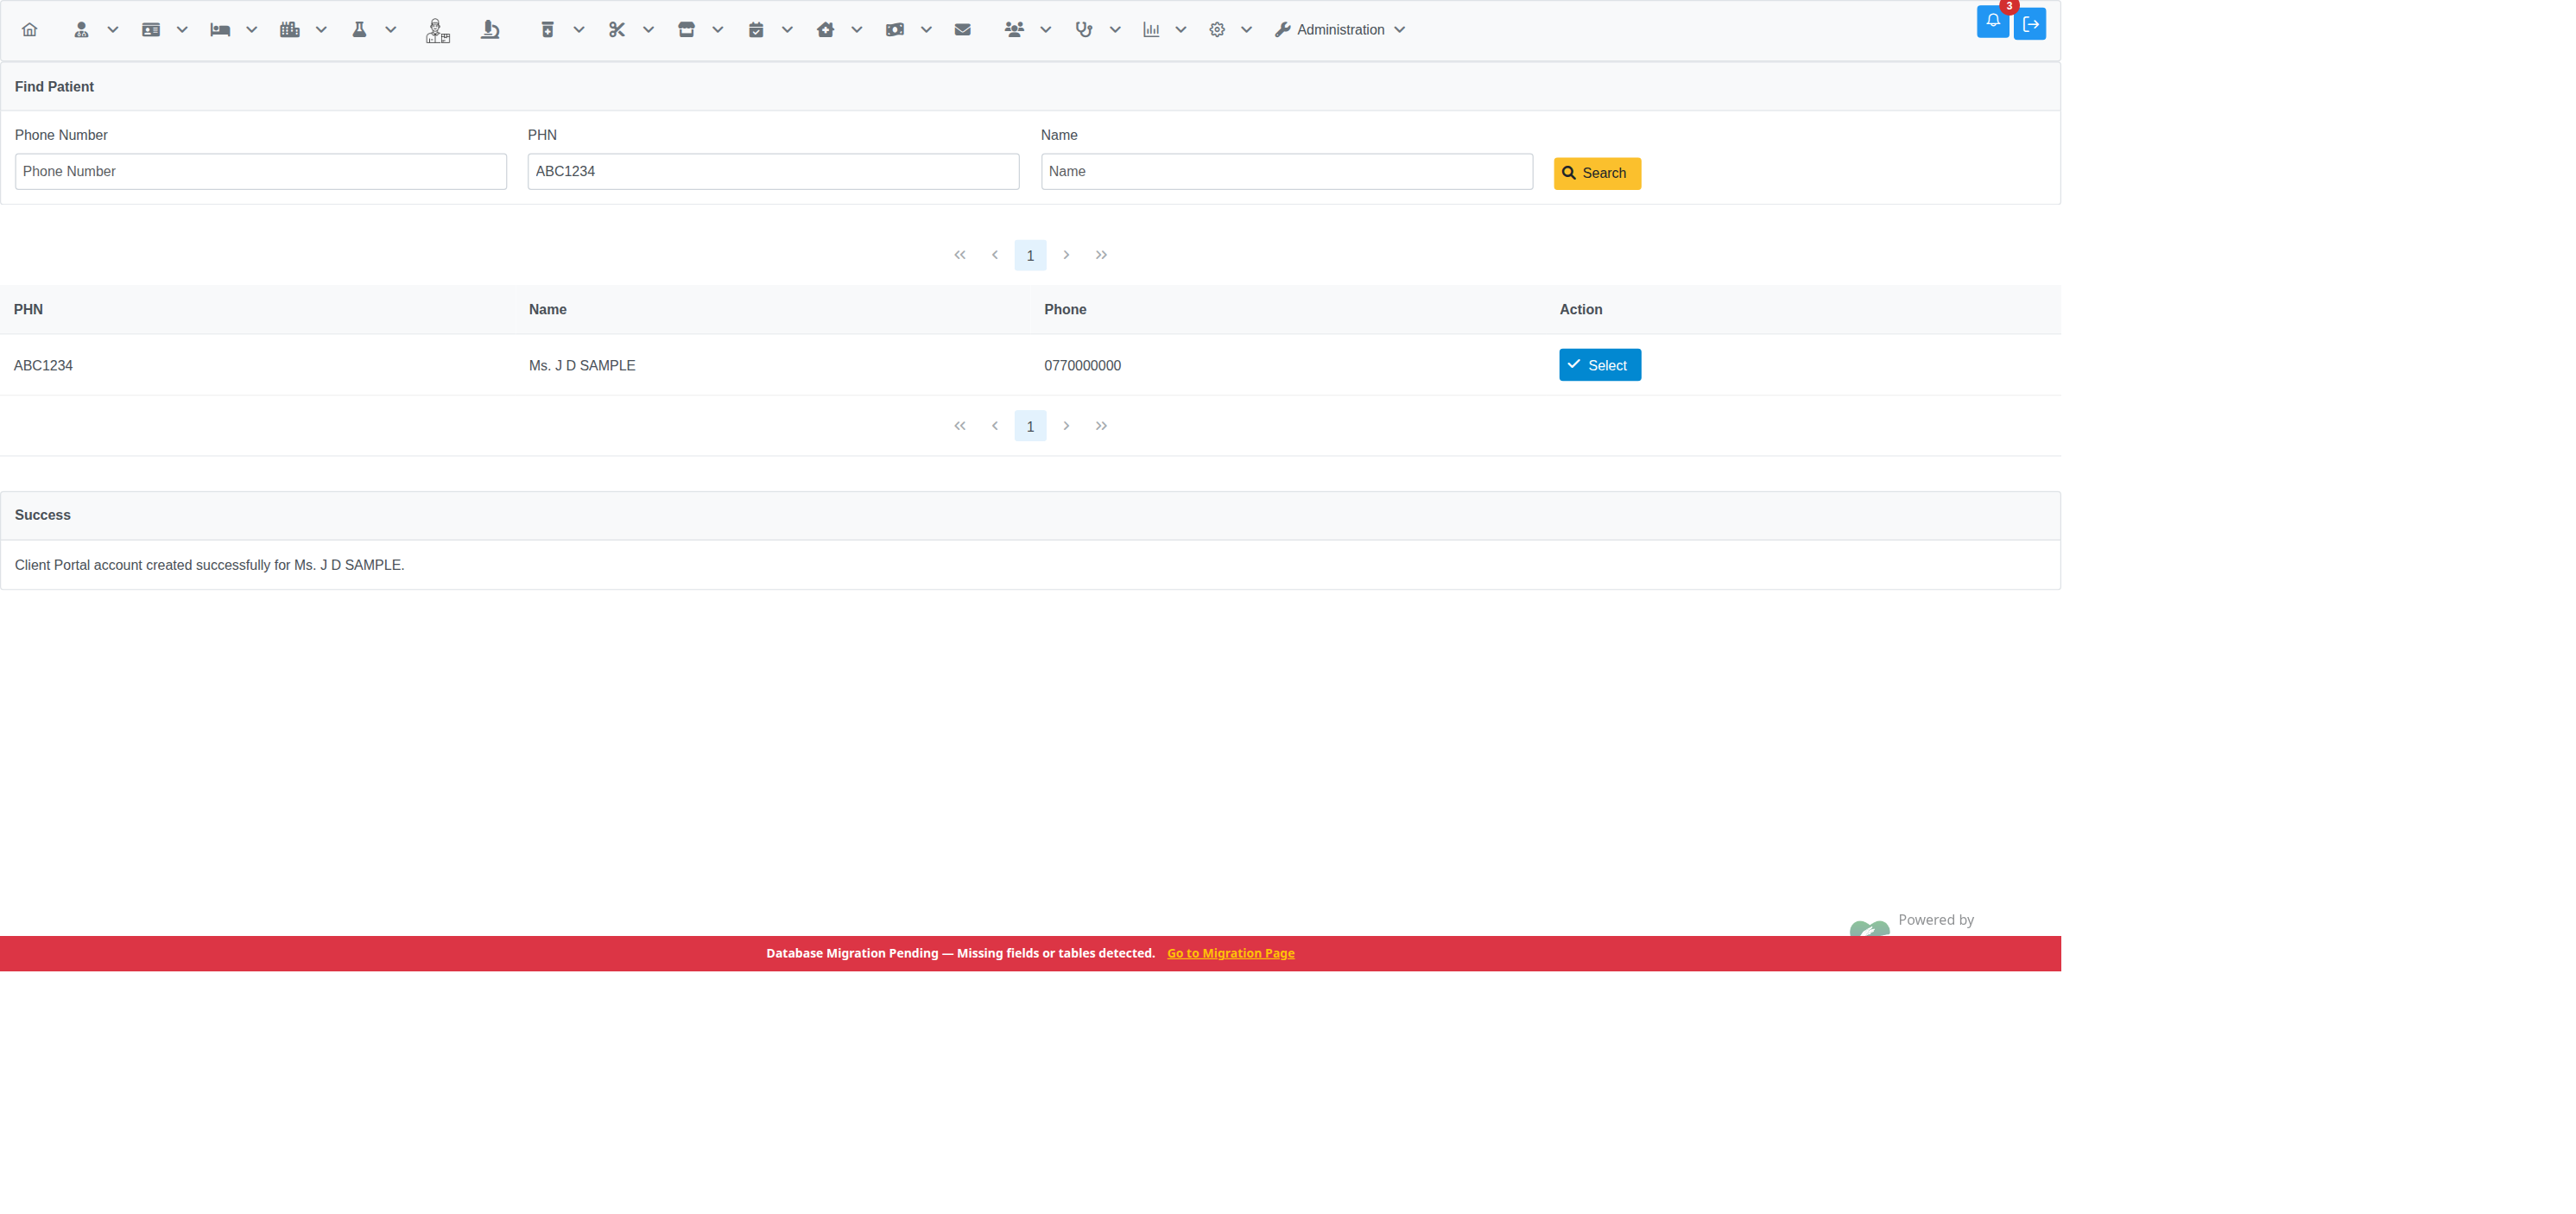 |
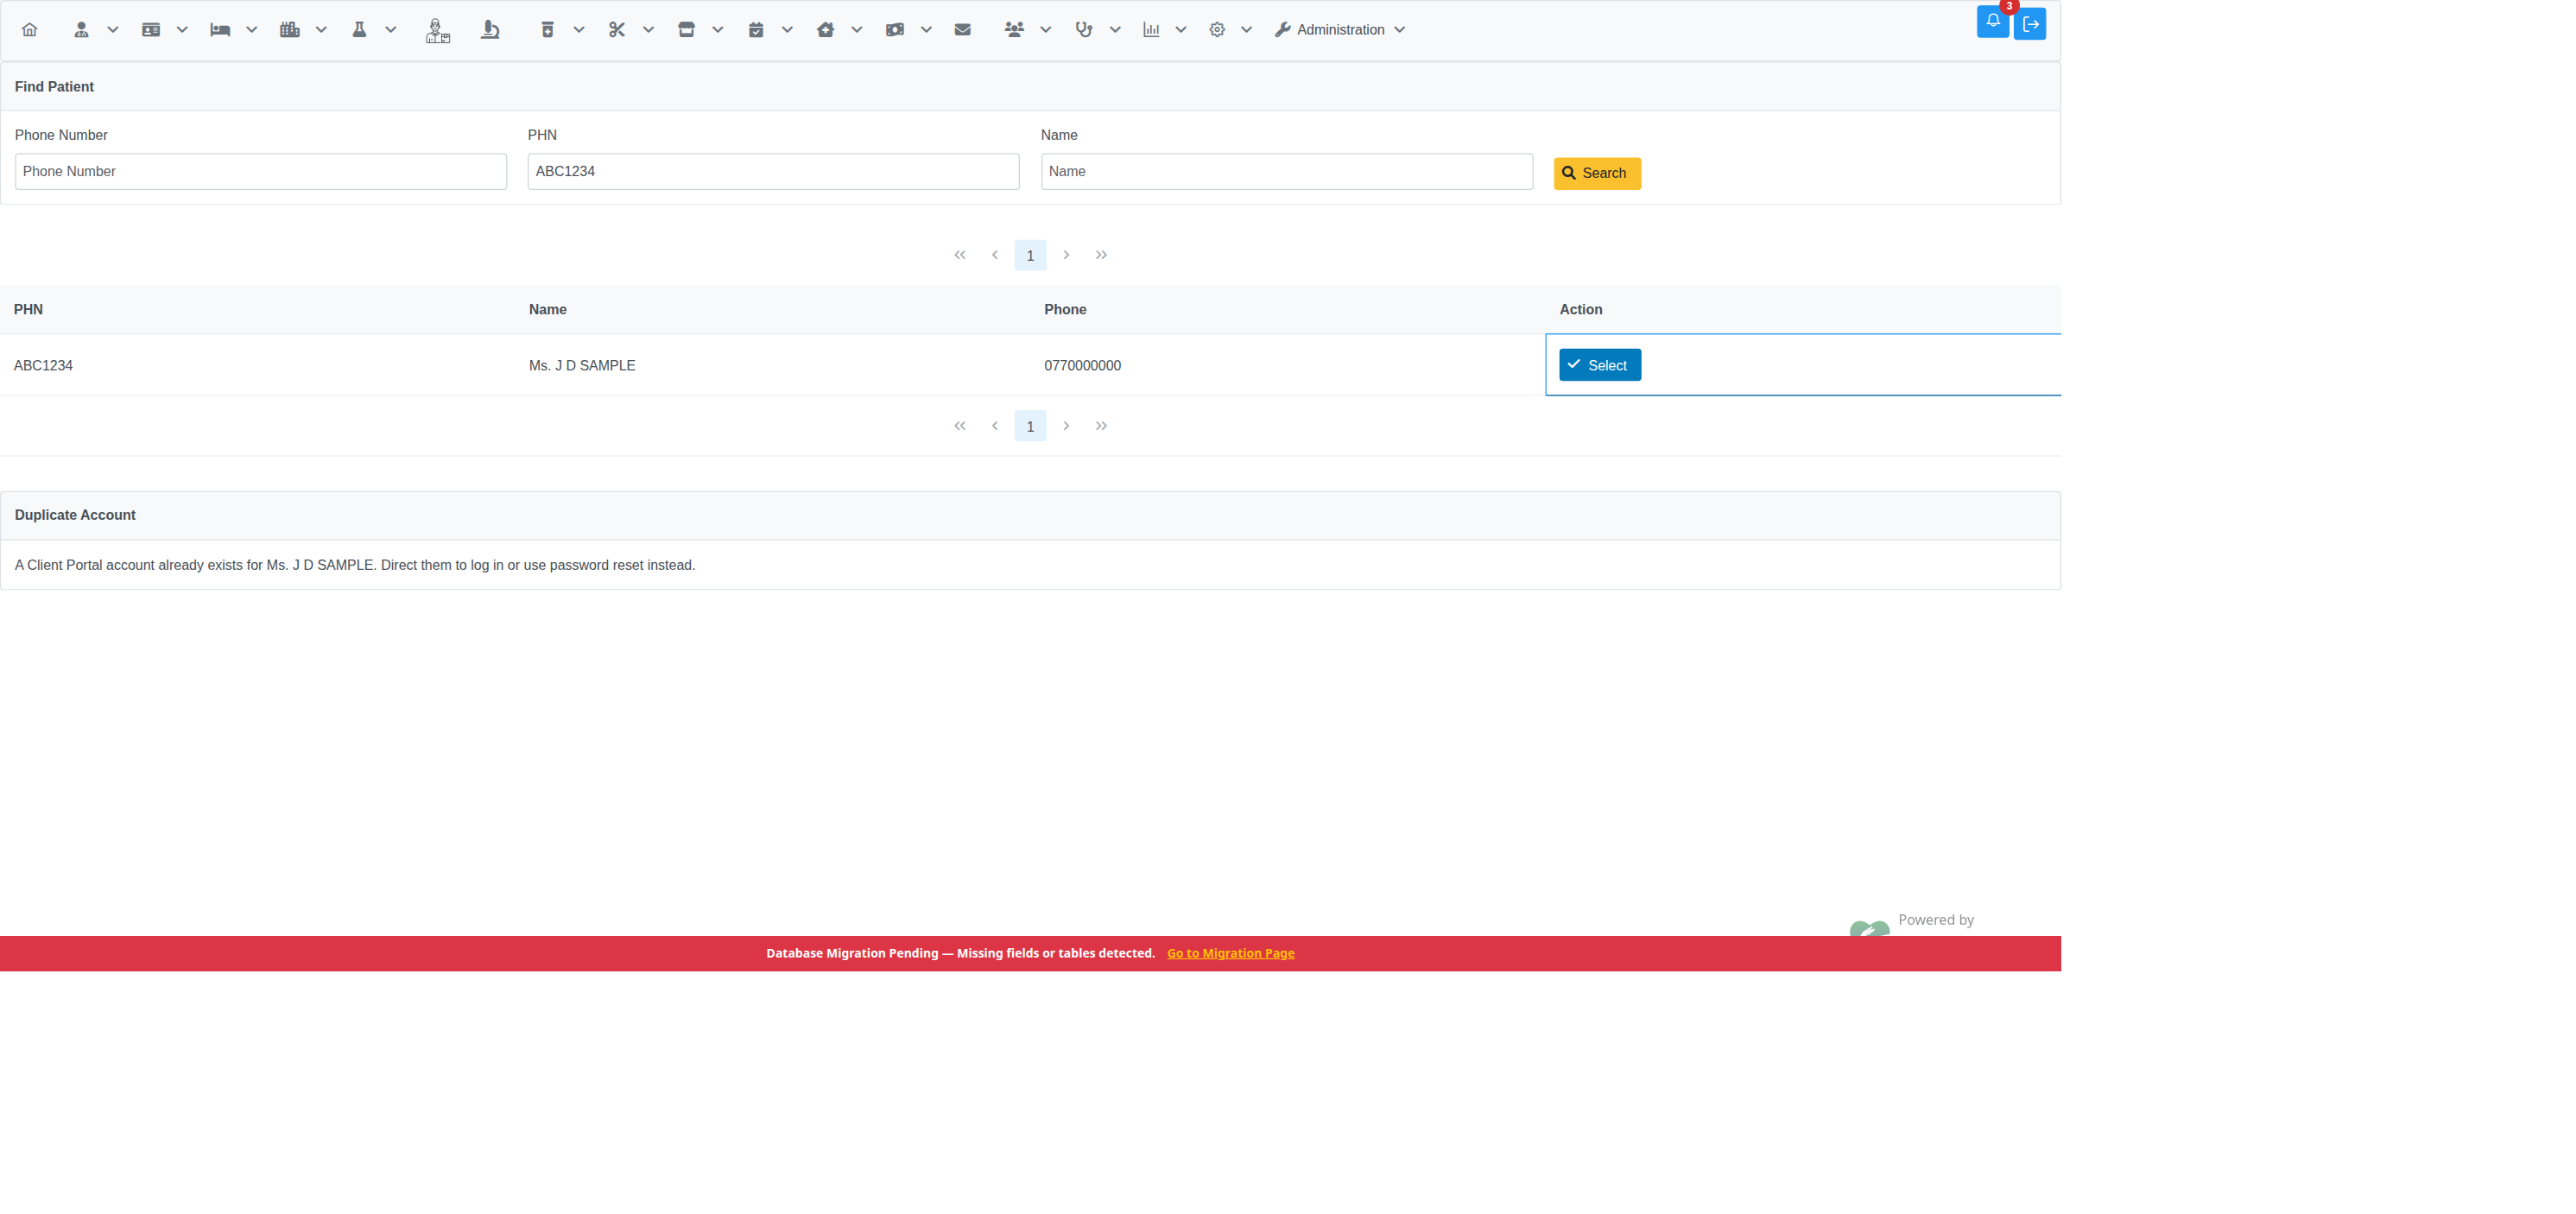
Unlike the phone-OTP path, there's no multi-match picker here — searching directly and picking a row from the results is the disambiguation step, so a shared household phone number isn't a special case for this channel. If the selected person already has an active portal account, the screen blocks creating a second one and points staff to login/password reset instead:
If your phone number is already on file at the hospital (from a previous
visit), you can register from home at /client_portal/register_phone.xhtml:
- Enter your phone number.
- The hospital sends you a one-time code (OTP) by SMS.
- Enter the code to verify it's really your phone.
- Set a password for your new account.
| Step 1 — enter phone number | Step 2 — enter OTP |
|---|---|
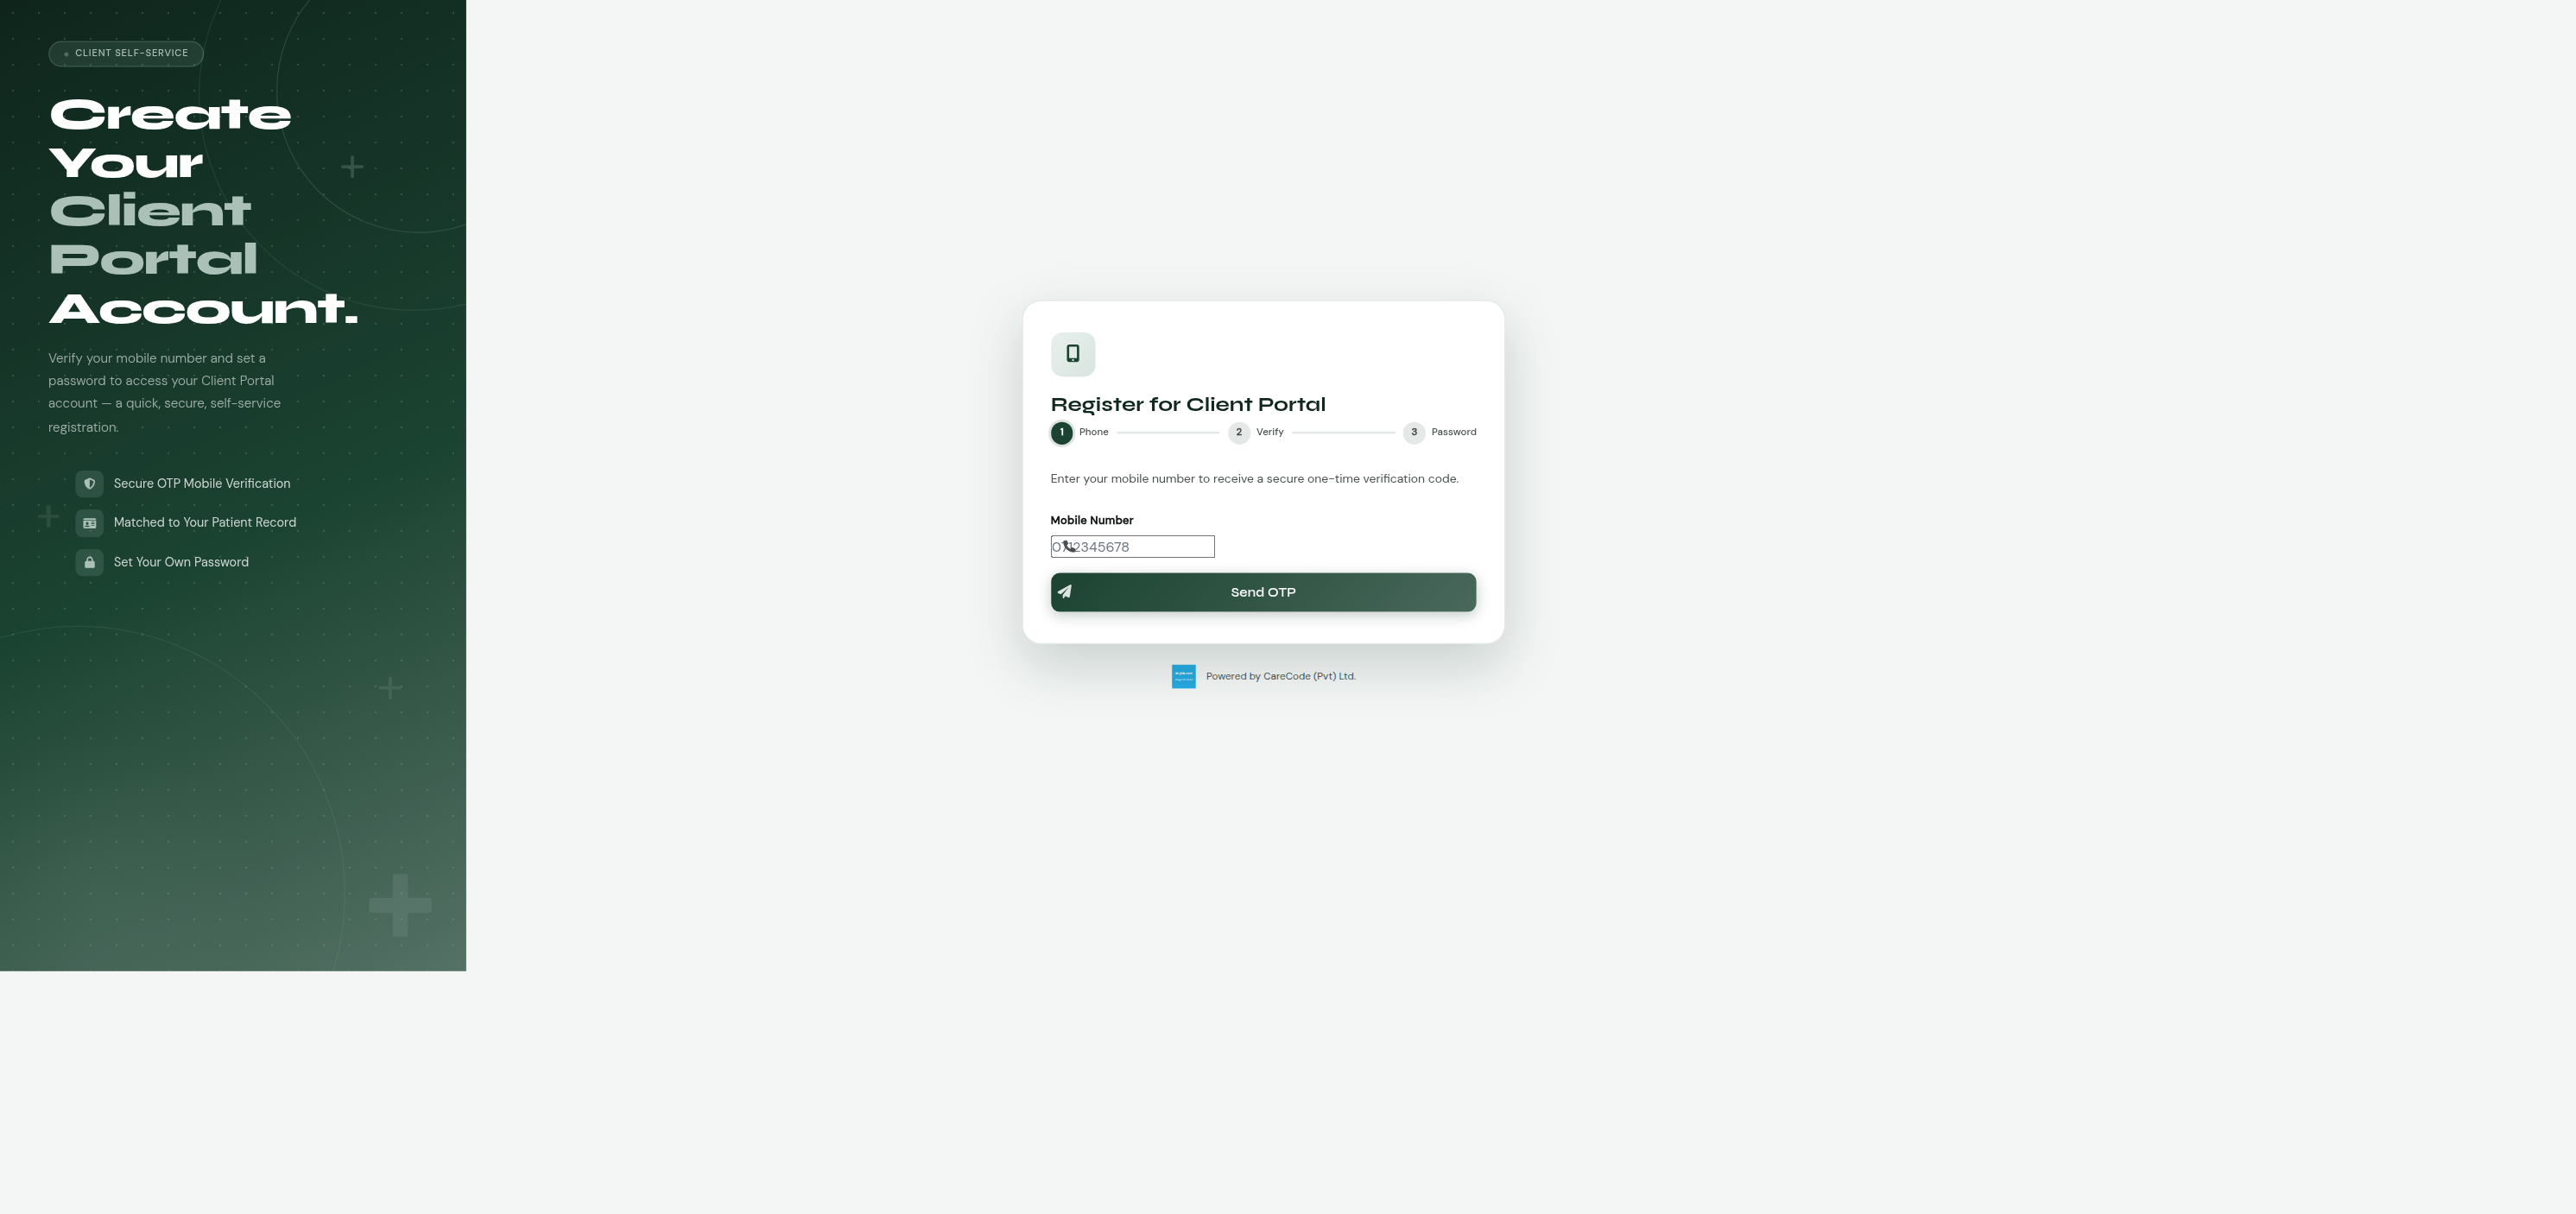 |
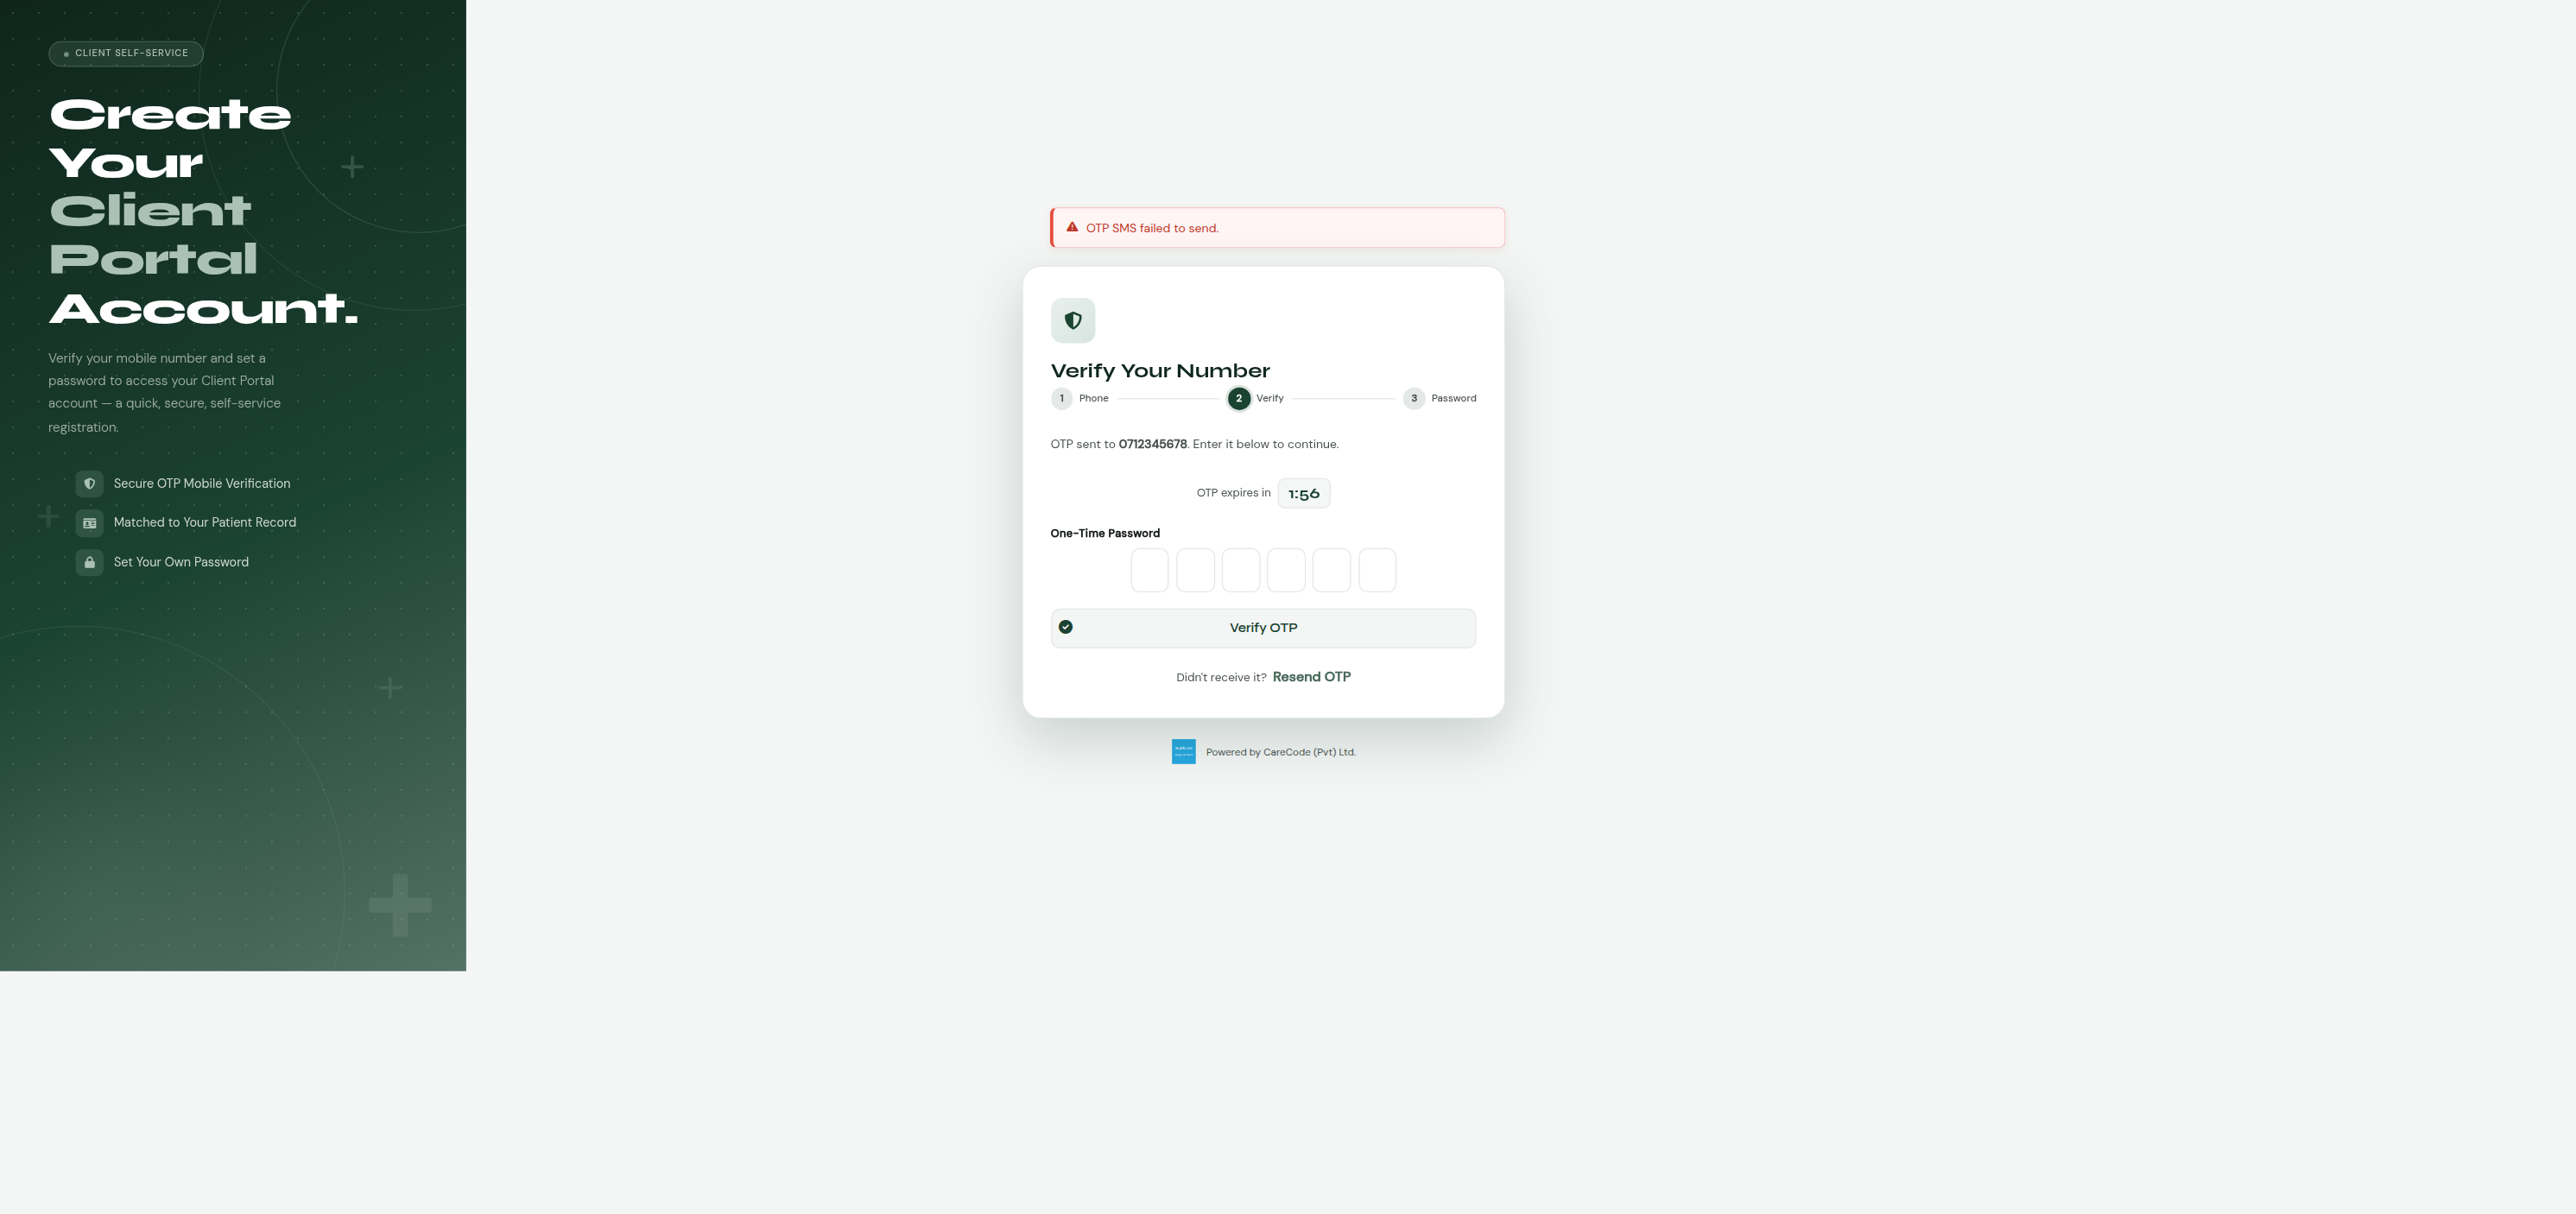 |
The "OTP SMS failed to send" banner in the screenshot above is a local/dev-only artifact — it appears when no SMS gateway is configured for the environment. On a properly configured deployment the OTP is delivered by SMS and this message doesn't appear. See Troubleshooting below.
If your phone number isn't on file yet, this path won't find you:
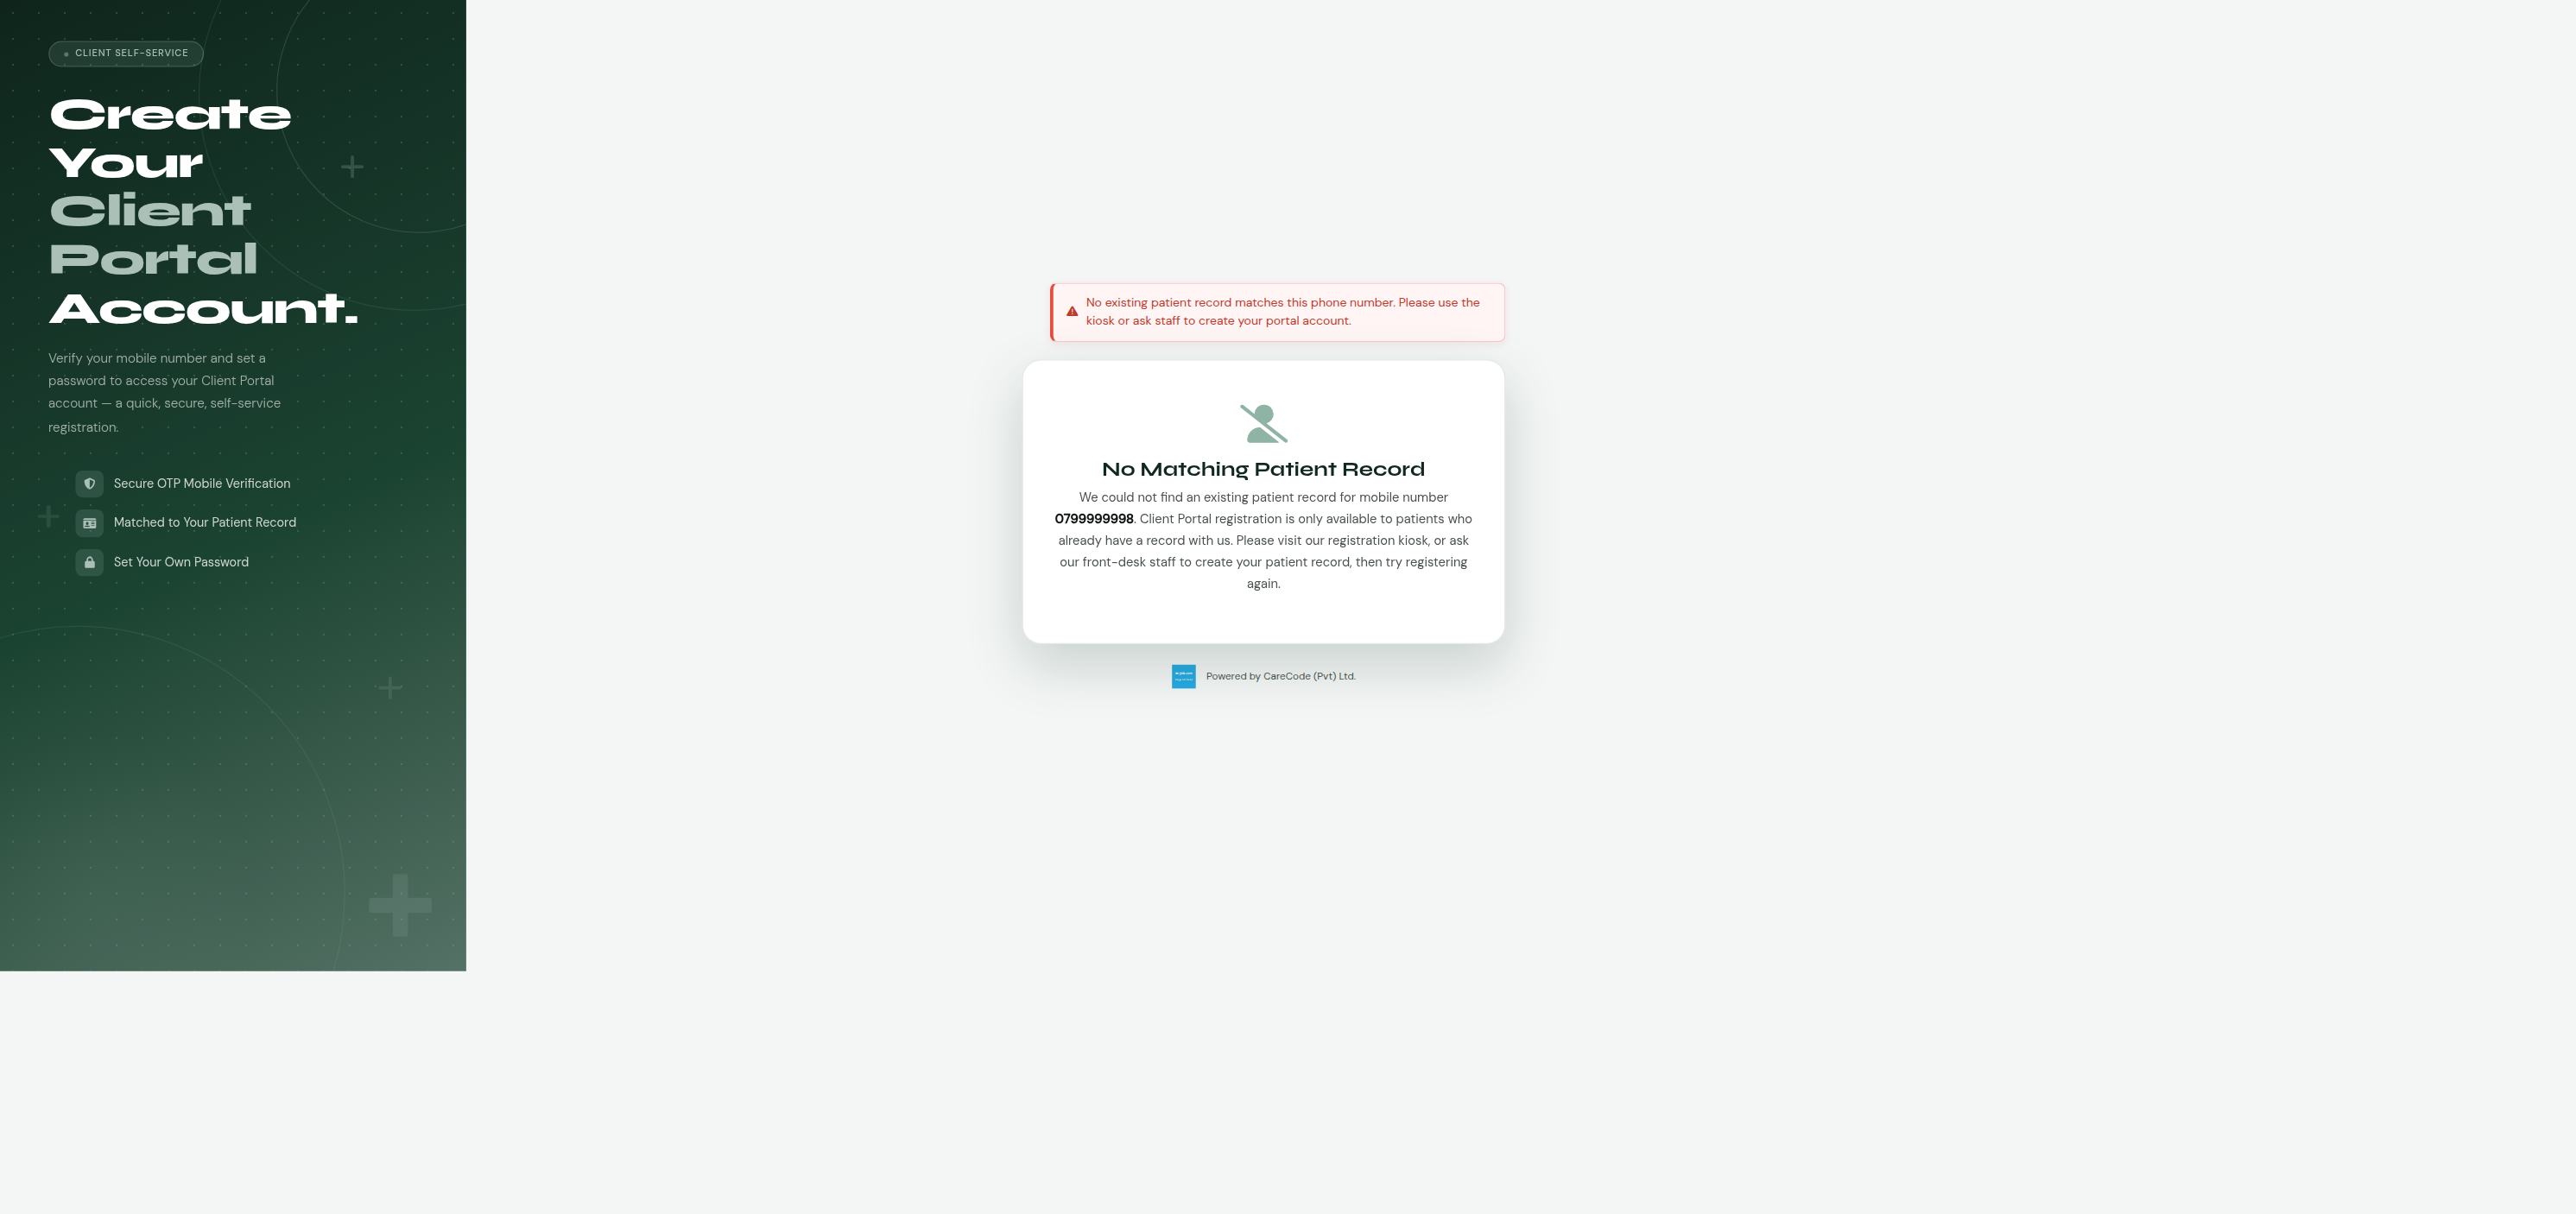
— use the Kiosk option below, which can create a patient record on the spot, or ask staff to register your account for you (option 1 above).
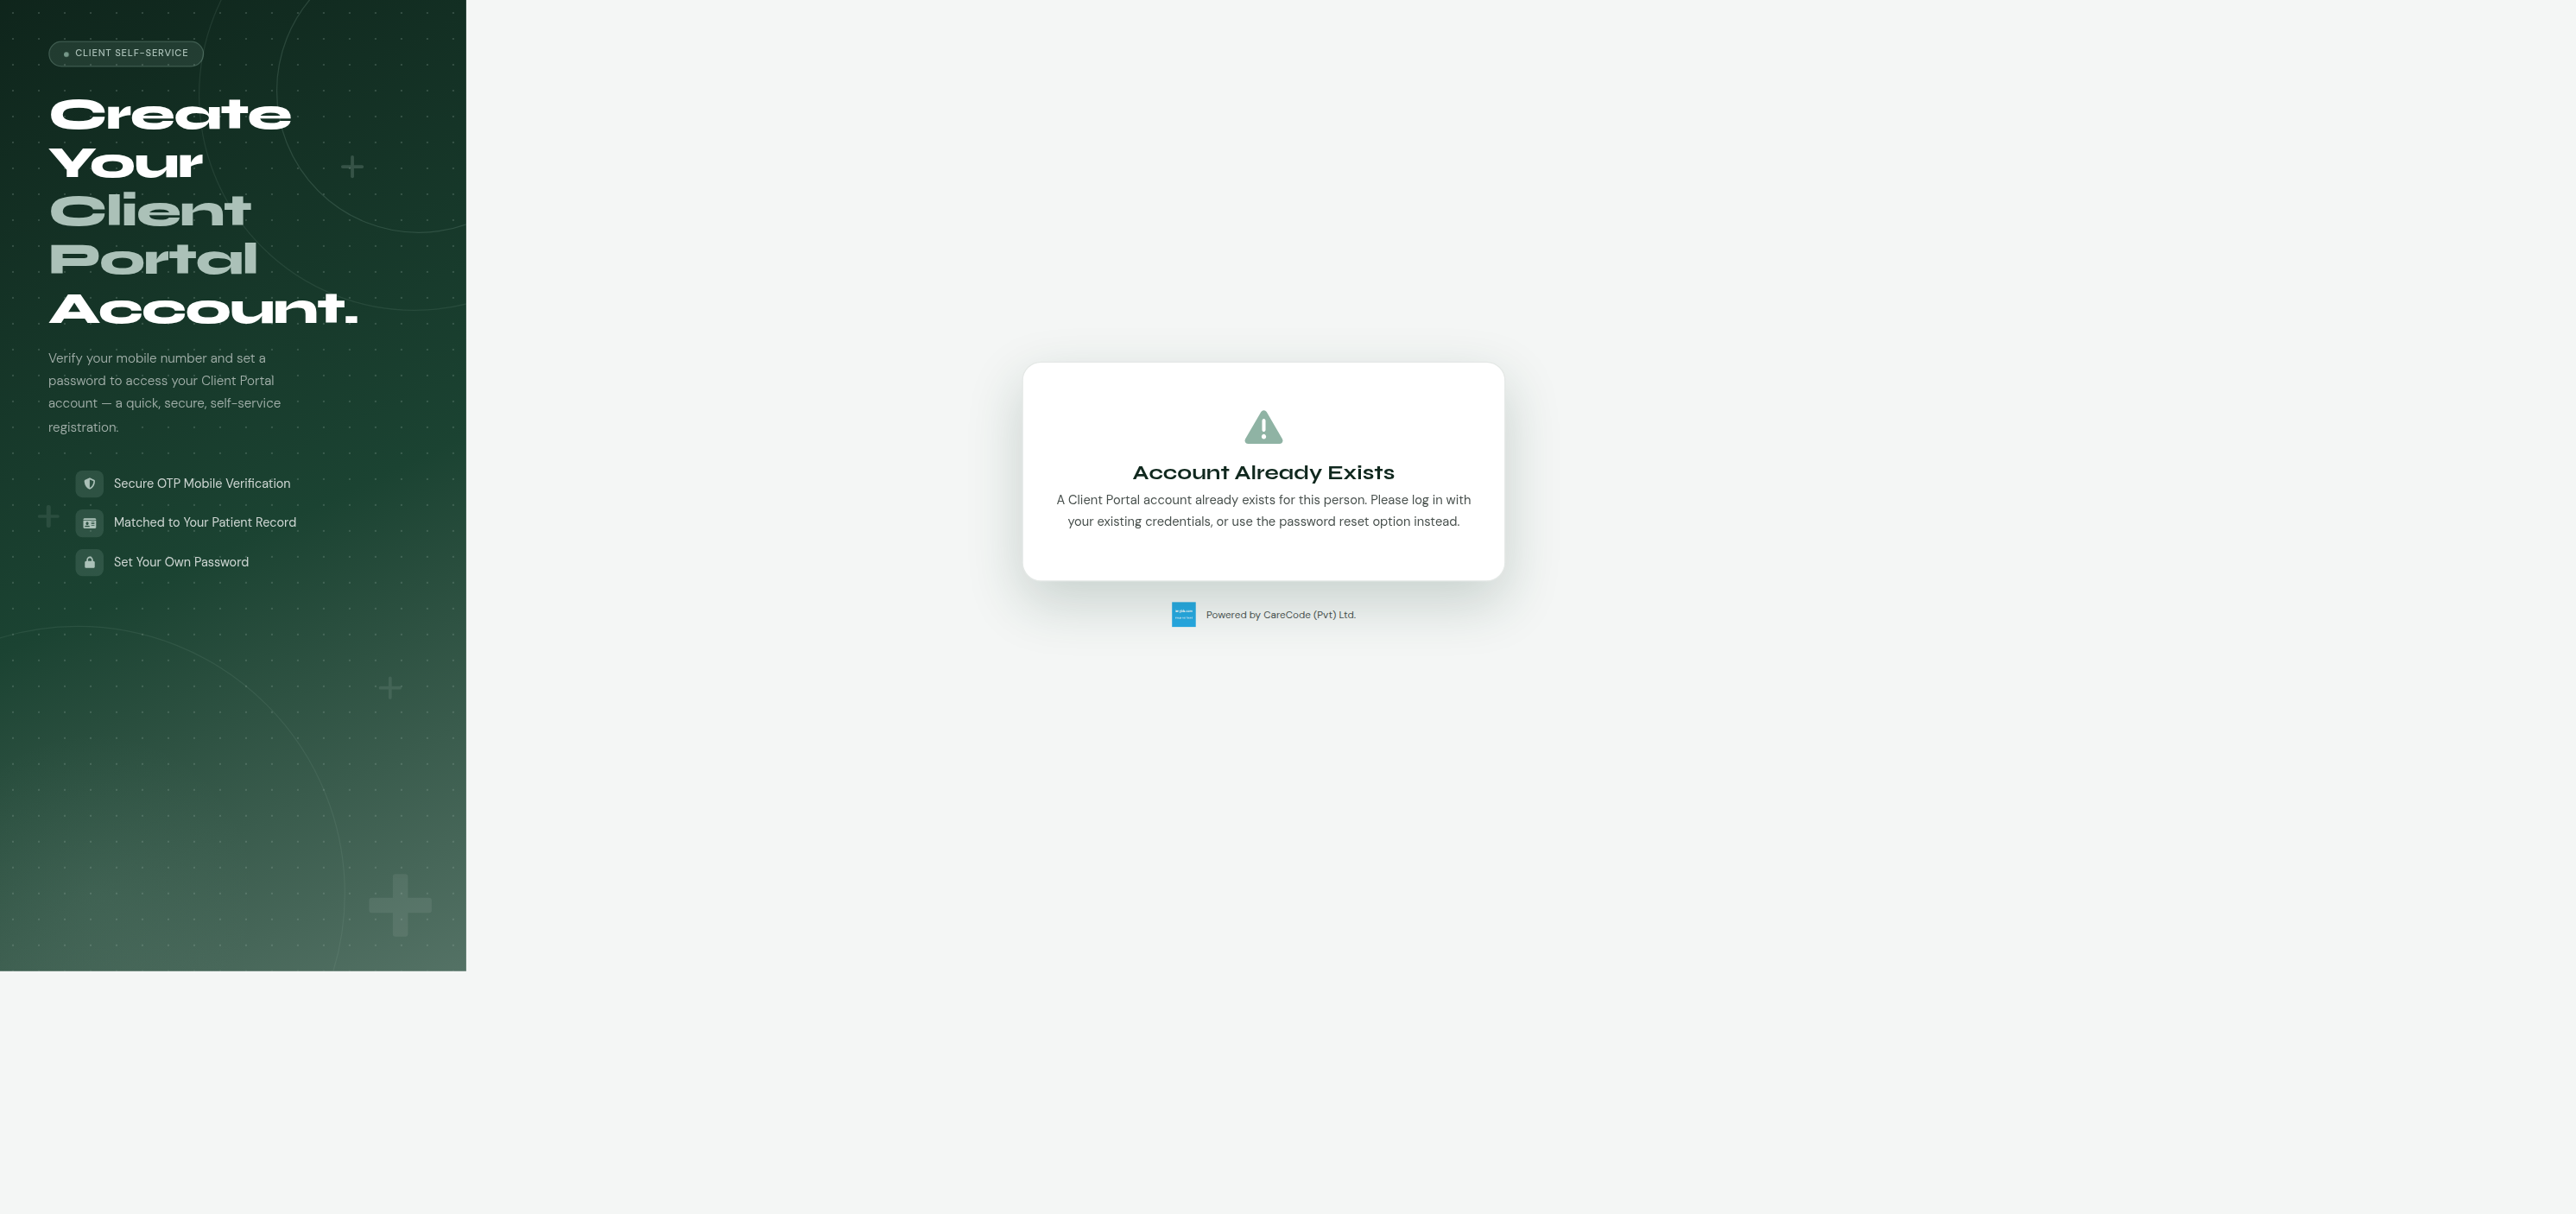
If you already have a portal account for that person, trying to register again shows a message telling you an account already exists instead of creating a duplicate:
Same idea as the phone method (option 2), but with an email instead: your
email must already be on file, you'll receive a one-time code by email
instead of SMS, and you verify it the same way before setting a password.
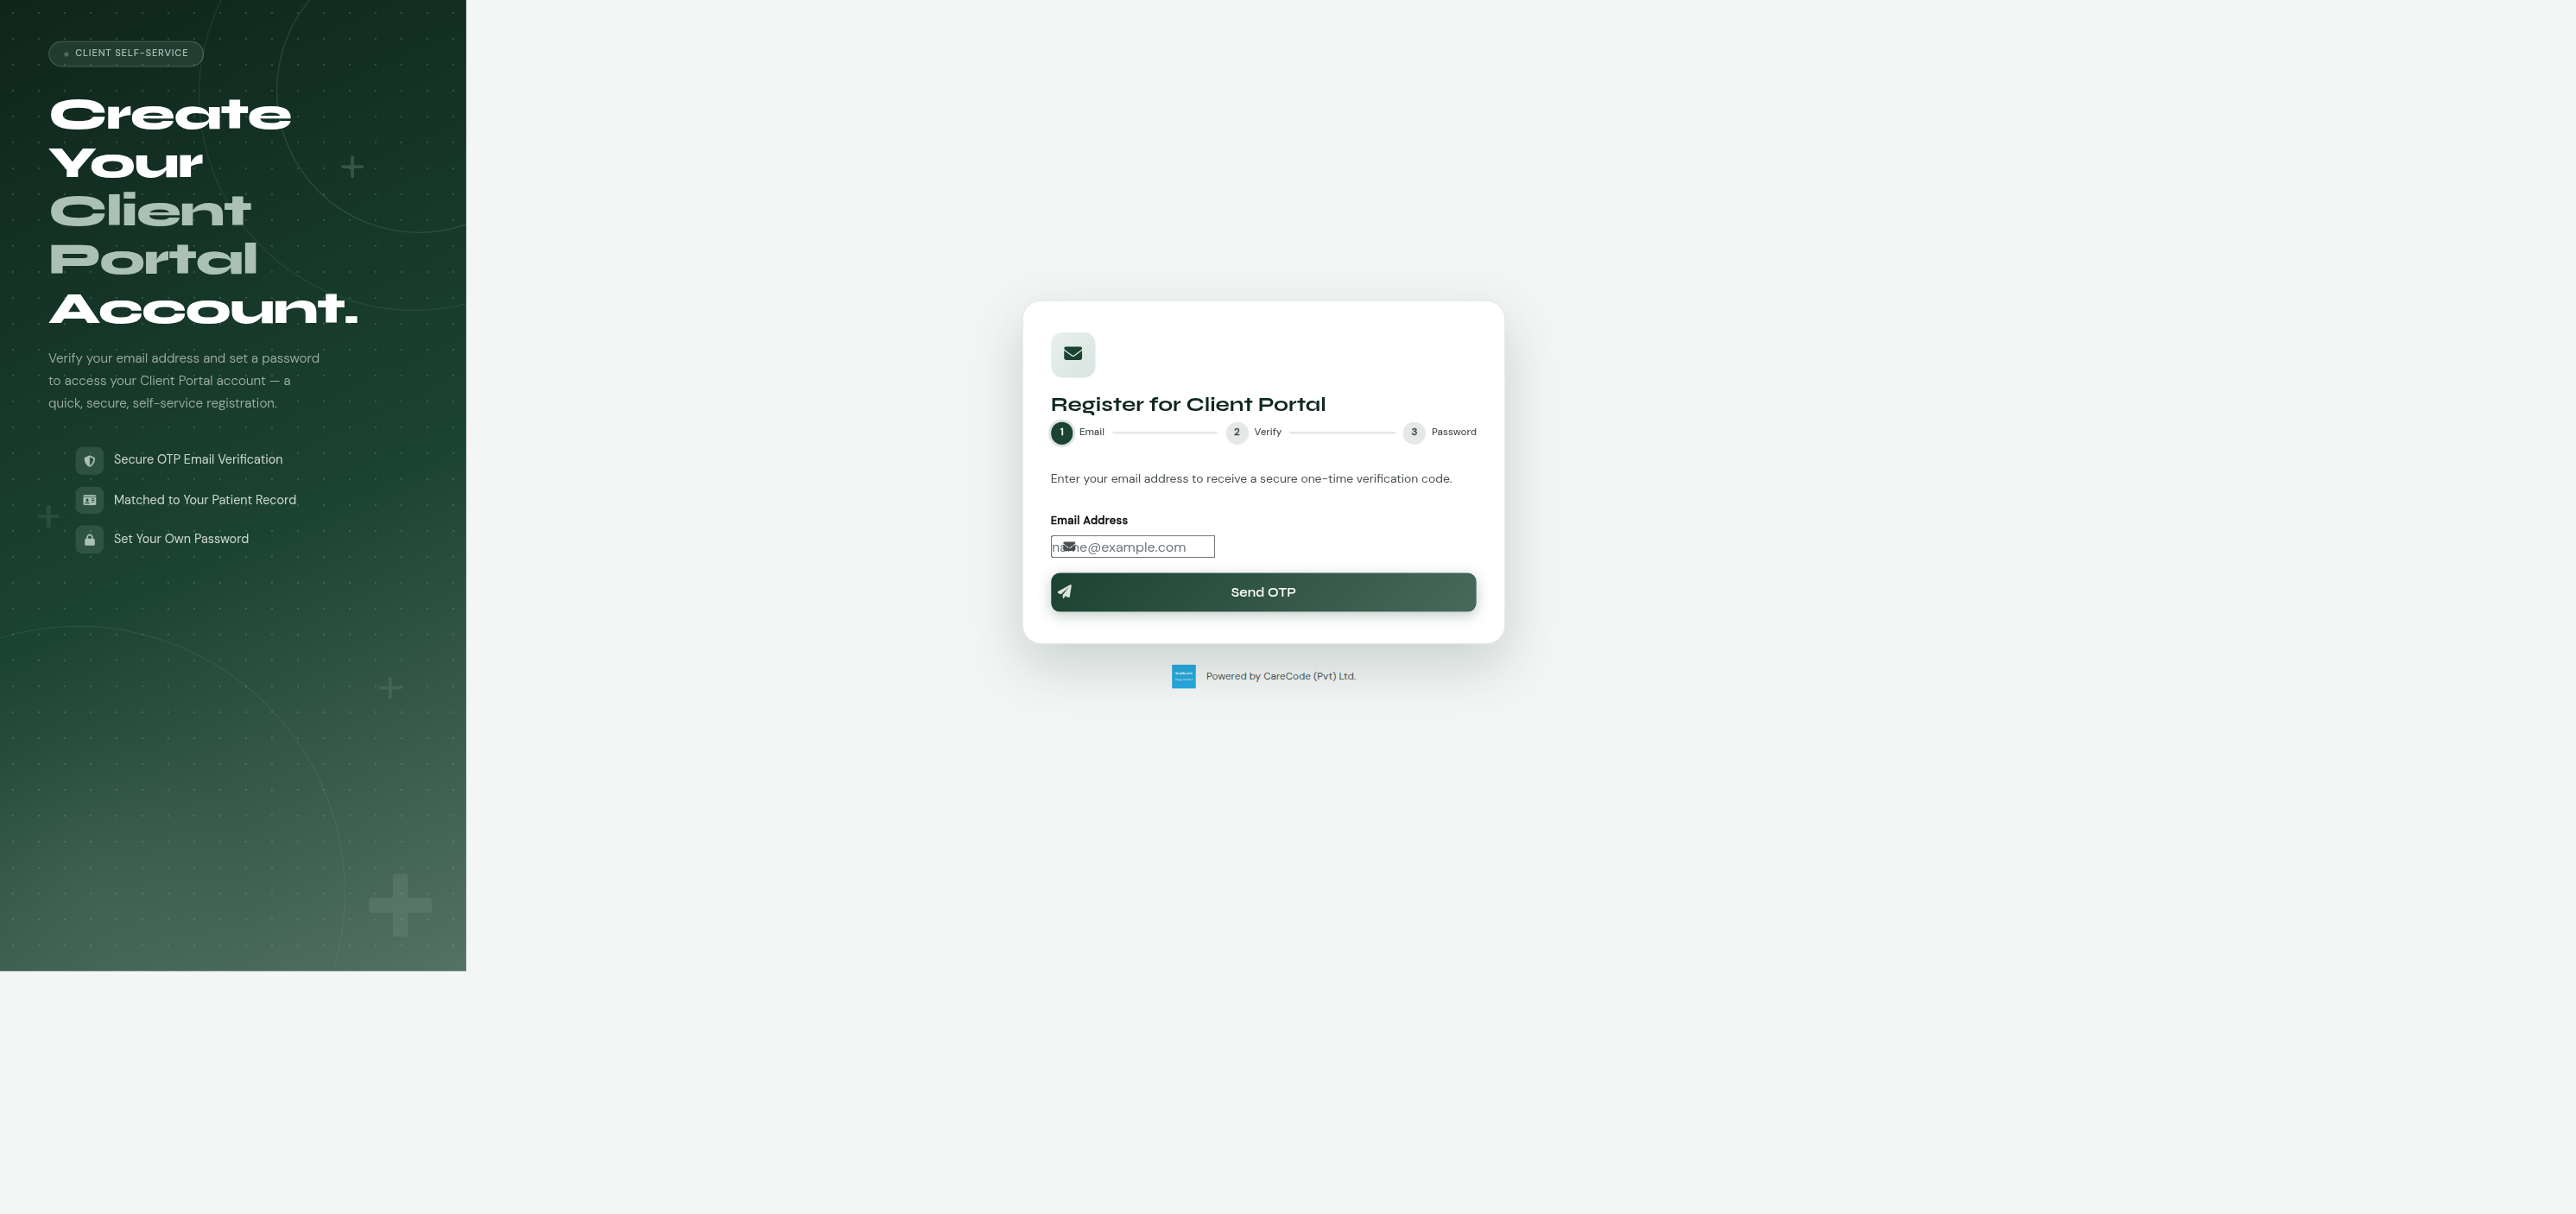
Register from home at /client_portal/register_email.xhtml:
- Enter your email address.
- The hospital sends you a one-time code (OTP) by email.
- Enter the code to verify it's really your email.
- Set a password for your new account.
| Step 1 — enter email address | Step 2 — enter OTP |
|---|---|
 |
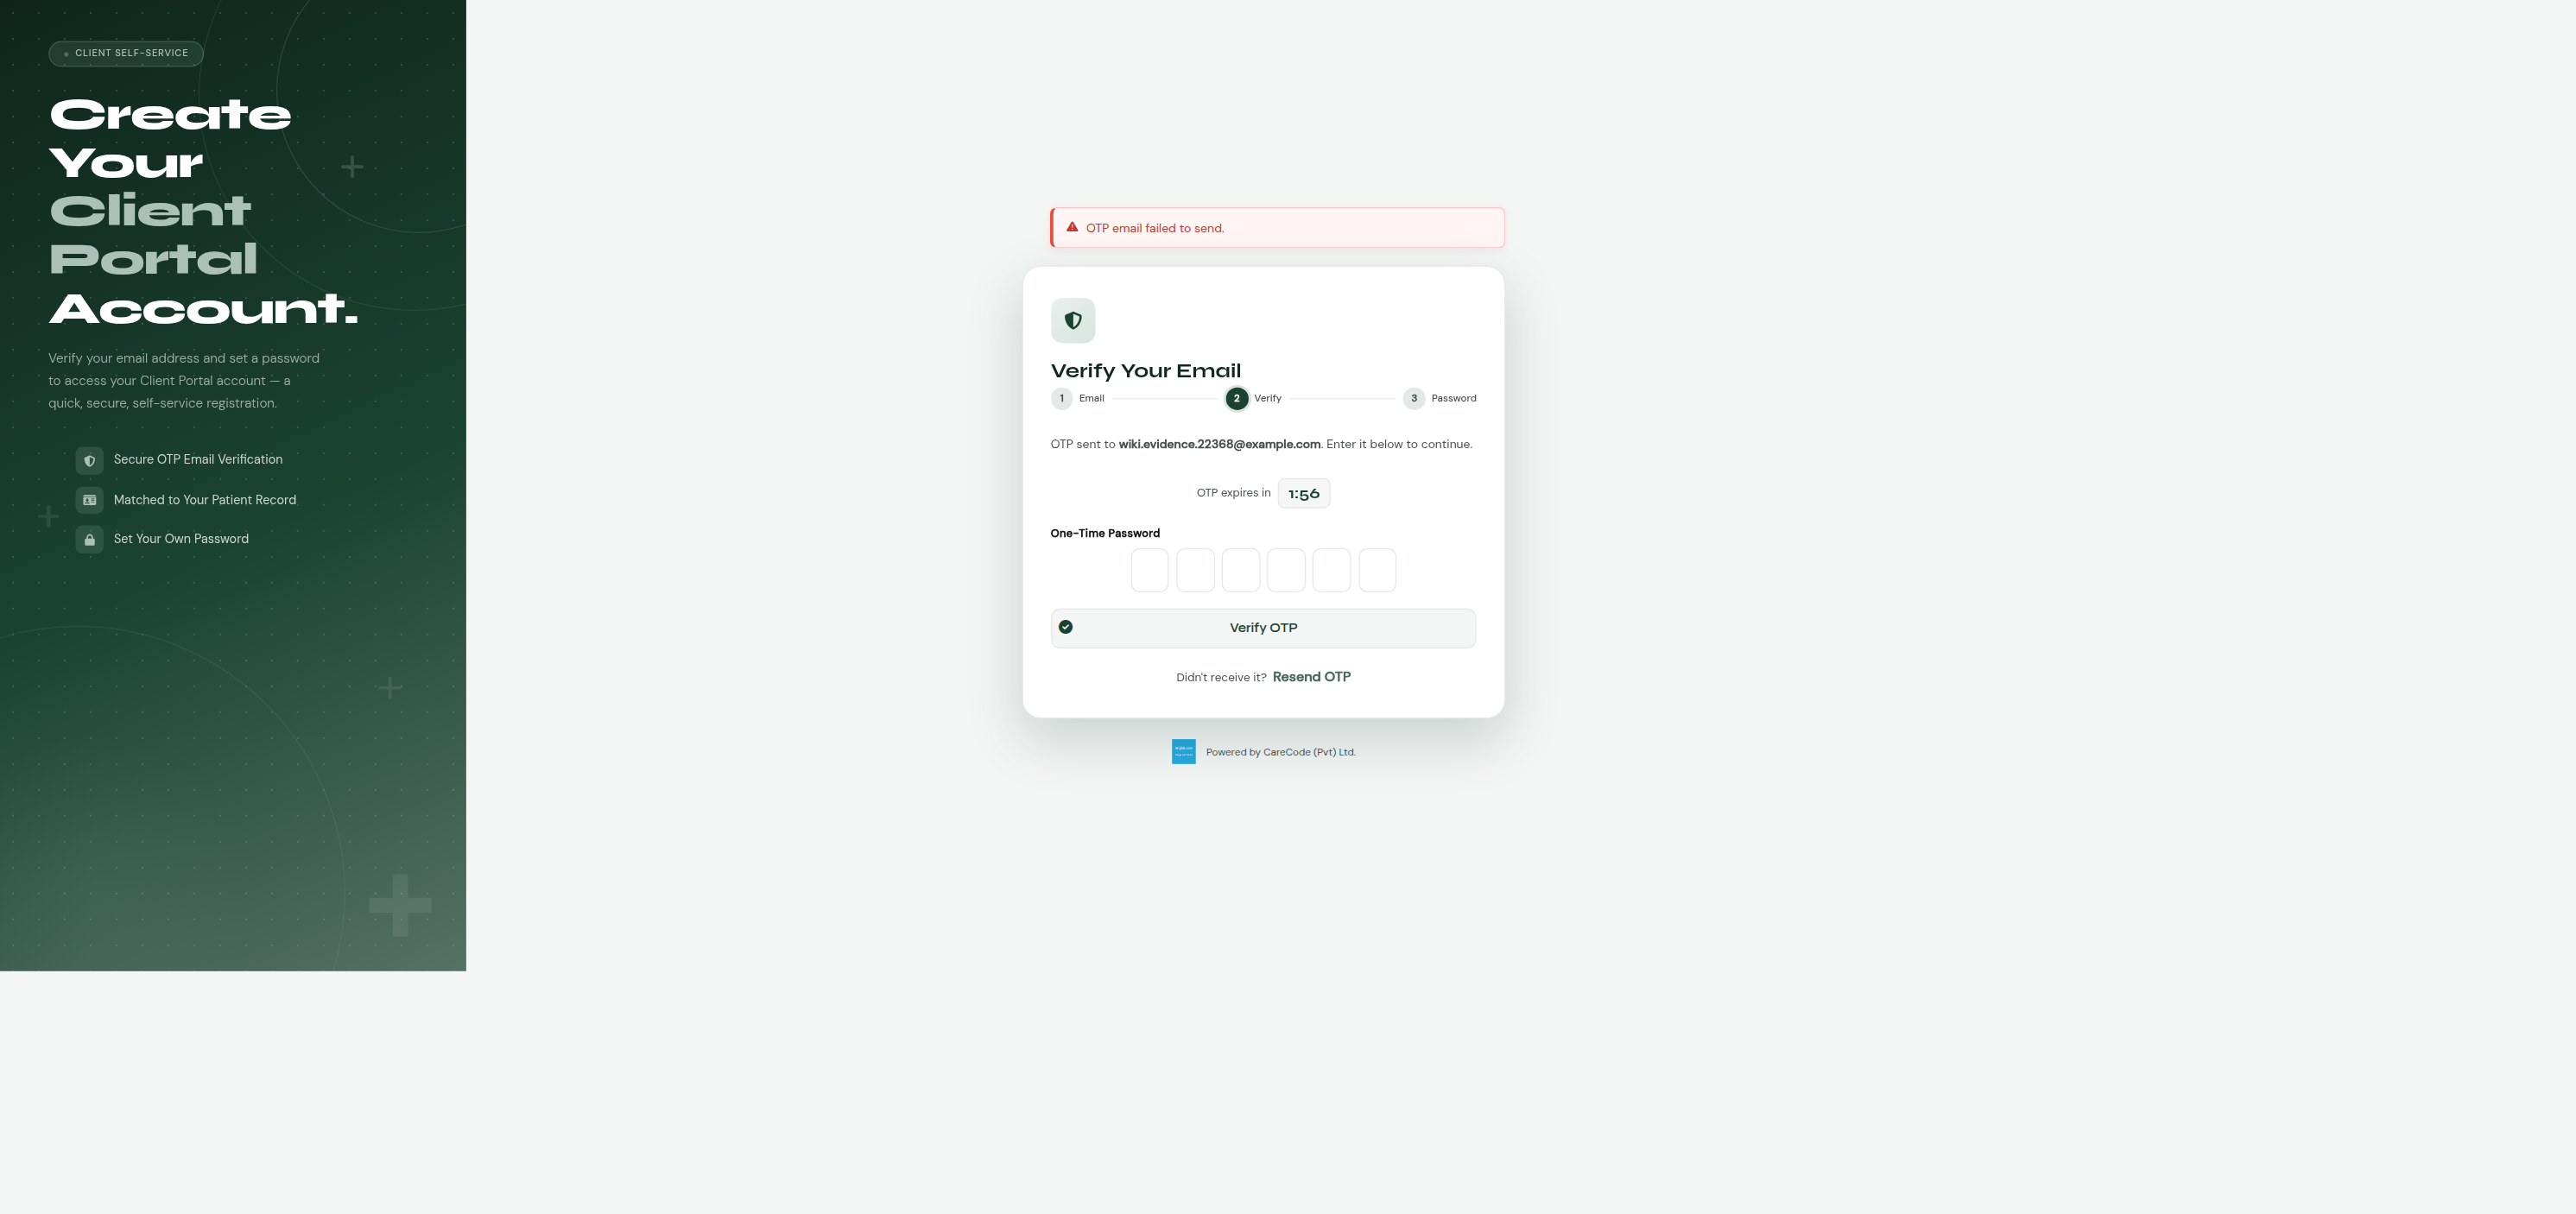 |
The "OTP email failed to send" banner in the screenshot above is a local/dev-only artifact — it appears when no email gateway is configured for the environment. On a properly configured deployment the OTP is delivered by email and this message doesn't appear. See Troubleshooting below.
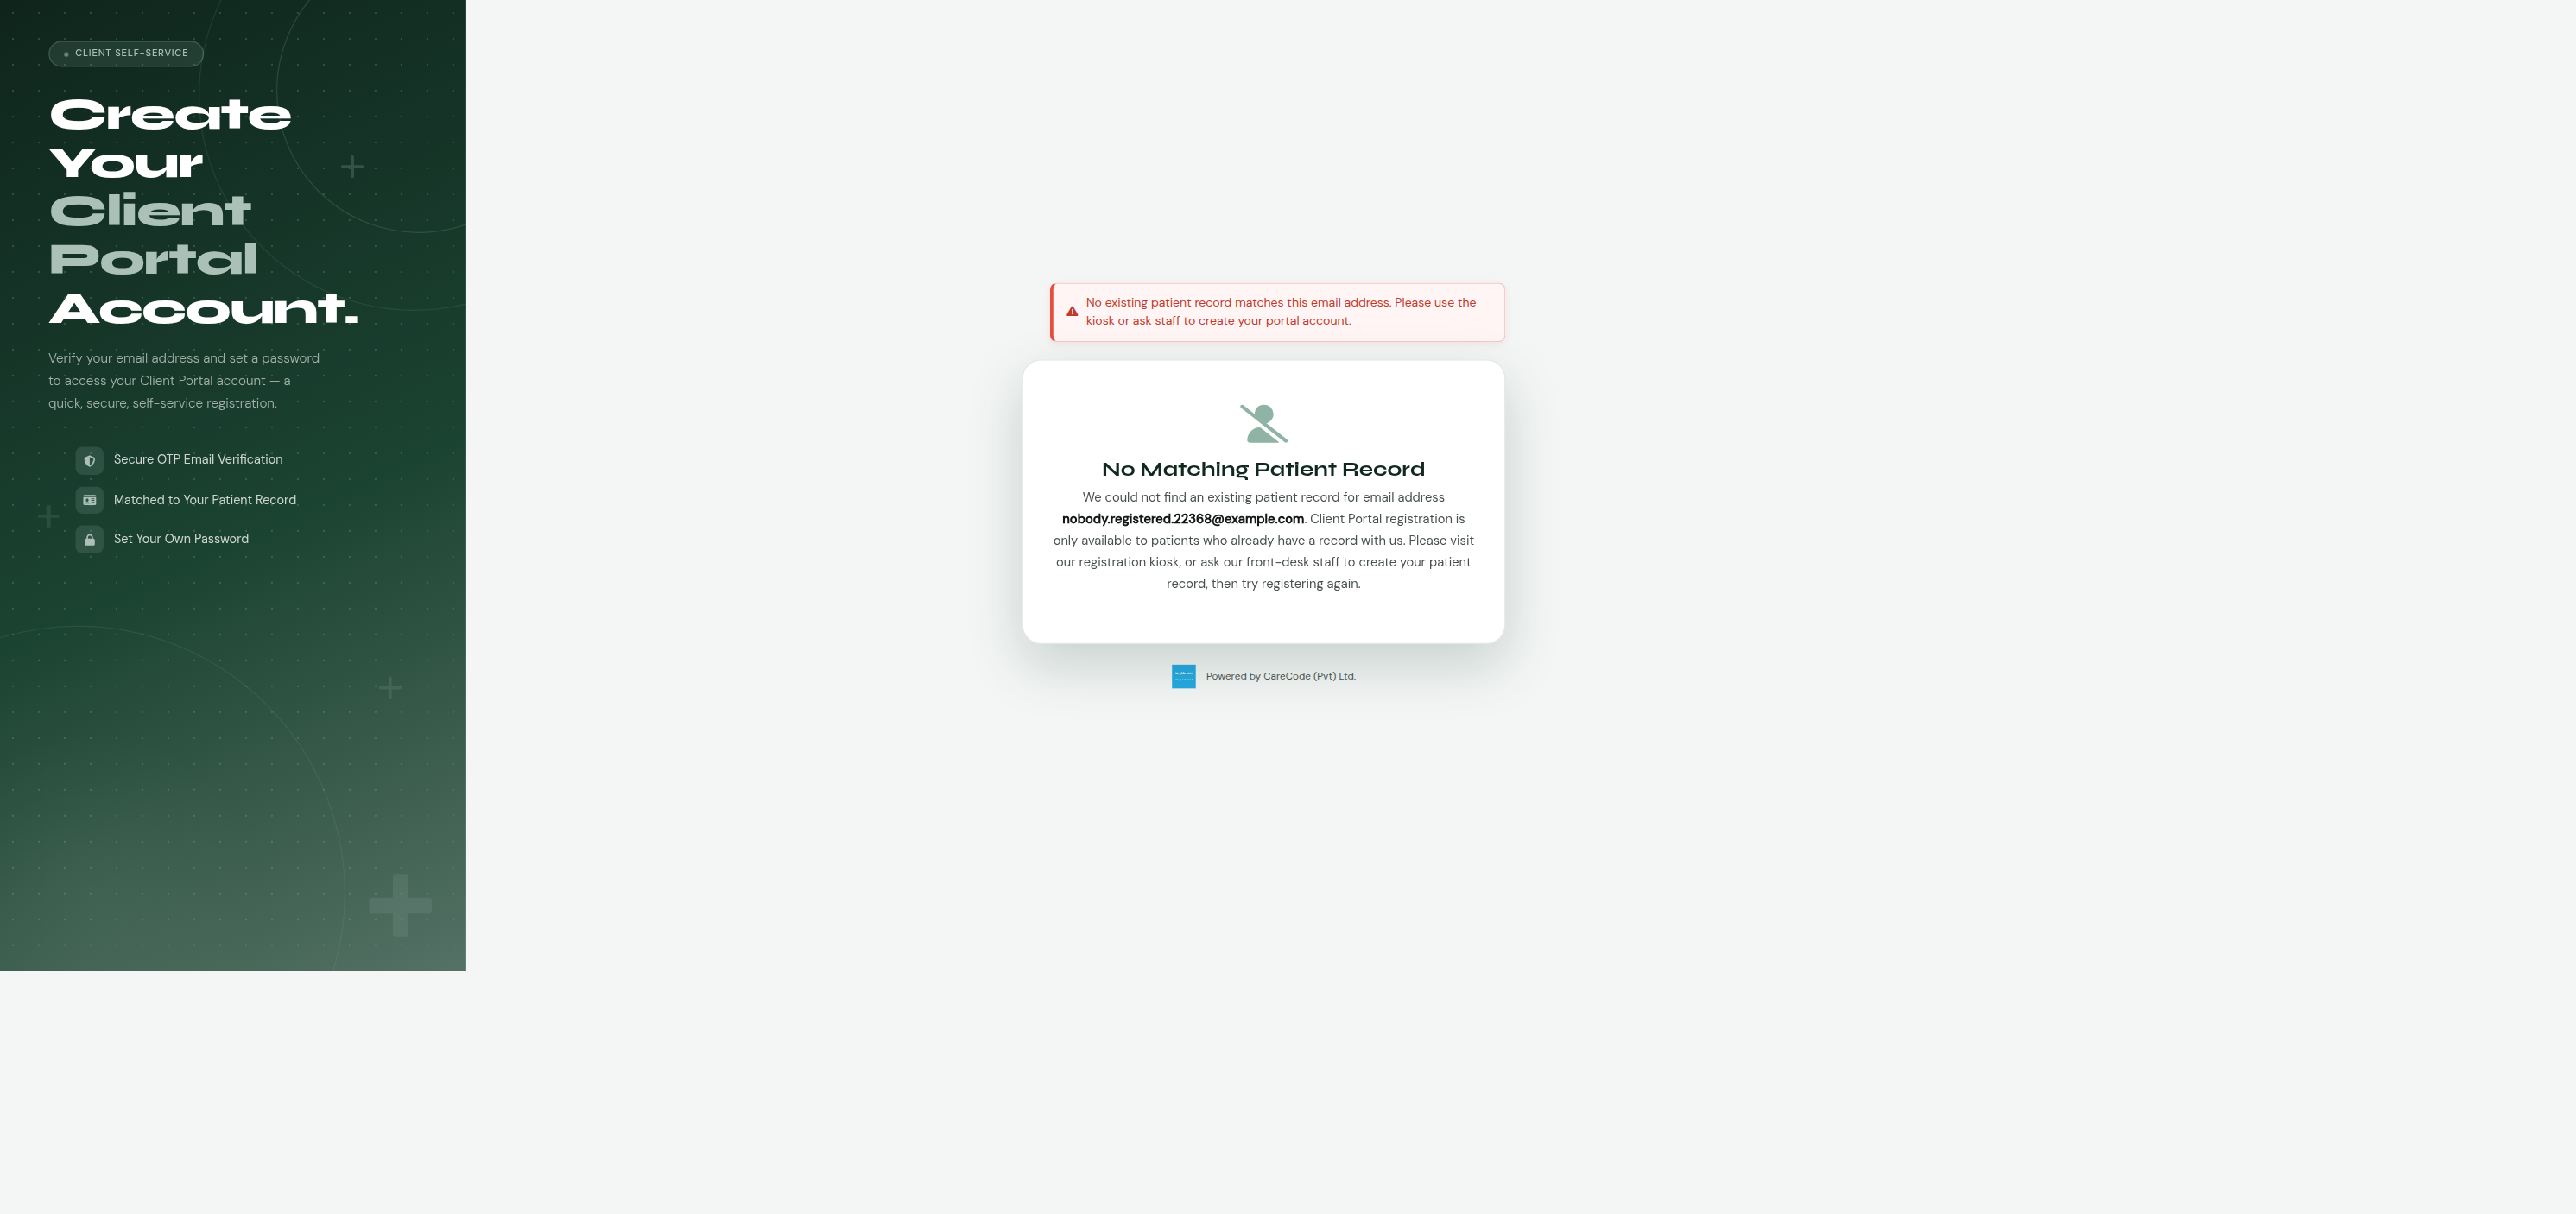
If your email address isn't on file yet, this path won't find you — same "No Matching Patient Record" message as the phone channel:
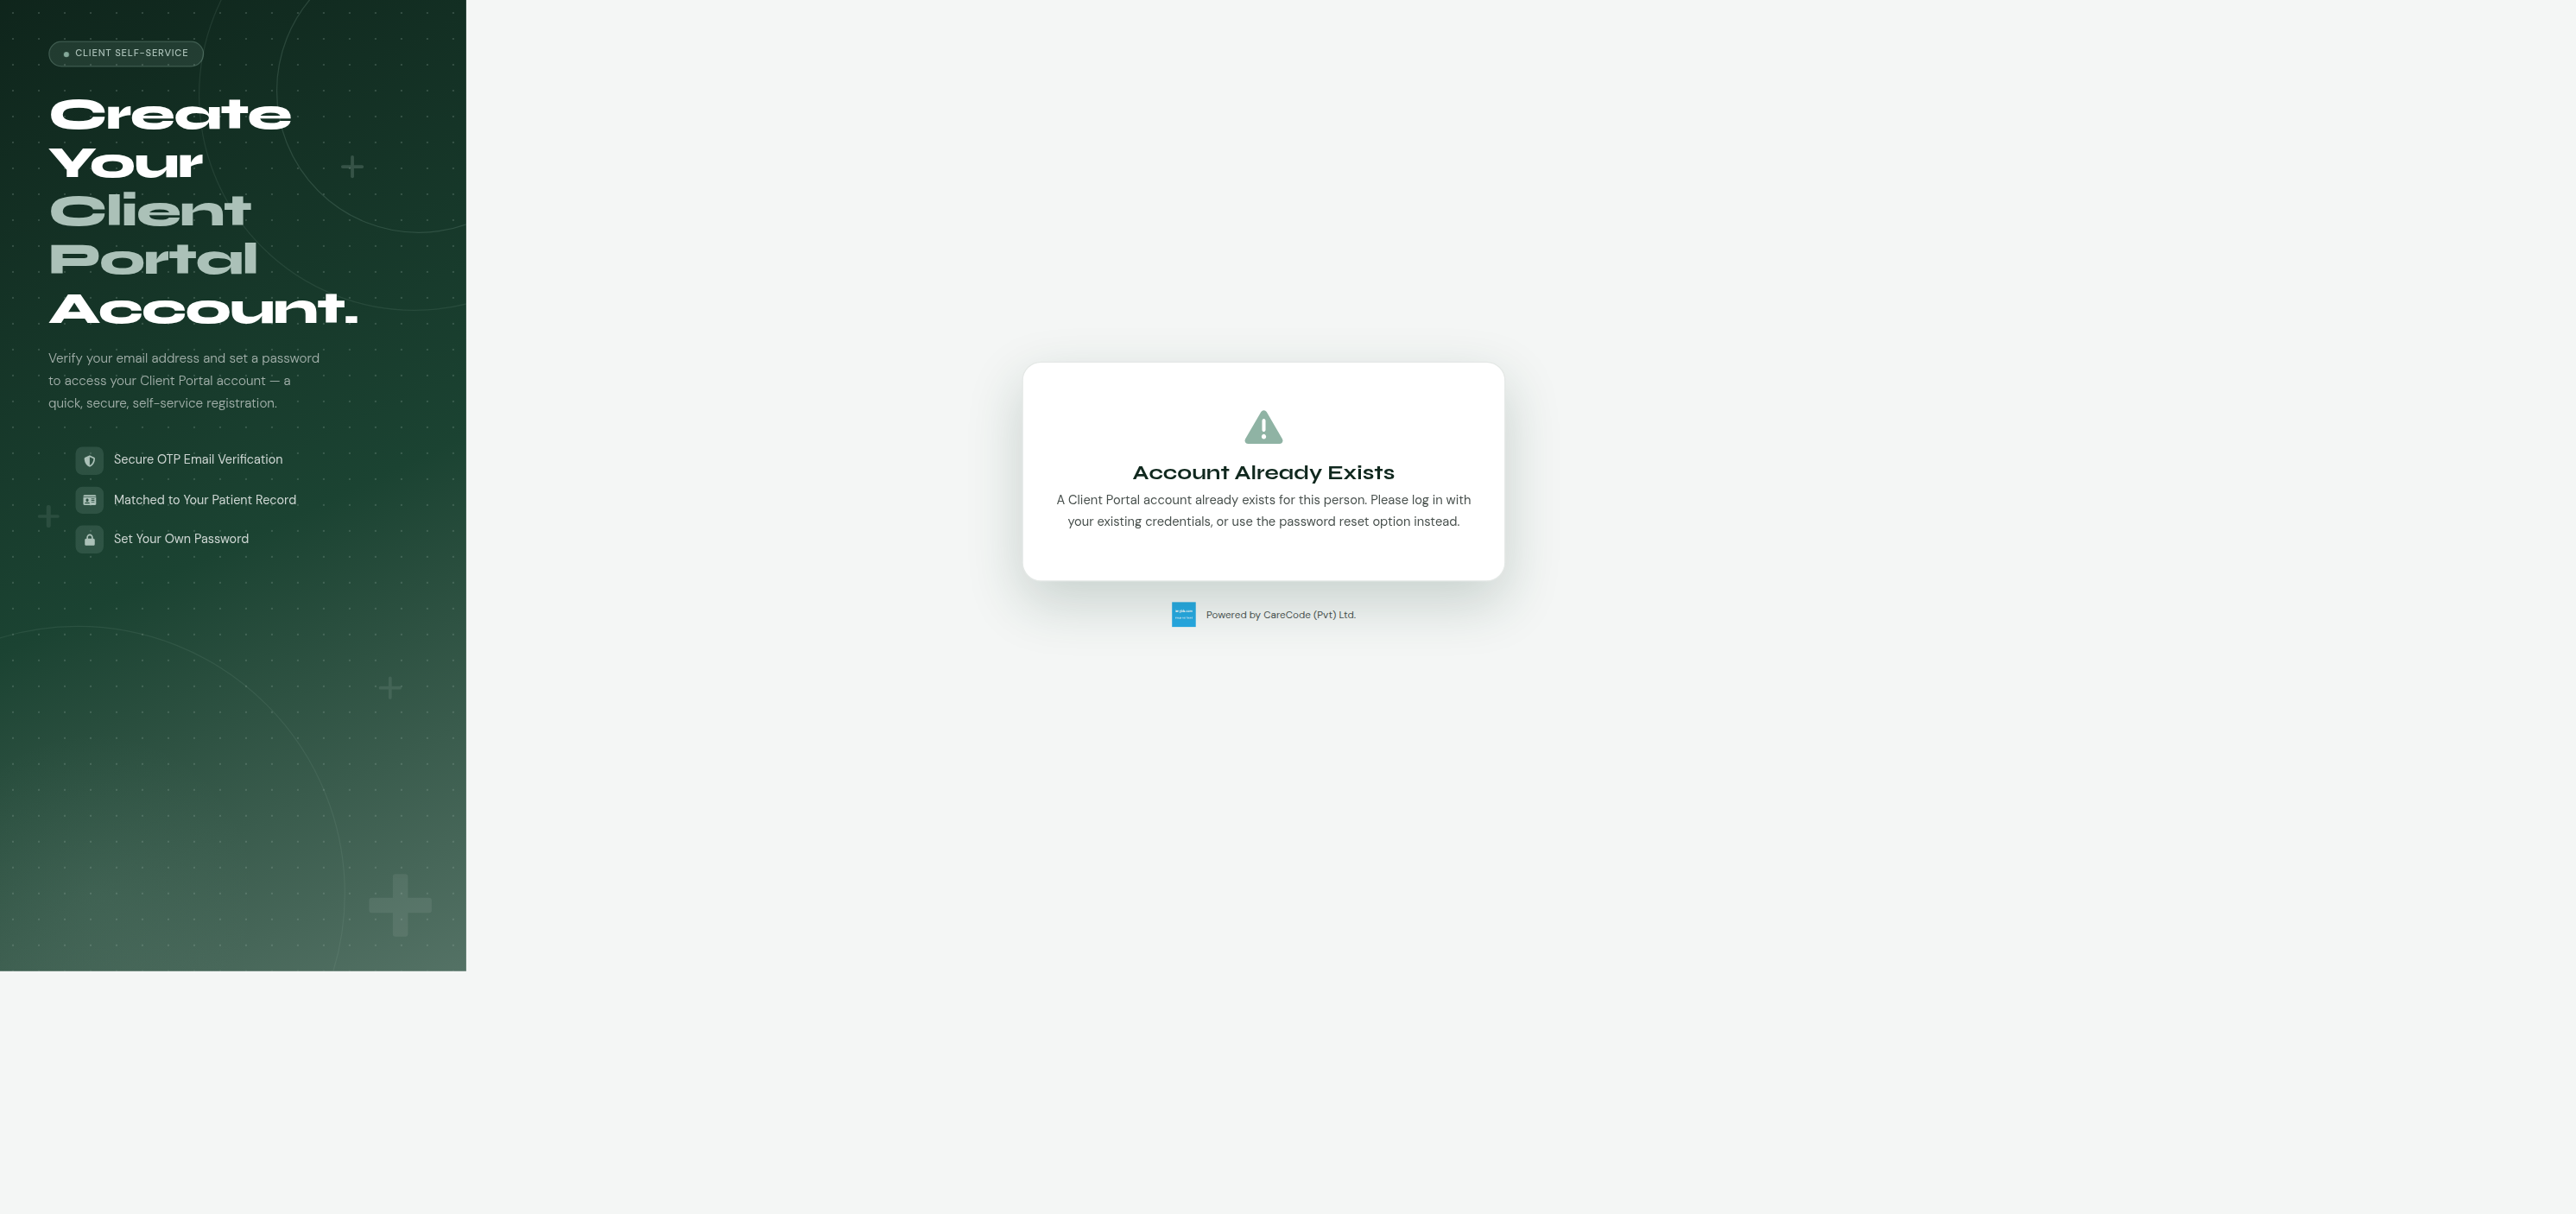
If you already have a portal account for that person (registered via any channel — phone, staff-assisted, or a previous email registration), trying to register again by email shows the same "account already exists" message rather than creating a duplicate, and — importantly — never discloses the account holder's name before this point:
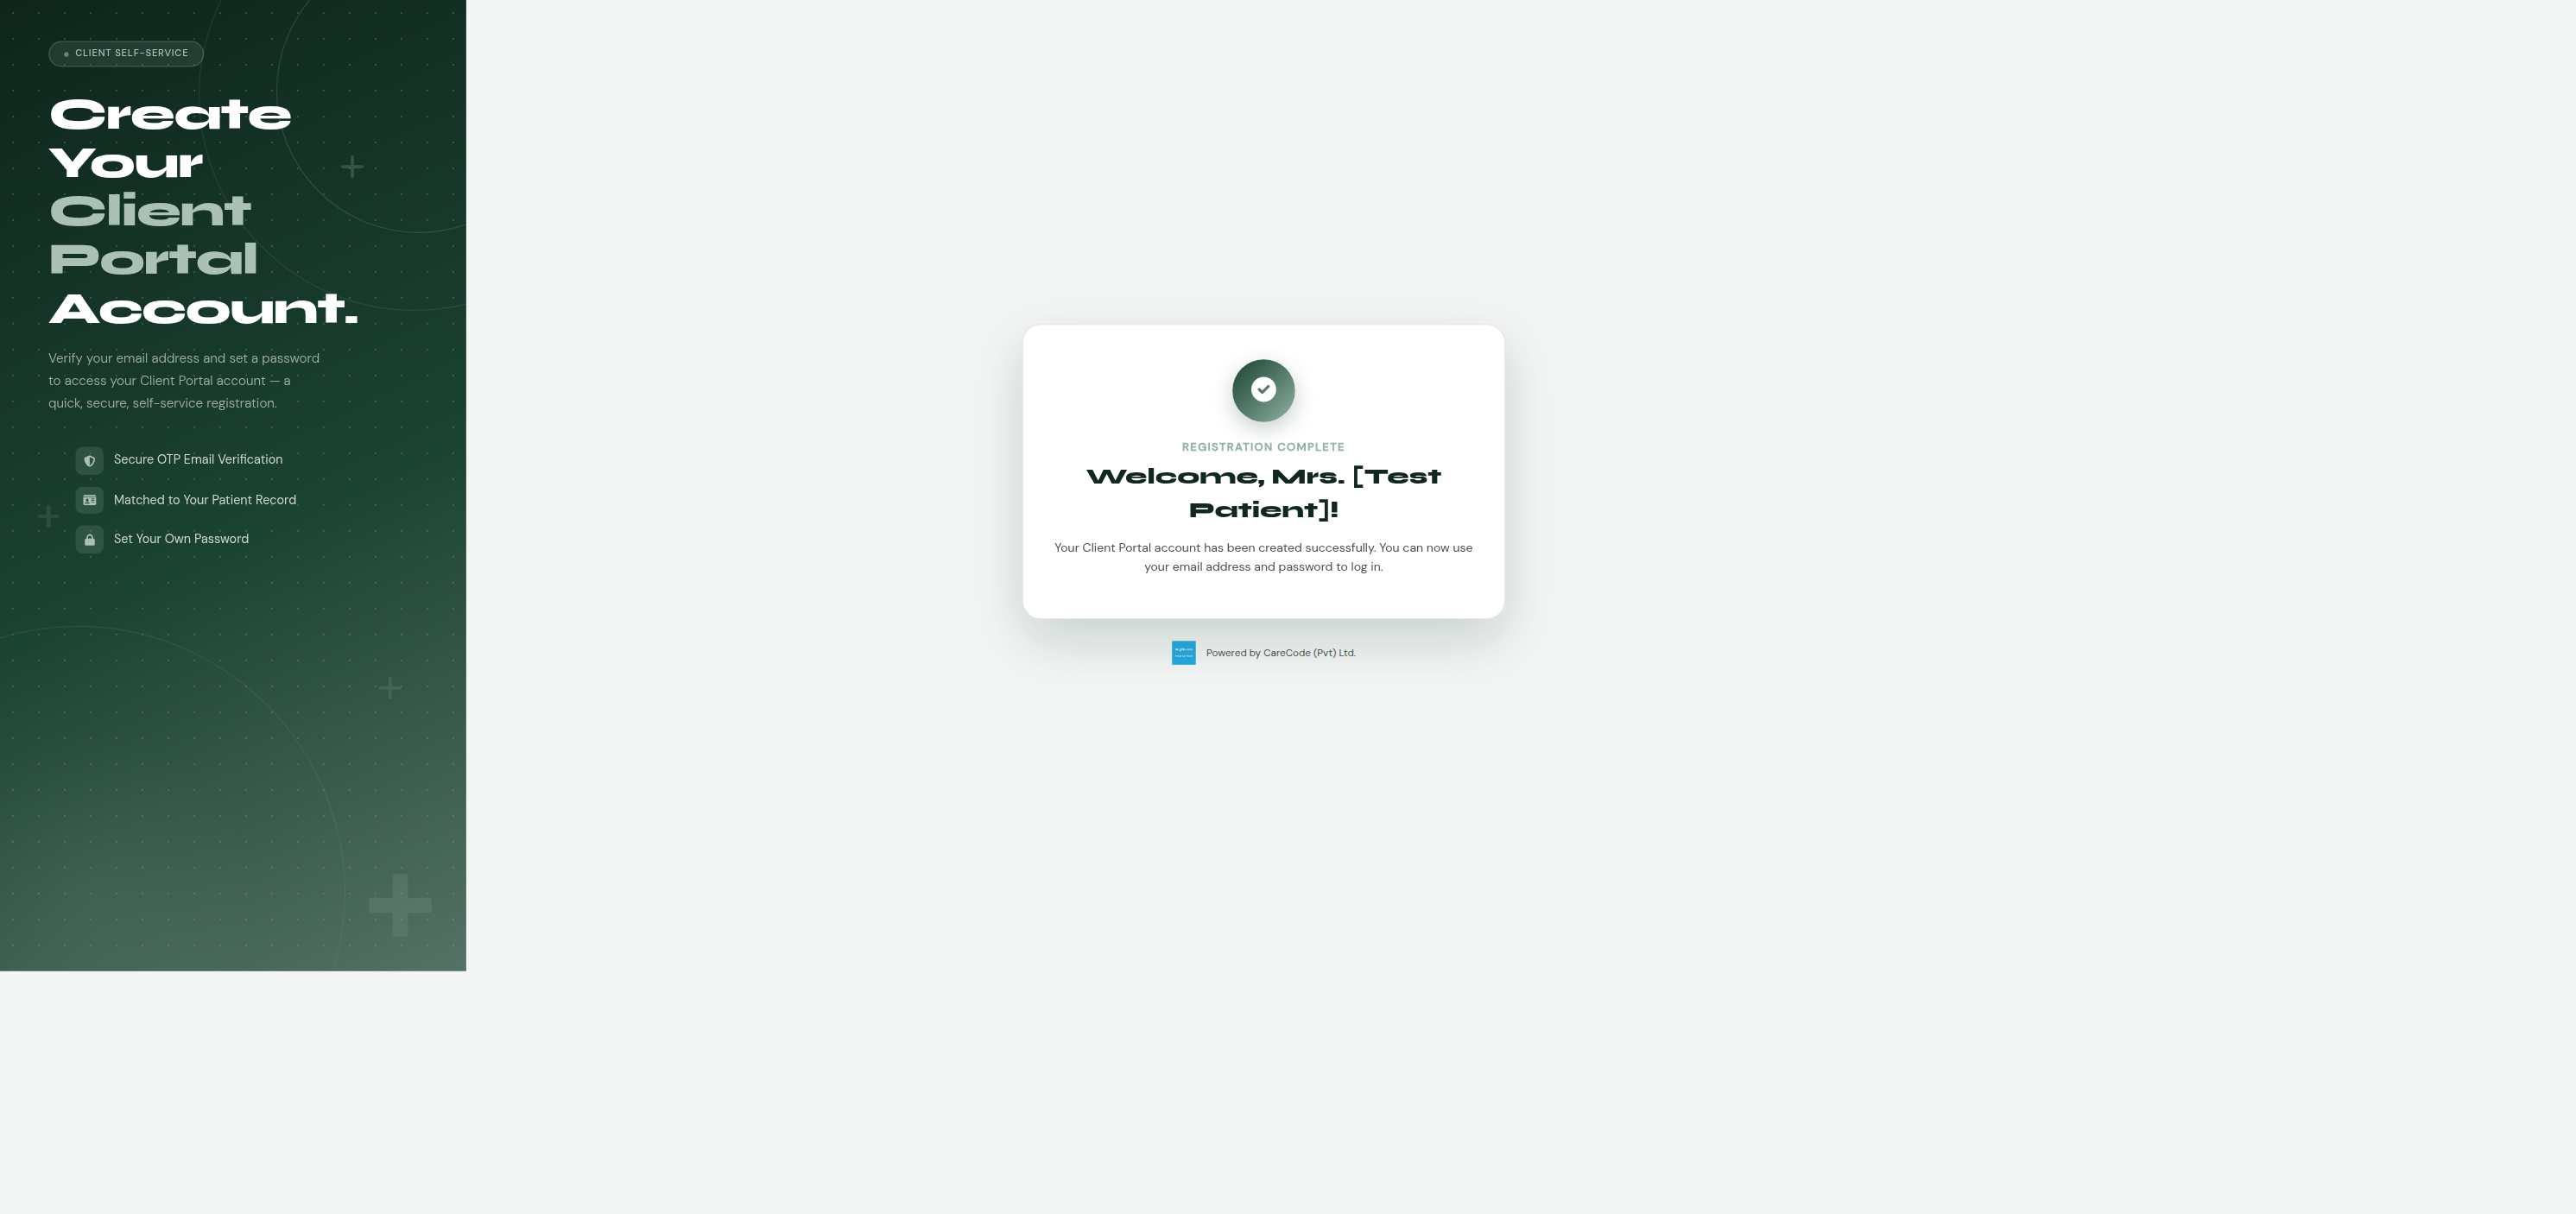
Once complete:
Hospitals can set up a self-service registration terminal in the lobby or
reception area, restricted to that terminal's network so it can't be used
remotely, at /client_portal/register_kiosk.xhtml. The kiosk still
verifies you by OTP, but — unlike registering from home (options 2 and
3) — the phone or email you enter doesn't have to already be on file. If
it isn't, the kiosk creates your patient record on the spot as part of
registering your account. This is the only registration path that can
sign up someone with no prior hospital visit at all.
- Choose phone or email as your verification method.
- Enter your phone number or email address.
- The hospital sends you a one-time code (OTP) by SMS or email.
- Enter the code to verify it.
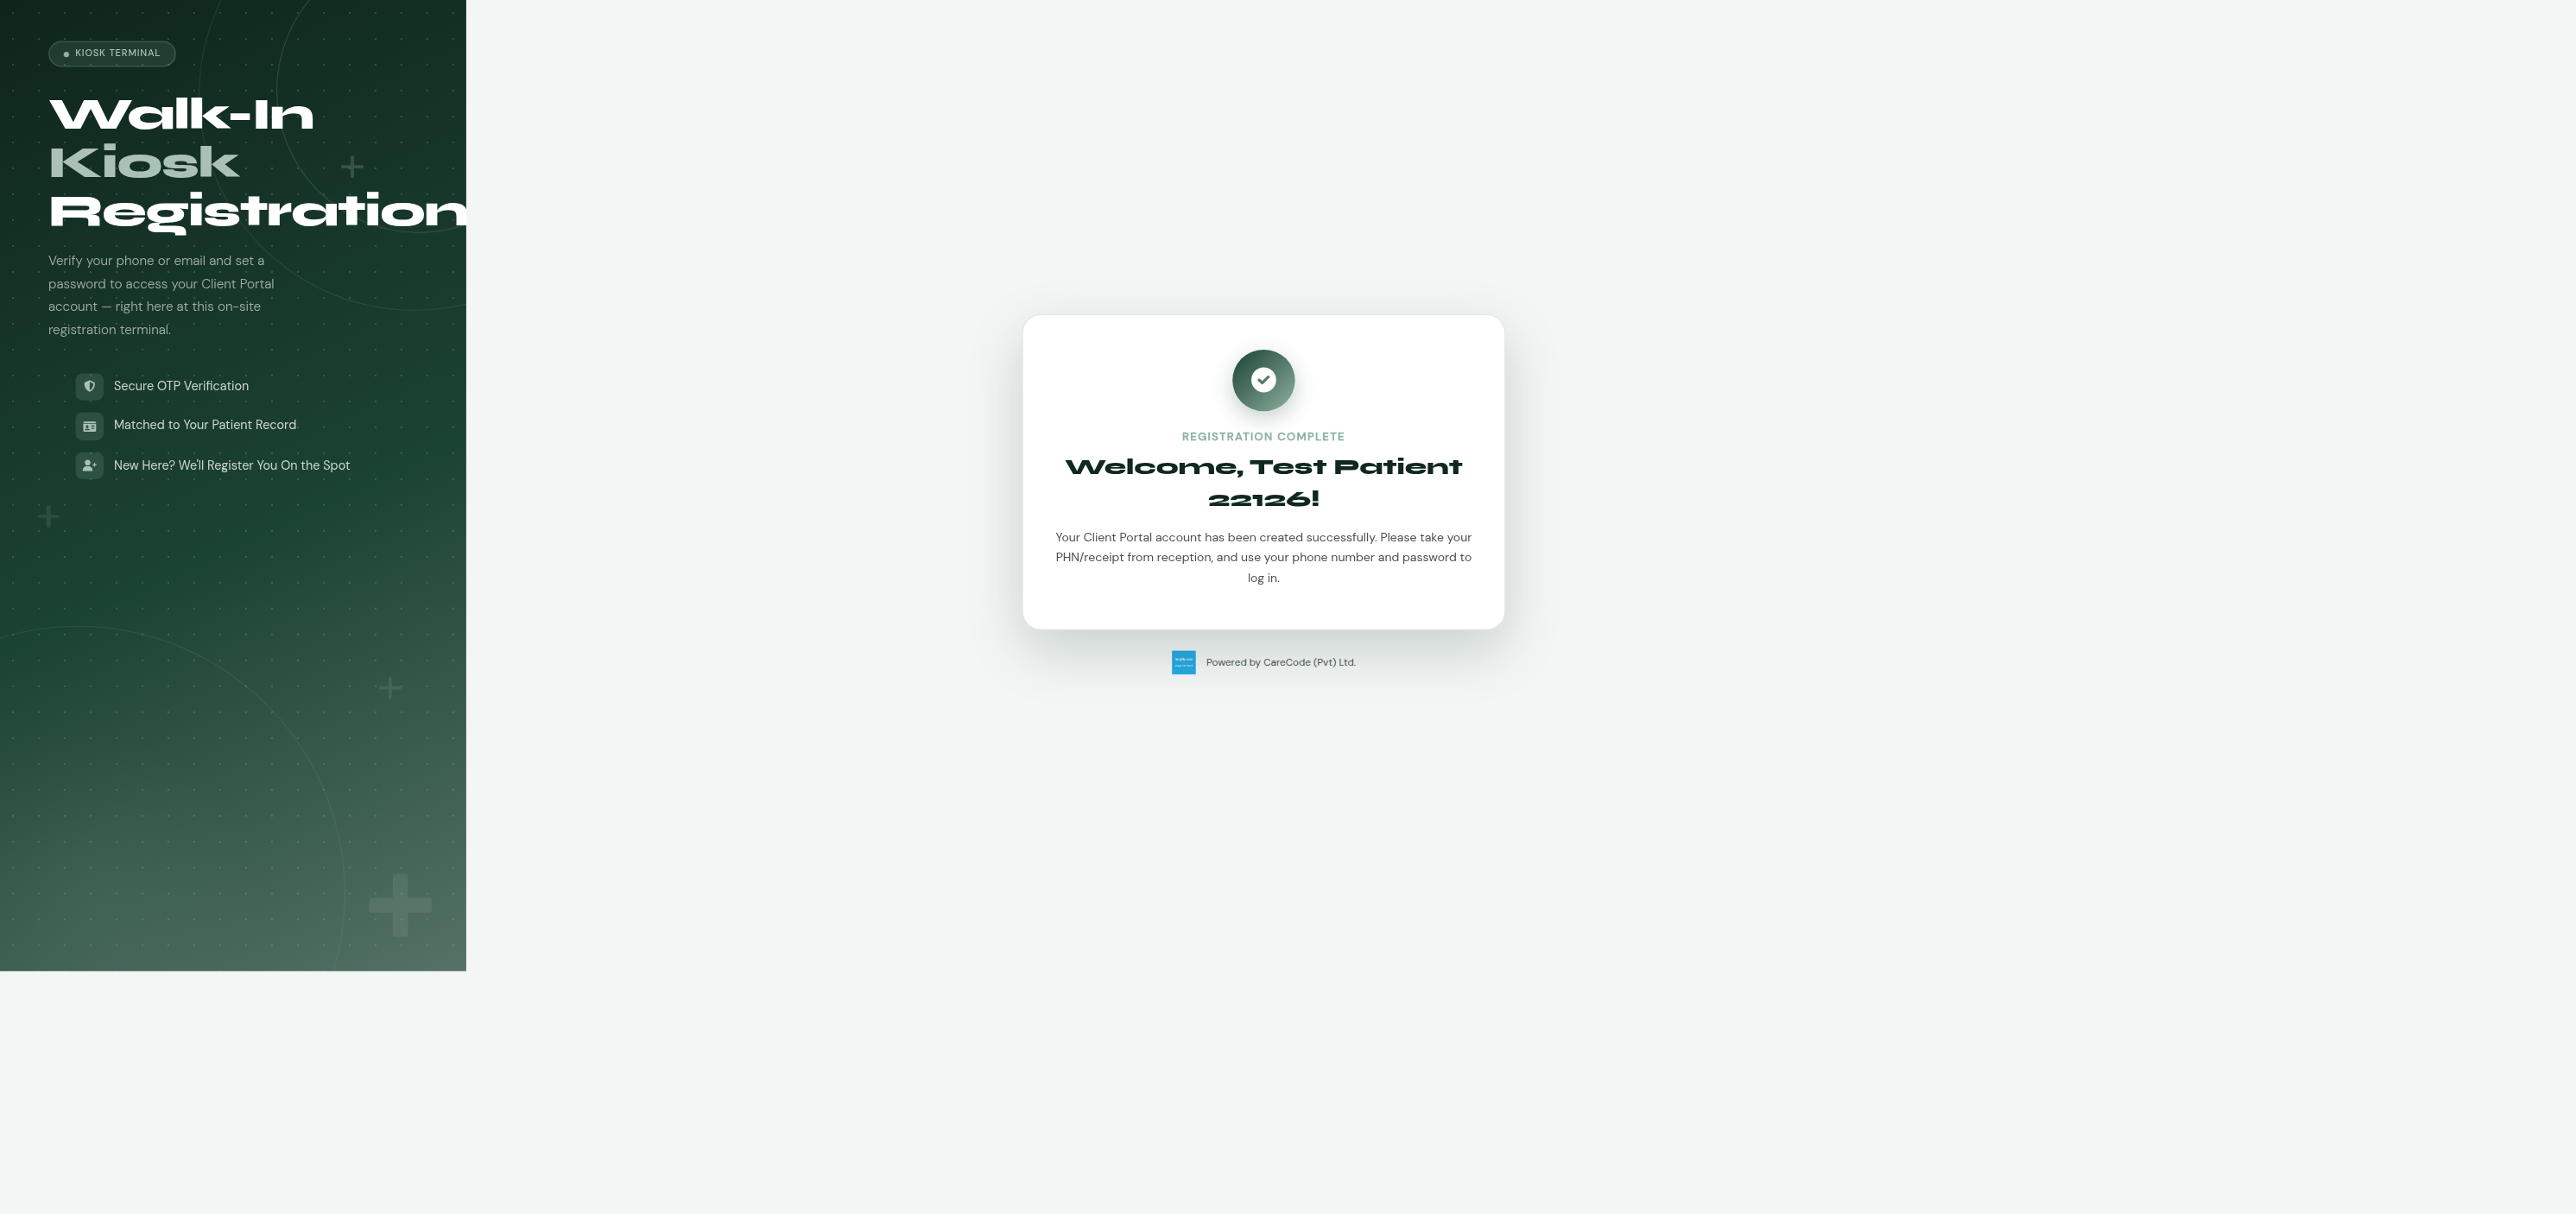
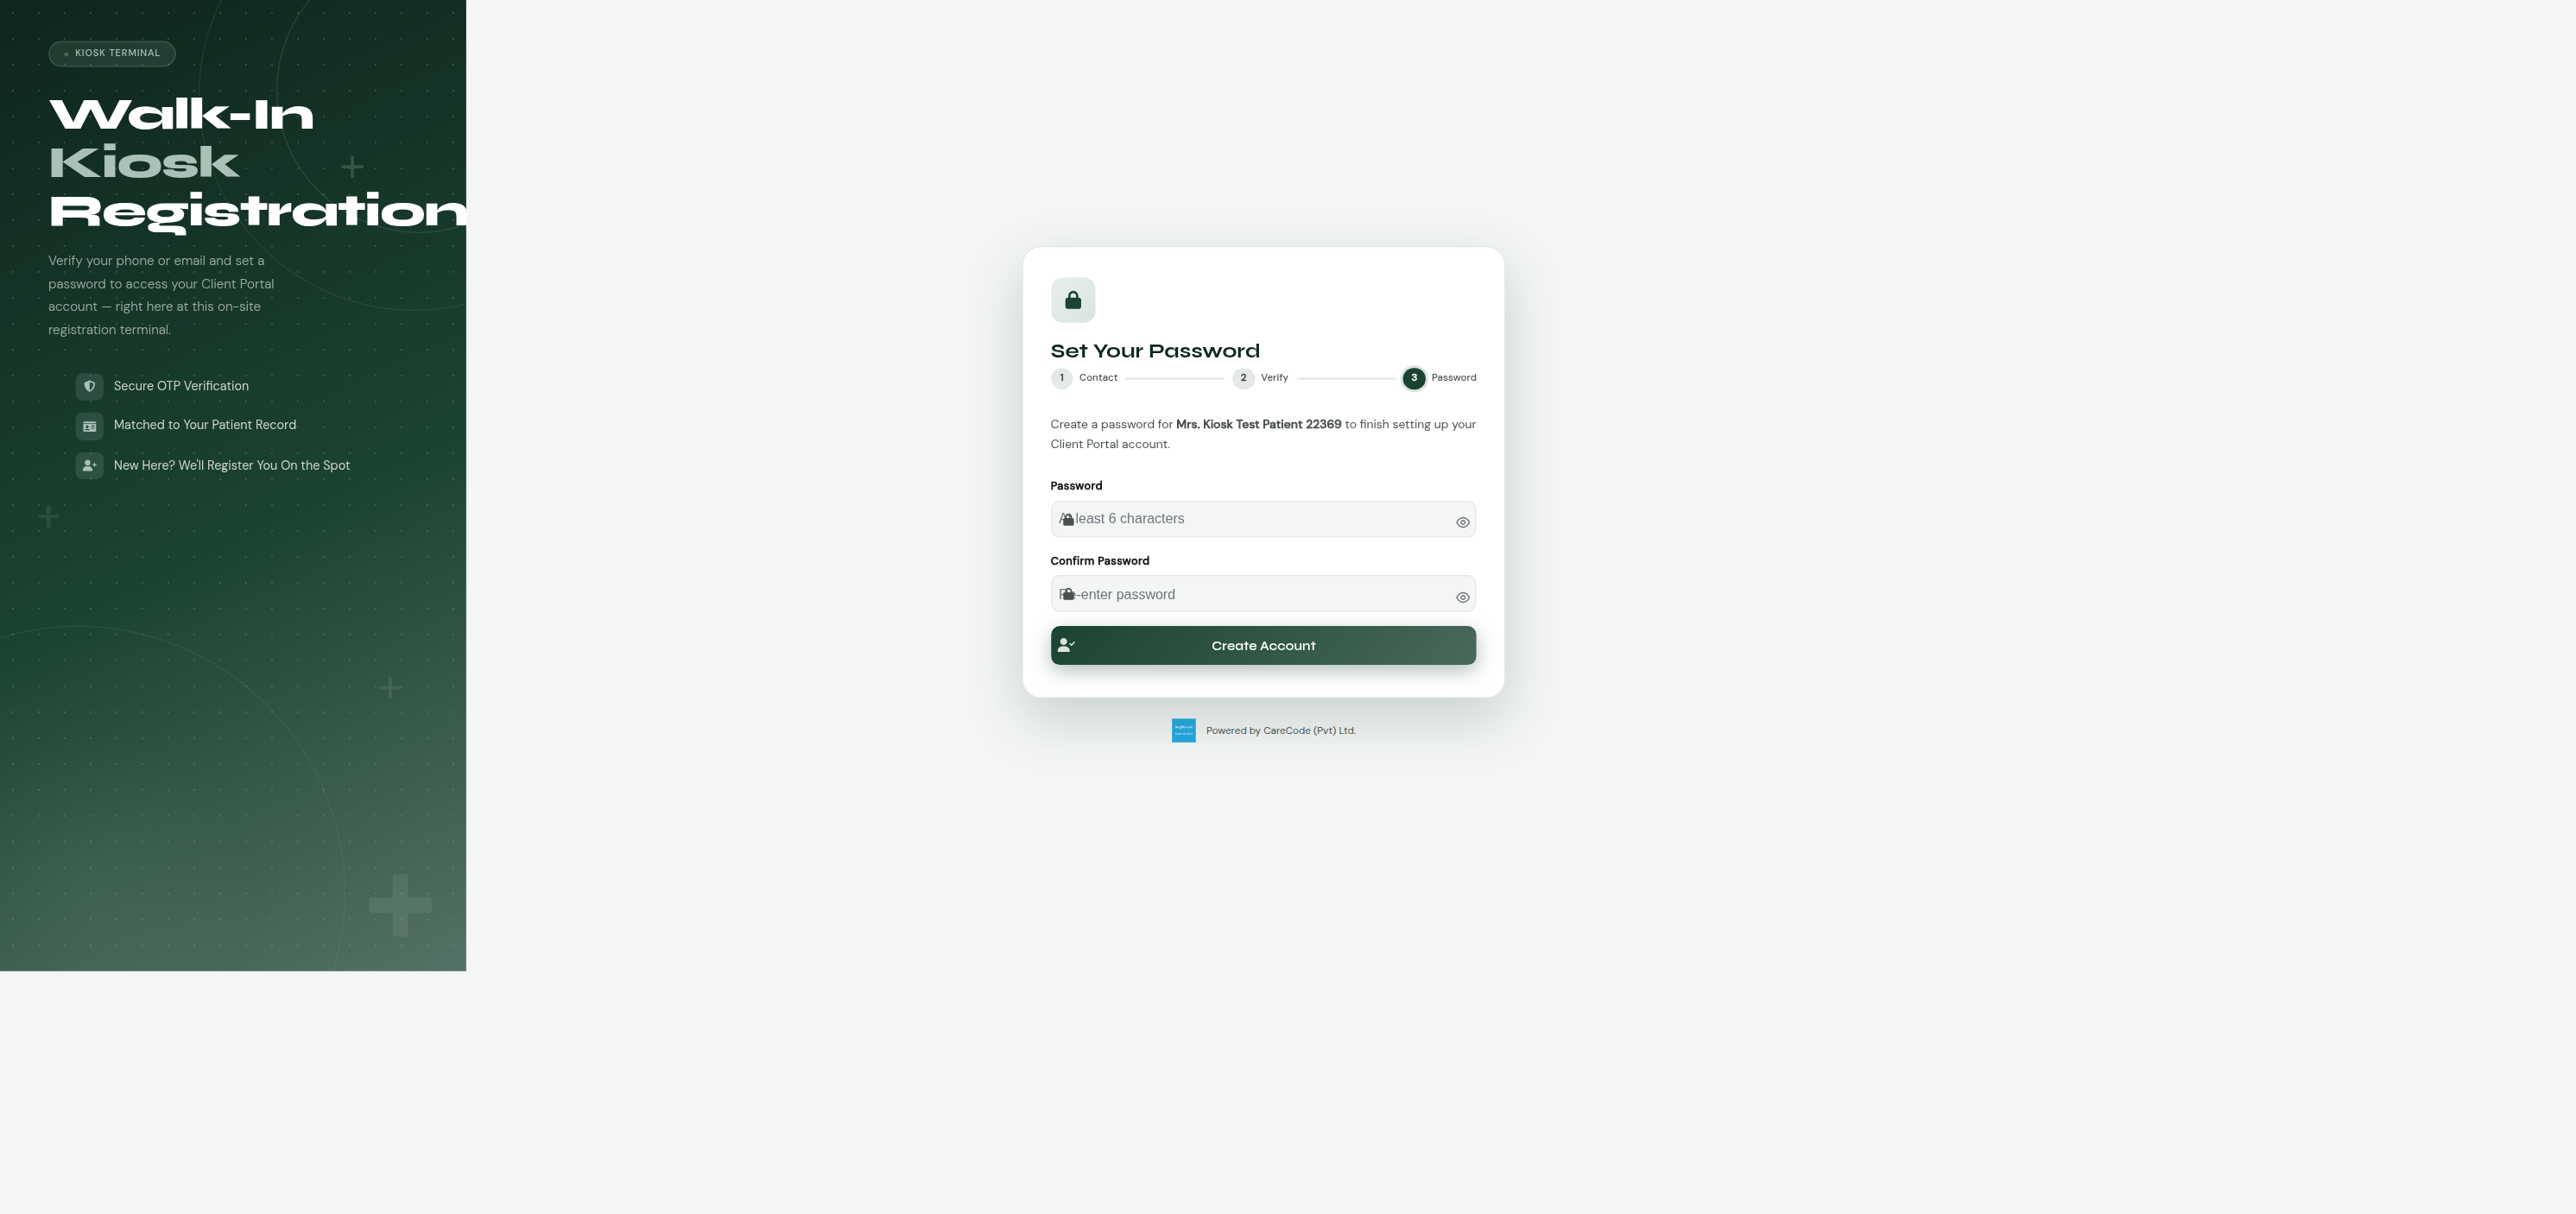
- If it matches an existing patient record, you're taken straight to the password step (or a picker, if more than one record matches — see What If My Family Shares One Phone Number? below). If it matches no existing record, fill in your name, title, gender, and date of birth to create your patient record on the spot.
- Set a password for your new account.
| Existing patient — registration complete | New patient — falls through to password step |
|---|---|
 |
 |
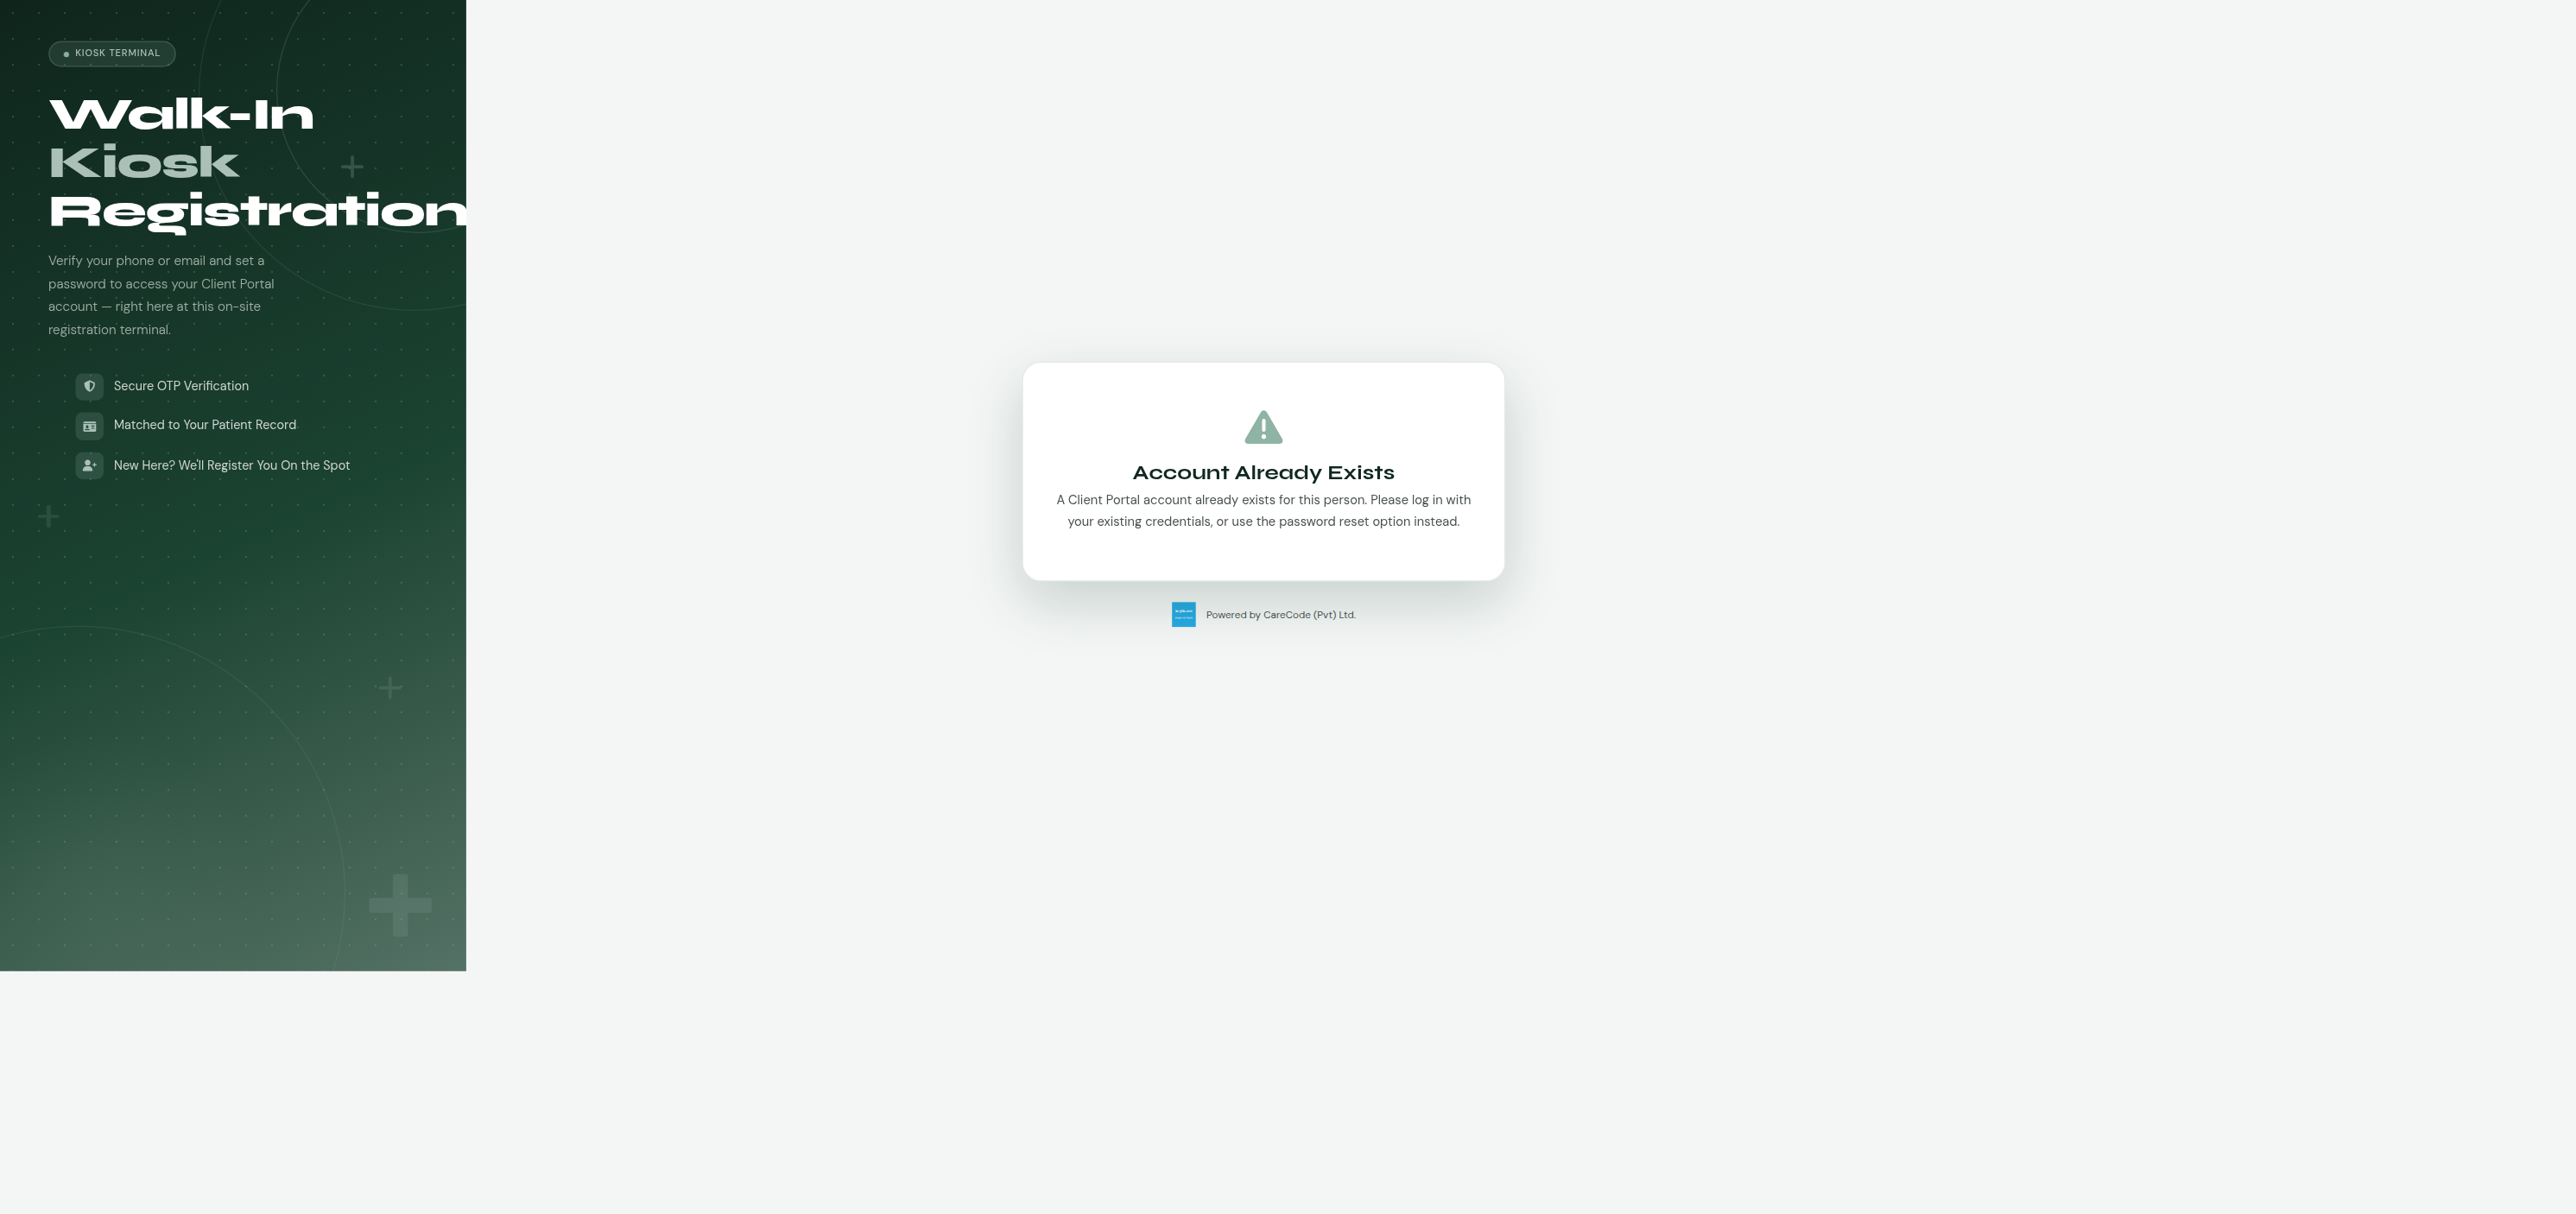
Like the phone/email self-service channels, if the matched person already has an active portal account, the kiosk blocks creating a duplicate:
The kiosk terminal itself needs to be authorized via the
Client Portal - Kiosk Allowed IPs configuration key — see
For Administrators below. An unauthorized terminal
(wrong IP, or the key left unconfigured) sees a "Terminal Not Authorized"
message and none of the registration flow — same fail-closed behavior as
an empty allowlist.
Many households — especially those with elderly parents or young children — share a single phone number. The phone-registration path (option 2) accounts for this: when you verify a shared phone number by OTP, if more than one patient record is linked to that number, you'll be shown a list of the people registered under it and asked to pick who you are before continuing. The one-time code verifies the phone, not the person — picking yourself from the list is a separate step afterward.
You set a password during registration. Future sign-ins use your phone or email plus that password — the one-time code is only needed at registration, and again if you ever need to reset a forgotten password.
Signing in takes you to a landing page showing your hospital's name, address, and contact details, along with a personalized welcome message:
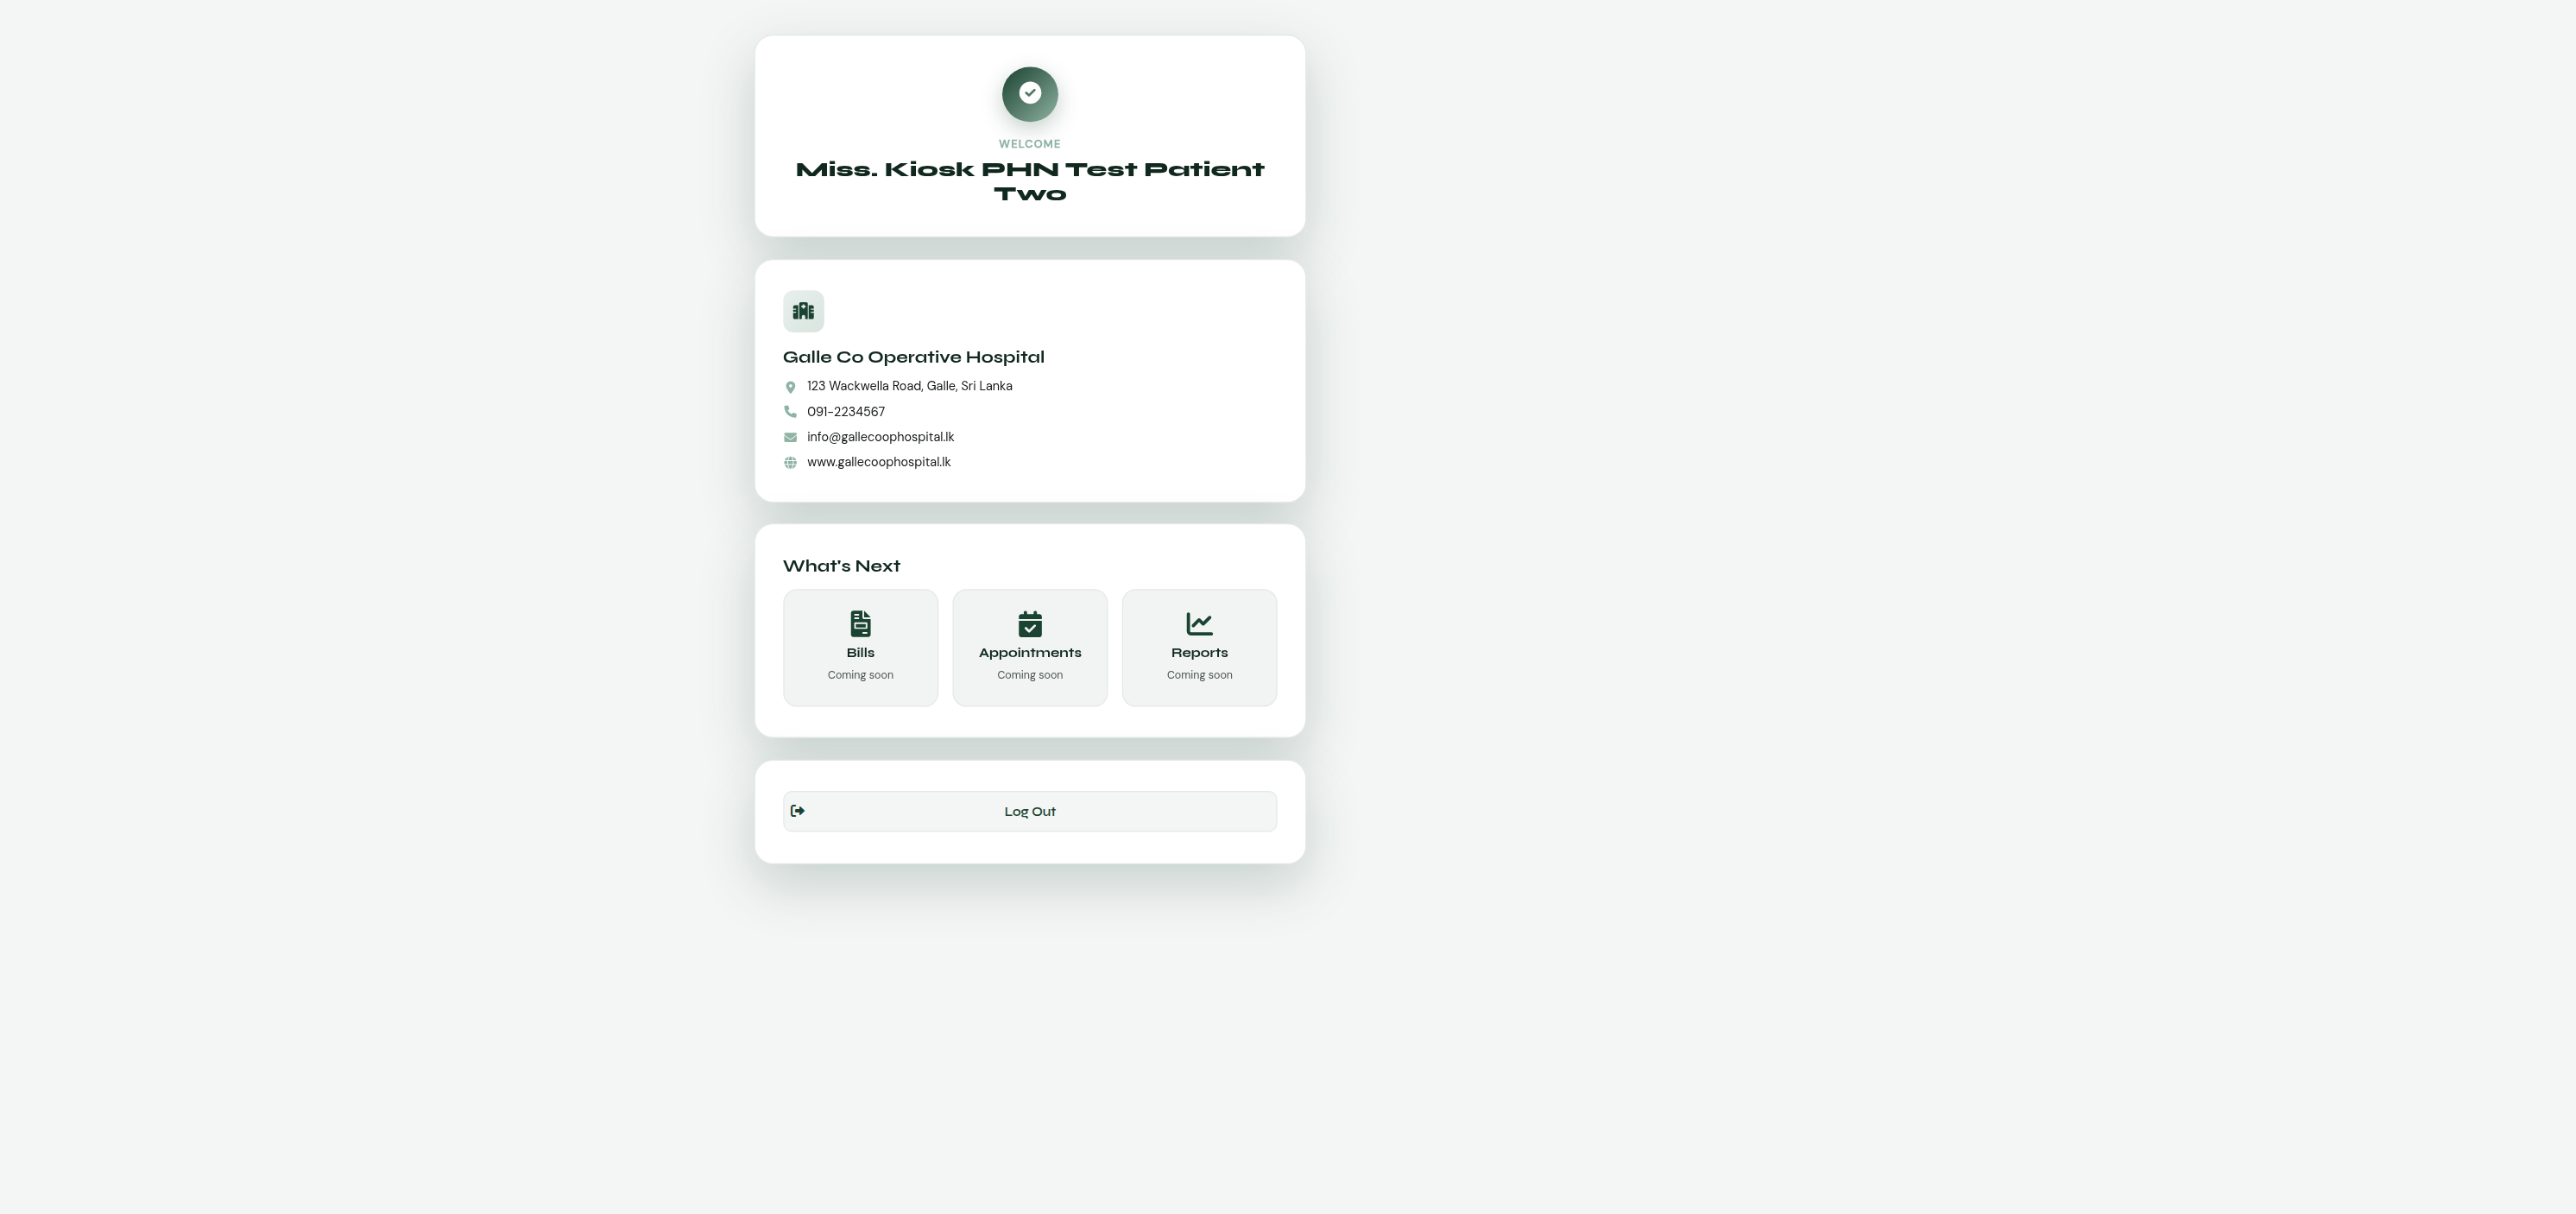
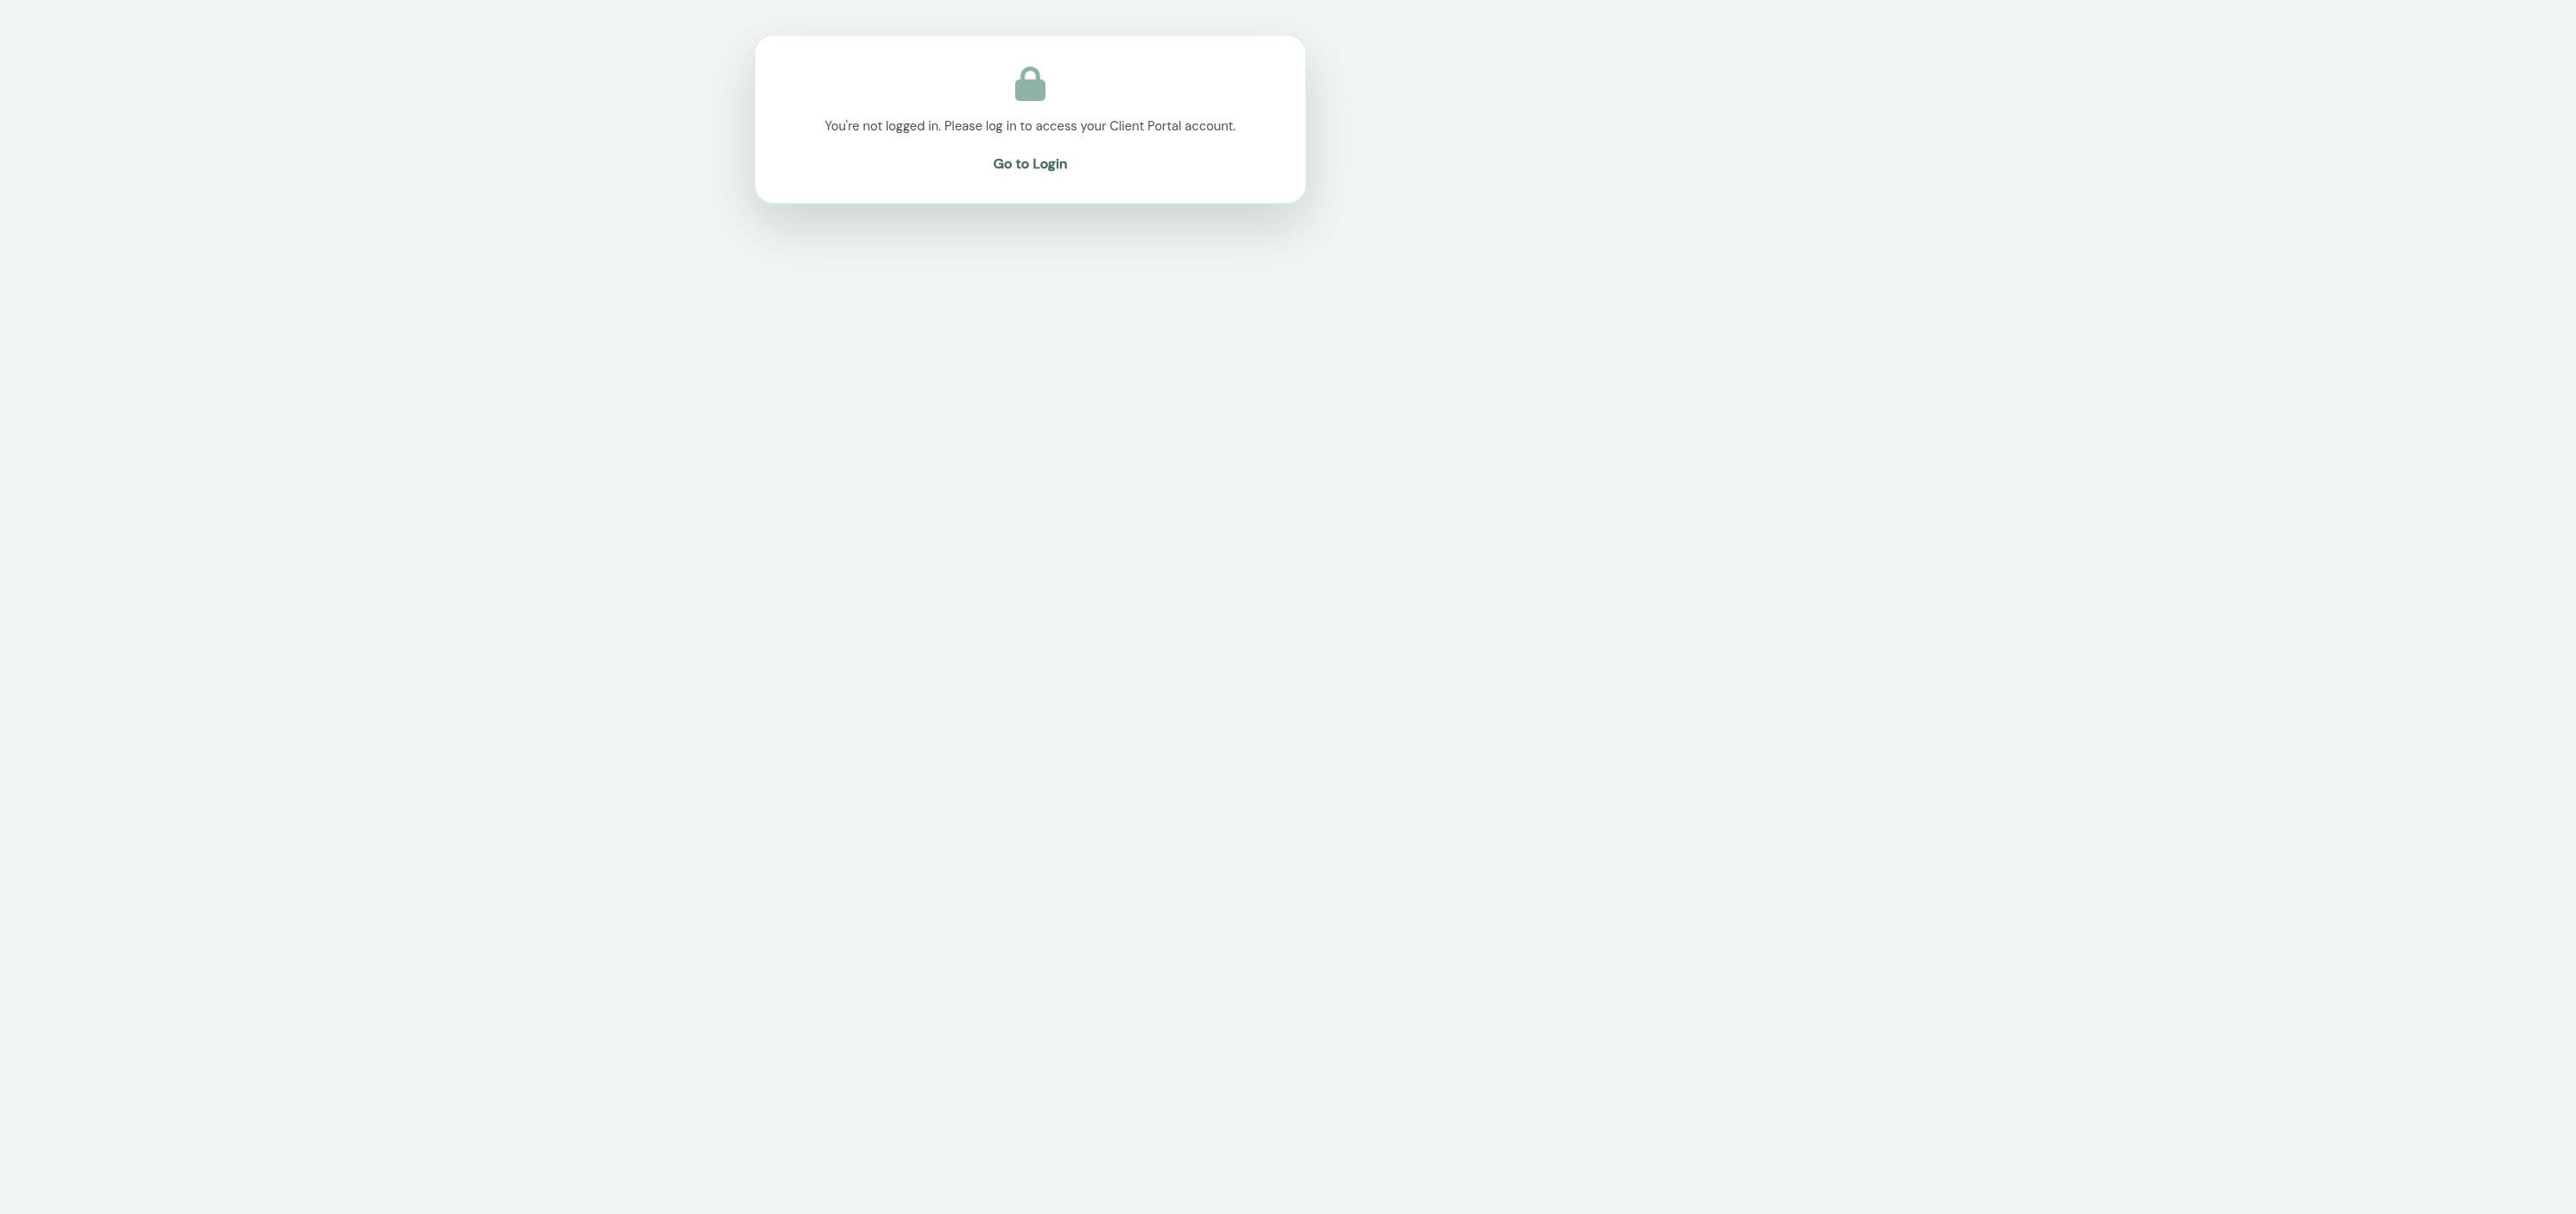
Features like viewing your bills, appointments, or lab reports are not part of this first version — the landing page clearly labels these as "coming soon" placeholders; they'll be added in later updates. If you navigate to the landing page without being logged in, you'll see a short message directing you back to the login page instead:
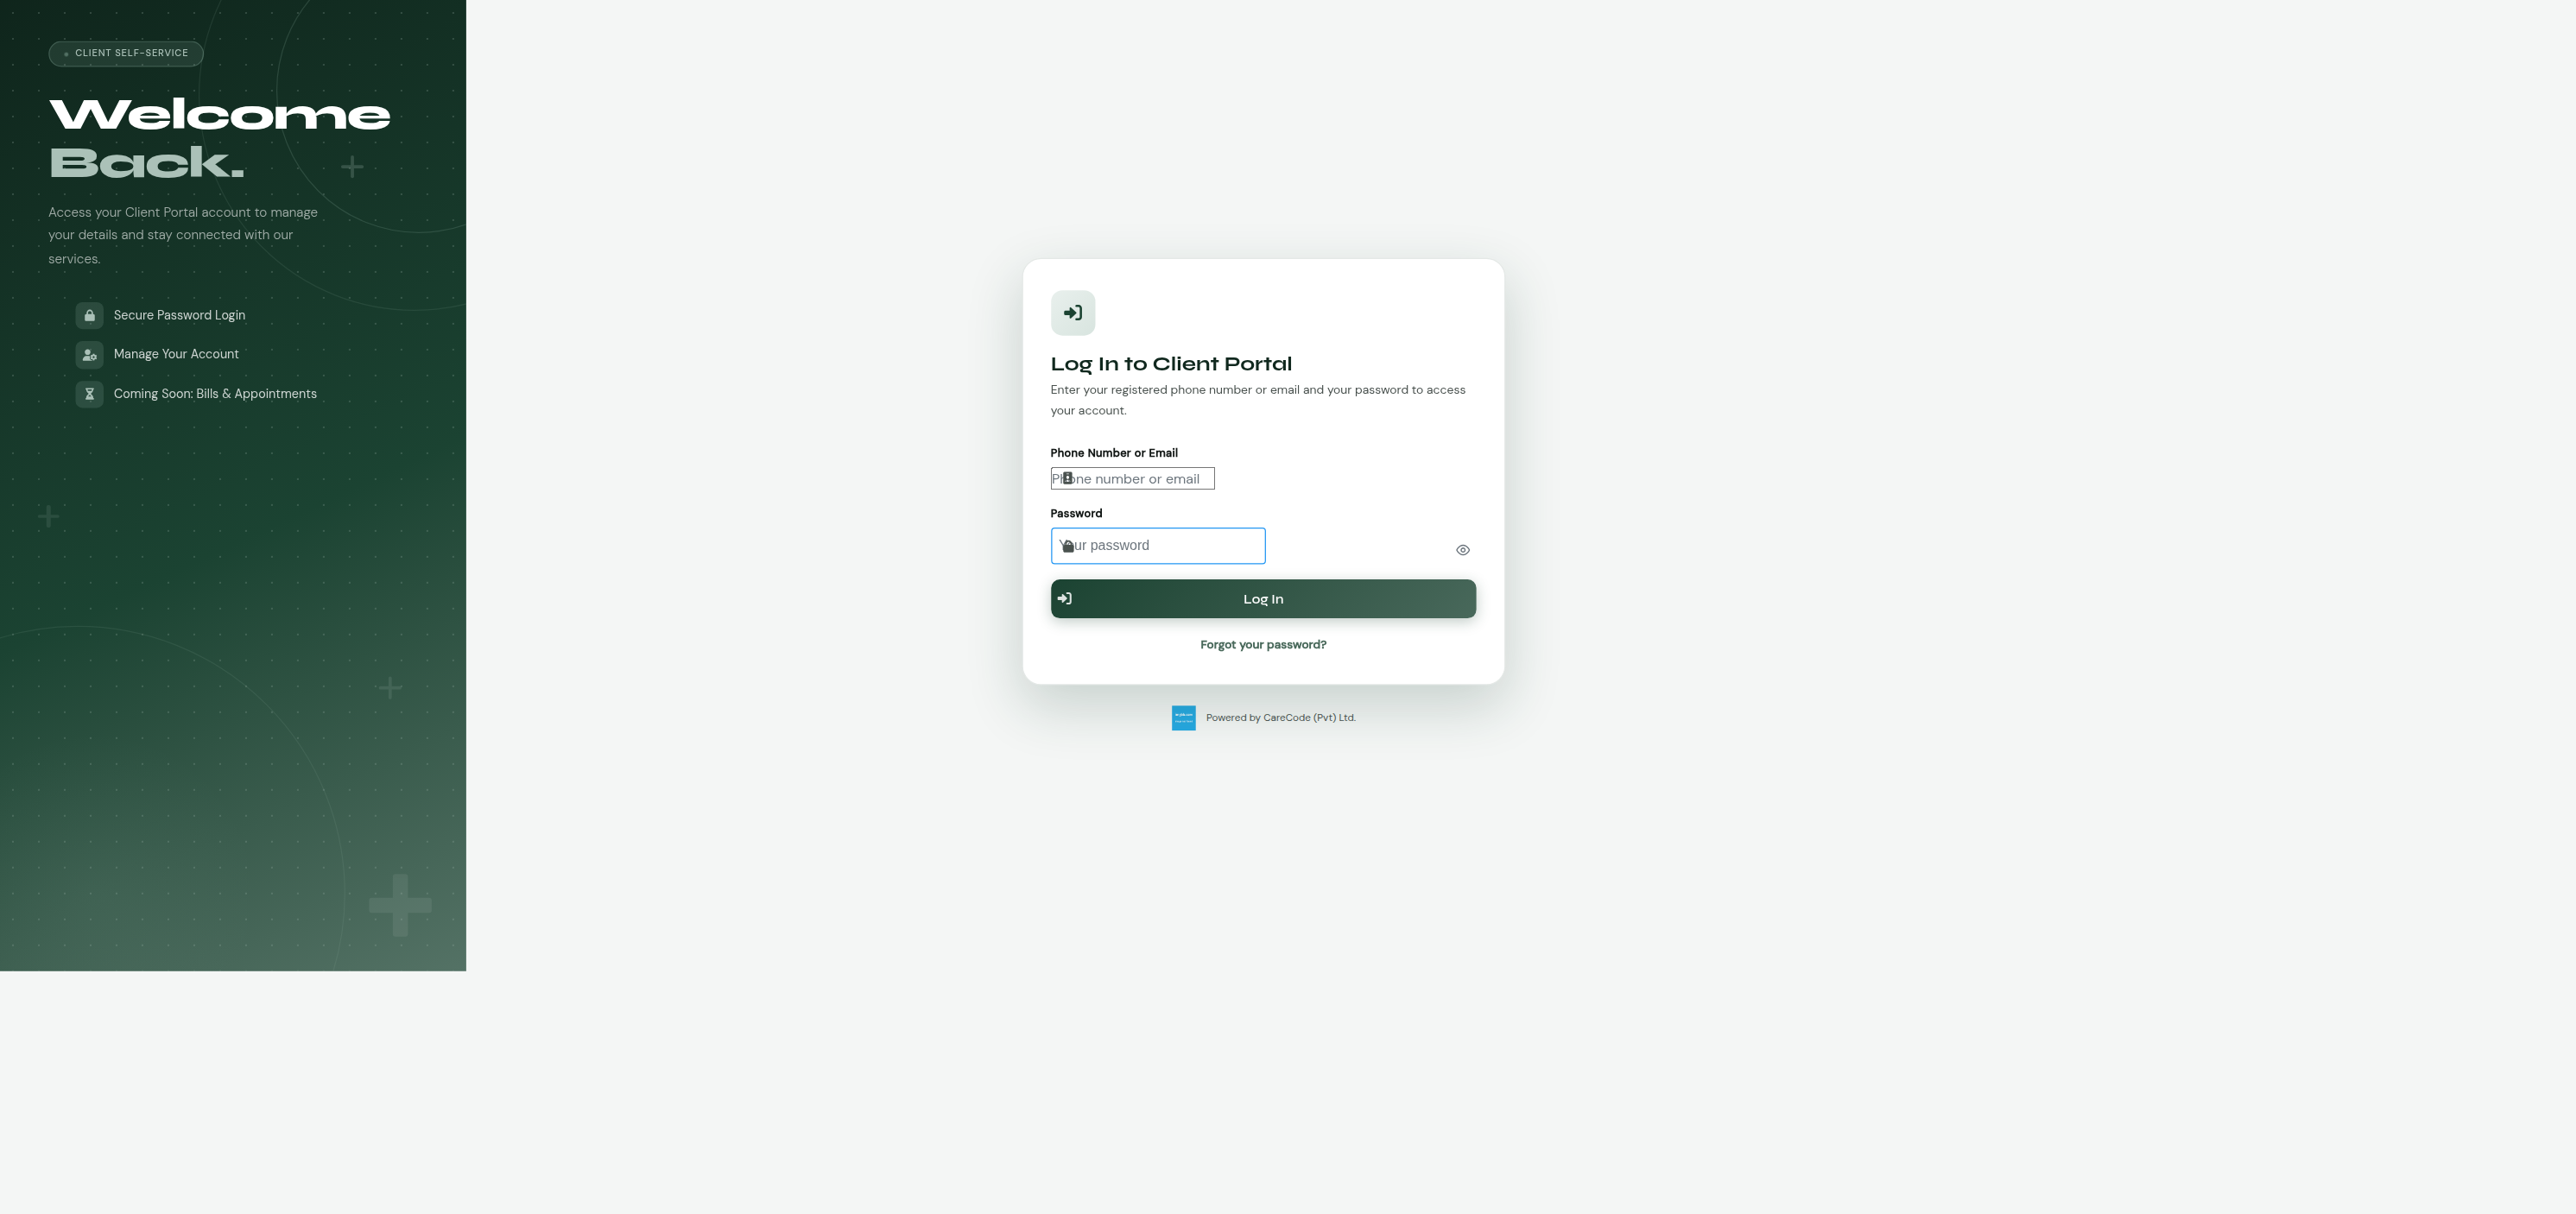
Once you have a Client Portal account (via any registration channel above),
sign in at /client_portal/login.xhtml with your phone number or email
plus the password you set at registration:
| Login form | After logging in |
|---|---|
 |
|
Logging in takes you to the landing page — your institution's details, a personalized welcome, and a Log Out button.
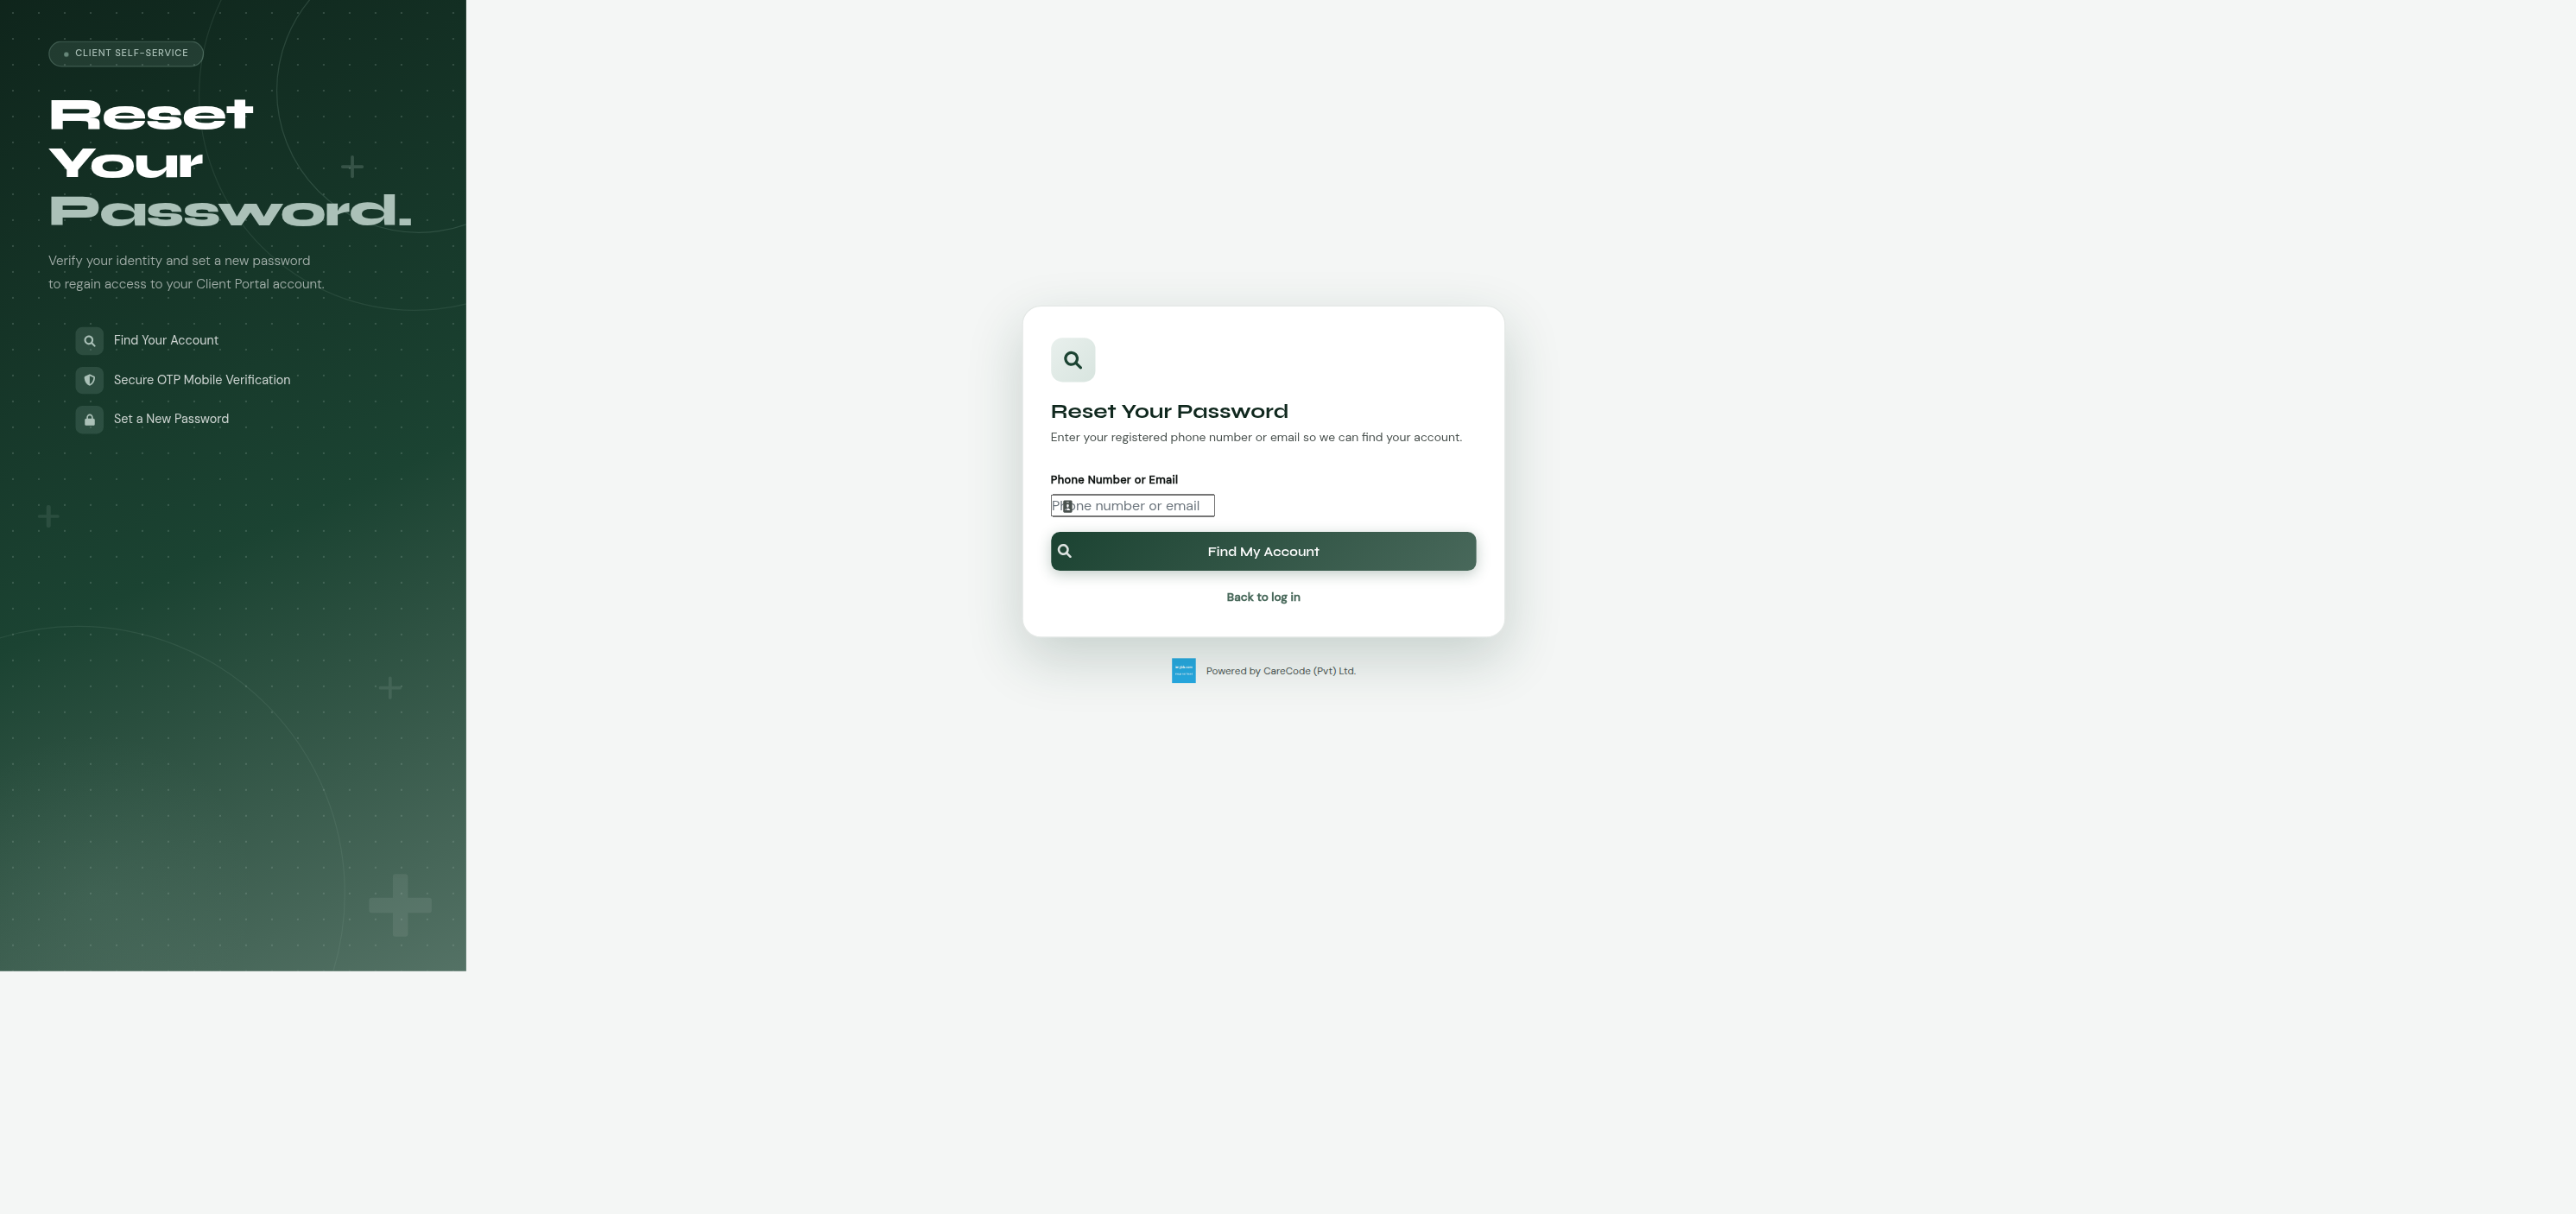
If your phone number is shared with other family members who also have
accounts, or you simply forget your password, use Forgot your
password? on the login page (or go directly to
/client_portal/reset_password.xhtml):
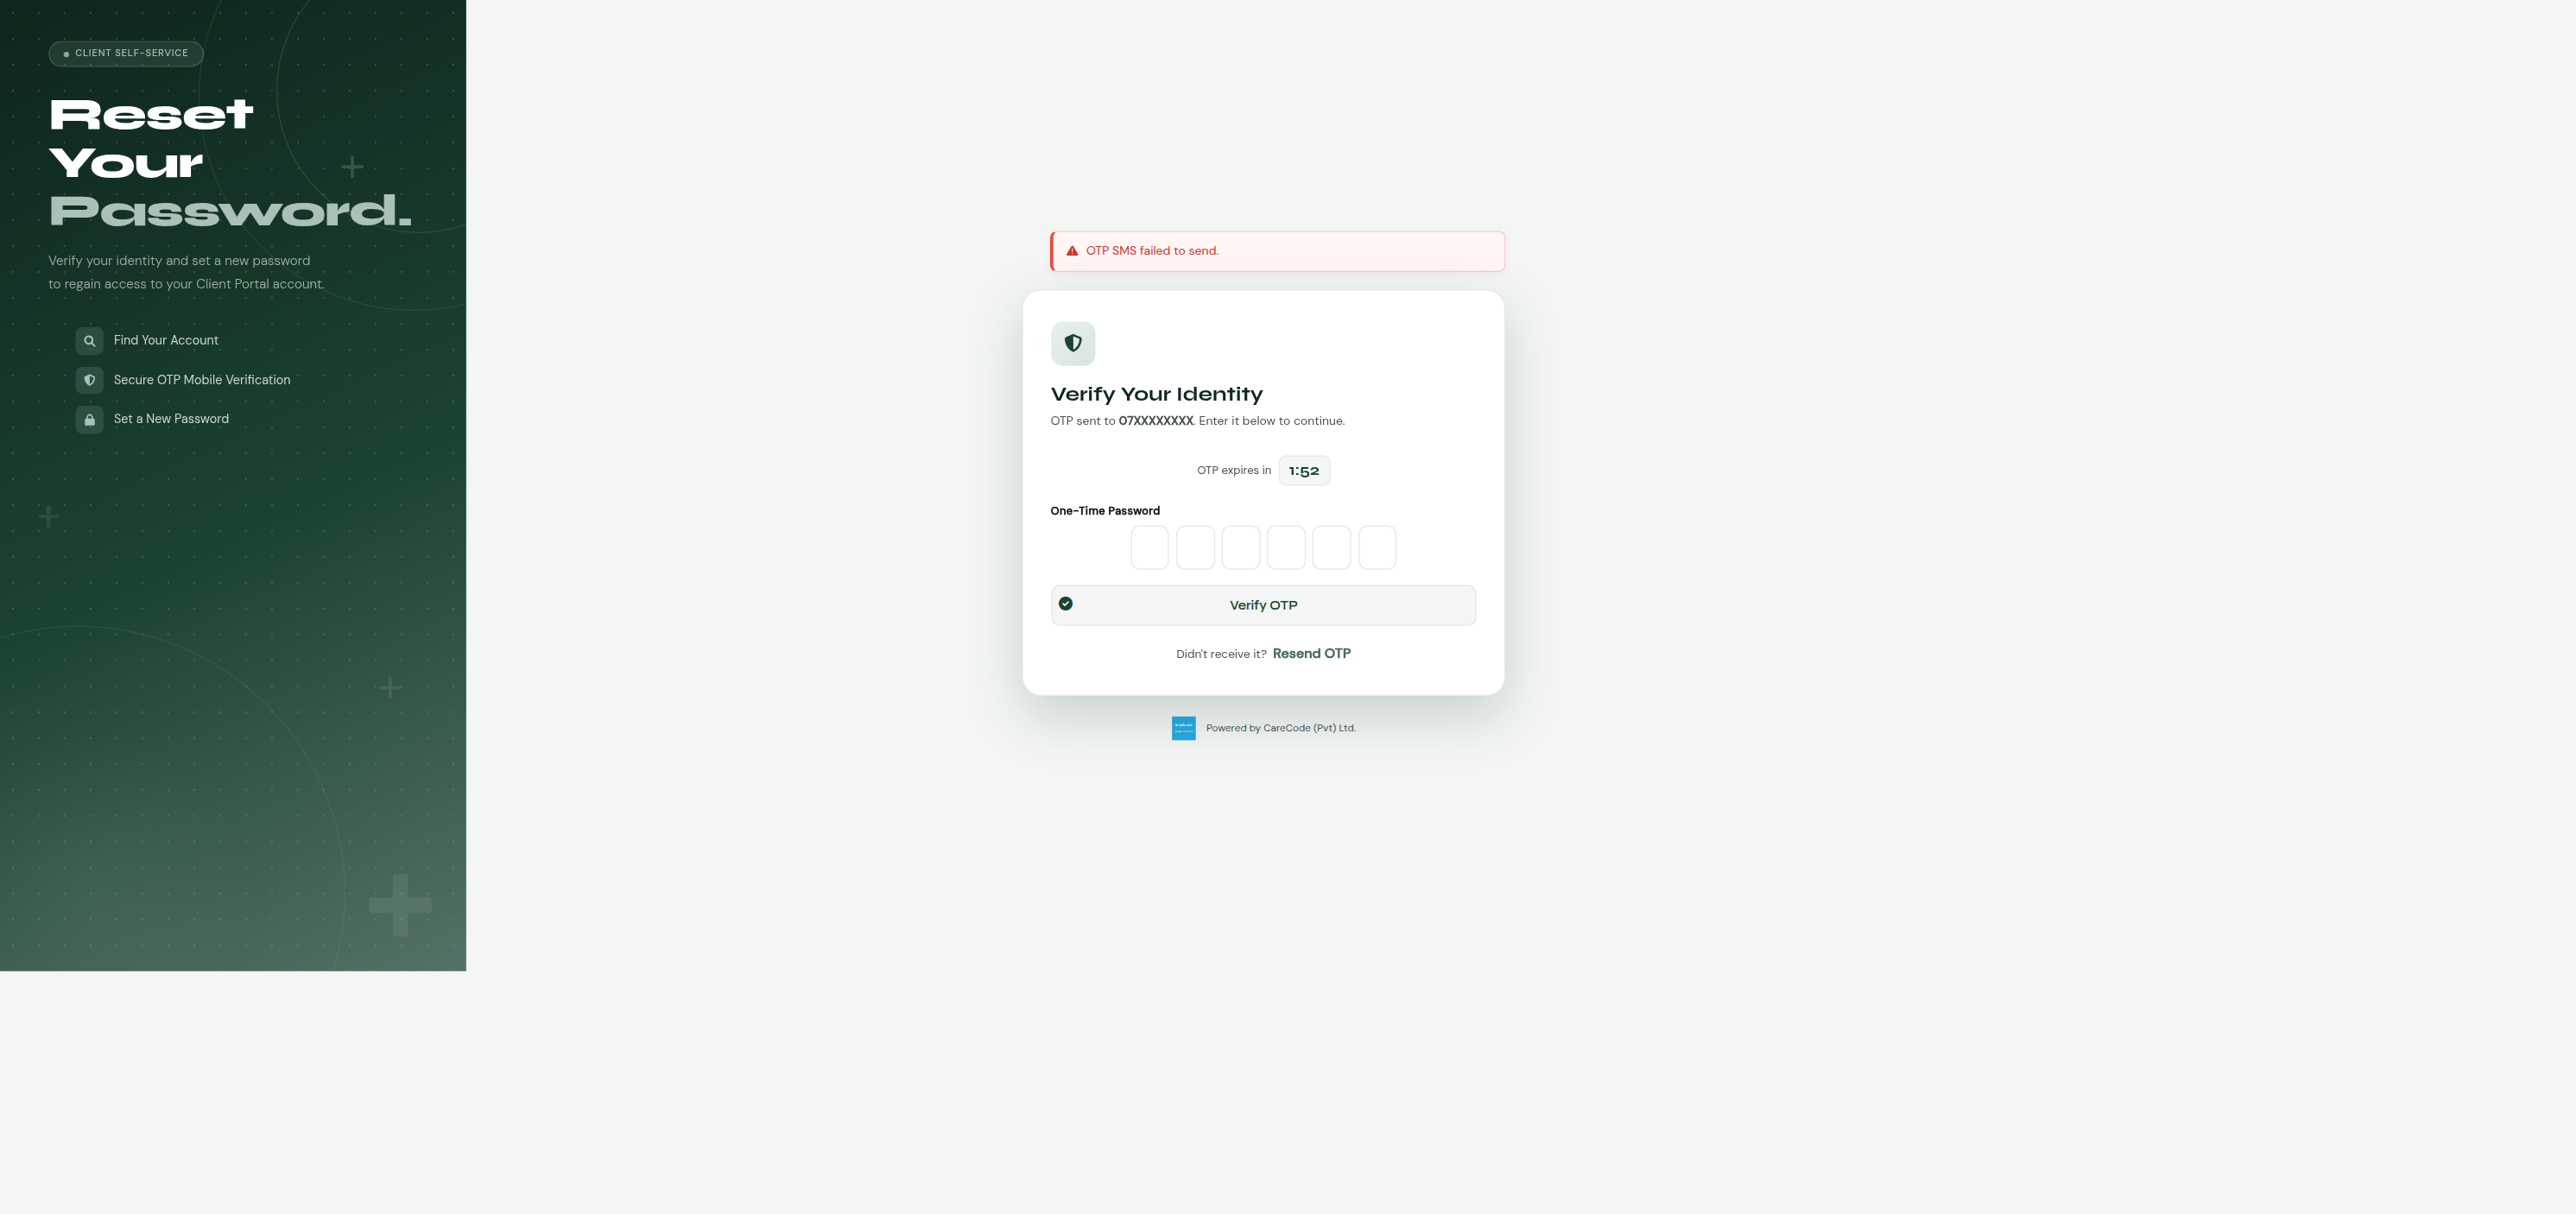
- Enter the phone number or email on your account.
- If more than one account matches (shared household phone), pick which one is yours — same picker pattern as the registration flow.
- The hospital sends a one-time code (OTP) to that phone number.
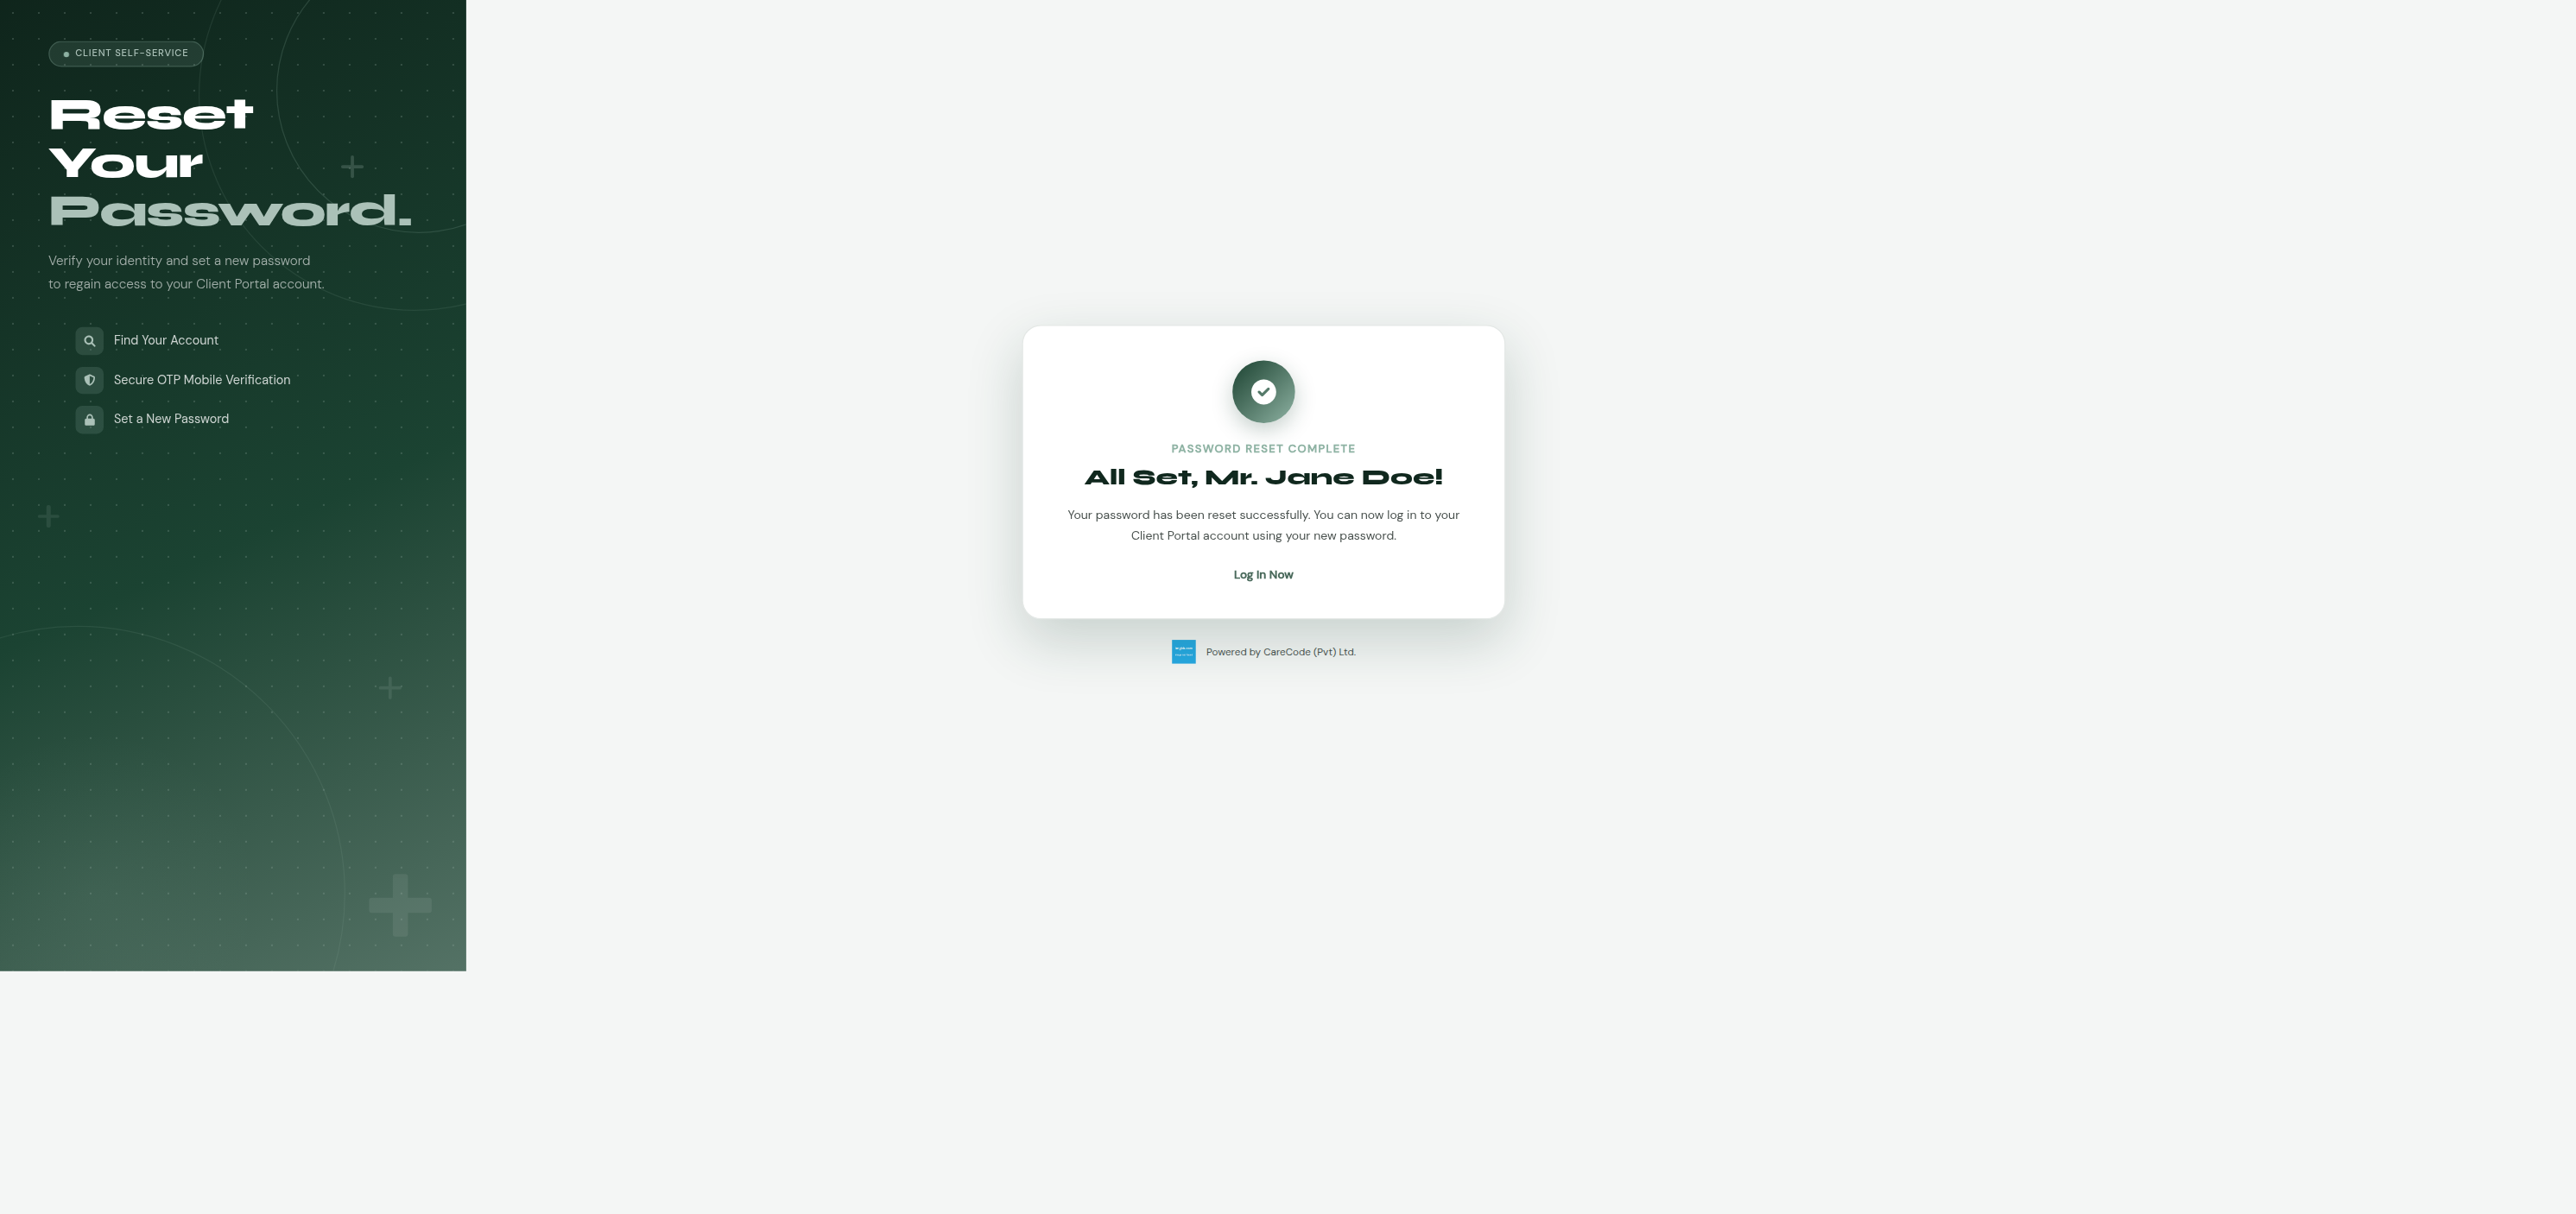
- Enter the code, then set a new password.
| Enter phone/email | Verify OTP | Reset complete |
|---|---|---|
 |
 |
 |
Password reset by email is not available yet. If your account's contact on file is a phone number, reset works as described above. If it matches only by email, you'll see a message explaining email reset isn't available yet — try your phone number instead, or contact support.
The Client Portal landing page and the kiosk's new-patient registration both need a way to resolve "which institution is this deployment for" without a logged-in staff session. Flag the institution to use via Administration → Manage → Institutions → (Edit an institution) → Default Institution checkbox:
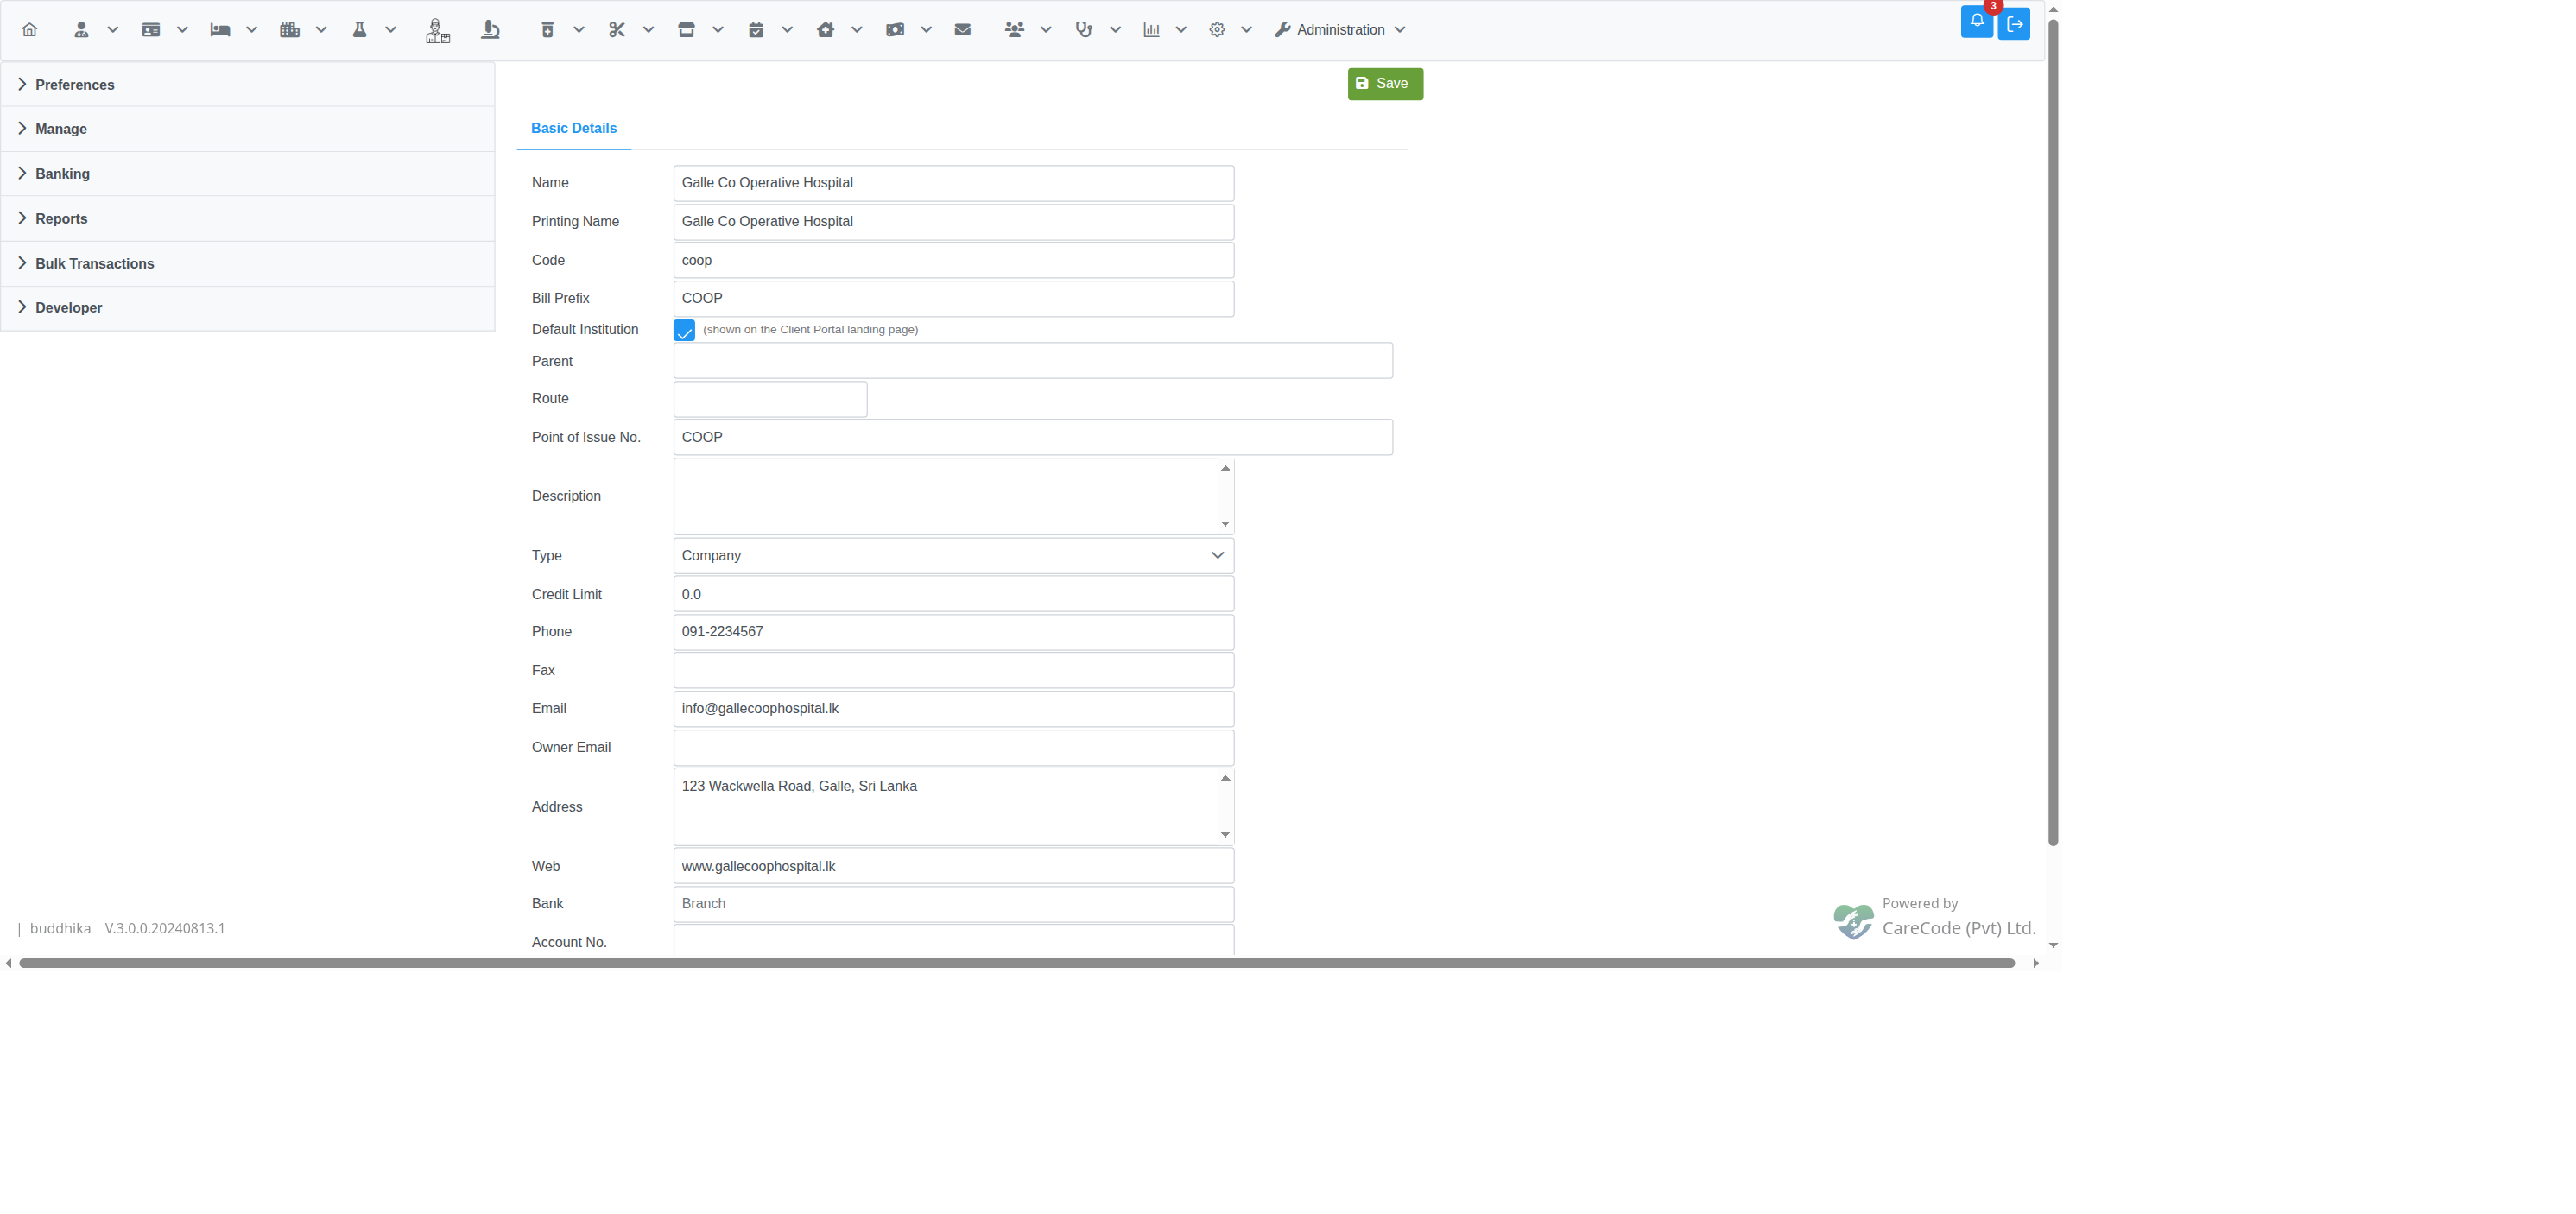
Only one institution can be flagged at a time — checking the box on one institution automatically un-checks it on any other institution that was previously flagged. If no institution is ever flagged (the common case for a single-institution deployment), the system falls back to the lowest-ID institution automatically, so most deployments don't need to touch this setting at all.
Staff who should be able to create Client Portal accounts on a patient's
behalf need the ClientPortalCreateAccount ("Create Client Portal
Account") privilege, assigned the normal way: Administration → Manage
Users → (select the user) → Manage Privileges → List Privileges, check it
under the Administration section of the privilege tree, then Update
User Privileges. As with any privilege change, the affected staff member
needs to log out and back in for it to take effect (privileges are cached
per session at login).
The registration channels read these configuration keys (via the usual application configuration screen), all optional with sensible defaults:
| Key | Default | Purpose |
|---|---|---|
Client Portal - OTP Length |
6 | Digits in the generated OTP. Values below 4 or above 12 fall back to the default. |
Client Portal - OTP Timeout Minutes |
2 | How long an OTP stays valid after it's sent. |
Client Portal - Custom SMS Body Message for Send OTP |
(built-in message) | Optional custom SMS template for registration OTPs. Use {otp} as a placeholder for the code. |
Client Portal - Custom SMS Body Message for Password Reset OTP |
(built-in message) | Same idea, for password-reset OTPs — kept as a separate key so the two messages can be worded differently (e.g. "registration code" vs "password reset code"). |
Client Portal - Custom Email Subject for Send OTP |
Your Client Portal Registration Code |
Subject line for registration OTP emails. |
Client Portal - Custom Email Body Message for Send OTP |
(built-in message) | Optional custom email body template for registration OTPs. Use {otp} as a placeholder for the code, same convention as the SMS template key. |
Client Portal - Theme Color |
#1b4332 (forest green) |
Accent color for the registration page. |
Client Portal - Logo URL |
(none — shows a generic icon) | Optional hospital logo shown on the registration page. |
Client Portal - Kiosk Allowed IPs |
(empty — fails closed) | Comma-separated list of IP addresses allowed to use the kiosk registration terminal (/client_portal/register_kiosk.xhtml). Checked the same way WebUser.isIpAllowed() checks its per-staff-user allowlist. Must be set for any kiosk terminal to work — an empty value blocks all access rather than accidentally allowing all IPs. |
OTP delivery uses the same SMS/email gateway configuration as the rest of the system (channel-booking OTPs, reminders, etc.) — there's nothing registration-specific to configure for the gateways themselves.
- "OTP SMS failed to send" / "OTP email failed to send" appears for every registration attempt — the environment's SMS or email gateway isn't configured or is failing. Check the usual gateway configuration keys. The registration flow still lets the patient proceed to the OTP-entry screen even when delivery fails (so the flow is testable without a gateway), so this message alone doesn't block testing — but it does mean no real patient can complete registration until the gateway is fixed.
-
"No Matching Patient Record" — the phone number or email address the
patient entered doesn't match any active
Patientrecord's contact details on file. Ask the patient to confirm the exact number/address registered with the hospital, or direct them to update their contact details in person. The phone/email self-service channels deliberately do not create new patient records — direct the patient to a kiosk terminal instead, which can create one on the spot. -
"Terminal Not Authorized" at the kiosk — the terminal's IP address
isn't in the
Client Portal - Kiosk Allowed IPsconfiguration key (or the key is empty/unconfigured, which fails closed by design). Confirm the terminal's actual outbound IP (check for NAT/proxying between the terminal and the app server — the app checksX-Forwarded-Forfirst, falling back to the raw connection address) and add it to the allowlist. - "Account Already Exists" — the selected person already has an active portal account. Direct them to log in, or use Forgot your password? if they don't remember their password.
-
A shared household phone number shows the wrong person, or too many
people — this reflects whichever
Patientrecords in the system have that phone number on file; it's not a bug in the picker itself. Data cleanup (correcting phone numbers on stale/duplicate patient records) is the usual fix. - "Incorrect phone/email or password" at login — deliberately generic (doesn't reveal whether the phone/email matched an account at all, to avoid account enumeration). If the patient is sure of their phone/email, direct them to password reset.
- "Email Reset Not Yet Available" at password reset — accounts can have a verified email on file, but the reset flow doesn't support email OTP yet. Direct the patient to reset via phone number instead, or contact support if they only have an email on file.
-
"No Matching Account" at password reset — no active
ClientAccountmatches that phone/email at all (different from "Account Already Exists" during registration, which means an account does exist). Direct them to register instead.
-
ClientAccount(com.divudi.core.entity.ClientAccount) — the portal identity,@ManyToOnetoPerson(not@OneToOne, so a retired account and a new active one can coexist for the same person). -
Institution.defaultInstitution— boolean flag identifying which institution's details the landing page and kiosk new-patient registration use when there's no staff session to resolve one from. Falls back to the lowest-ID institution if none is flagged.
-
ClientPortalPhoneRegistrationController,ClientPortalEmailRegistrationController,ClientPortalStaffRegistrationController,ClientPortalKioskRegistrationController— one controller per registration channel,@ViewScoped. -
ClientPortalLoginController/ClientPortalPasswordResetController— login and password reset,@ViewScoped. -
ClientPortalSessionController—@SessionScoped, holds the logged-inClientAccount, entirely separate from the staffSessionController. -
ClientPortalHomeController— backs the post-login landing page; resolves the default institution viaInstitutionFacade.findDefaultInstitution().
-
ClientPortalMatcher.classify(List<Patient>)— classifies a phone/email lookup as no-match / single-match / multi-match. -
ClientPortalOtpGenerator.generate(int length)— OTP code generator. -
ClientPortalIpAllowlist.isAllowed(requestIp, allowedIpsCsv)— kiosk terminal IP restriction. -
ClientAccountFacade.createIfNoActiveAccount(...)— row-locked check-then-create, preventing duplicate accounts under concurrent registration attempts. -
InstitutionFacade.findDefaultInstitution()/clearDefaultInstitutionExceptFor(id)— resolves and manages the default institution.
Standalone public pages (own layout, no shared template): register_phone.xhtml,
register_email.xhtml, register_kiosk.xhtml, login.xhtml,
reset_password.xhtml, home.xhtml. The staff-assisted registration
screen lives under admin/client_portal/ and uses the normal internal
app template.
com.divudi.bean.kiosk.KioskController / kiosk/kiosk_registration.xhtml
is a different, pre-existing front-desk patient self-registration
screen — no OTP, no IP restriction, no ClientAccount involvement. Don't
confuse it with this feature's kiosk registration channel
(client_portal/register_kiosk.xhtml,
com.divudi.bean.clientportal.ClientPortalKioskRegistrationController).
- Password reset only supports phone/SMS OTP — accounts with only a verified email on file see a "not available yet" message rather than a broken flow. Wiring email-based reset in is a known follow-up.
- OTP attempt-limiting/cooldown and session-fixation hardening across the client-portal auth controllers is a separate, tracked follow-up.