Repository navigation
Clip Extractor Scene Cuts
Find where the shots of a video change (the hard cuts between scenes). Then jump from cut to cut, mark a whole scene with one key, or put every scene in the clip list and export them all. New in 1.8.0.
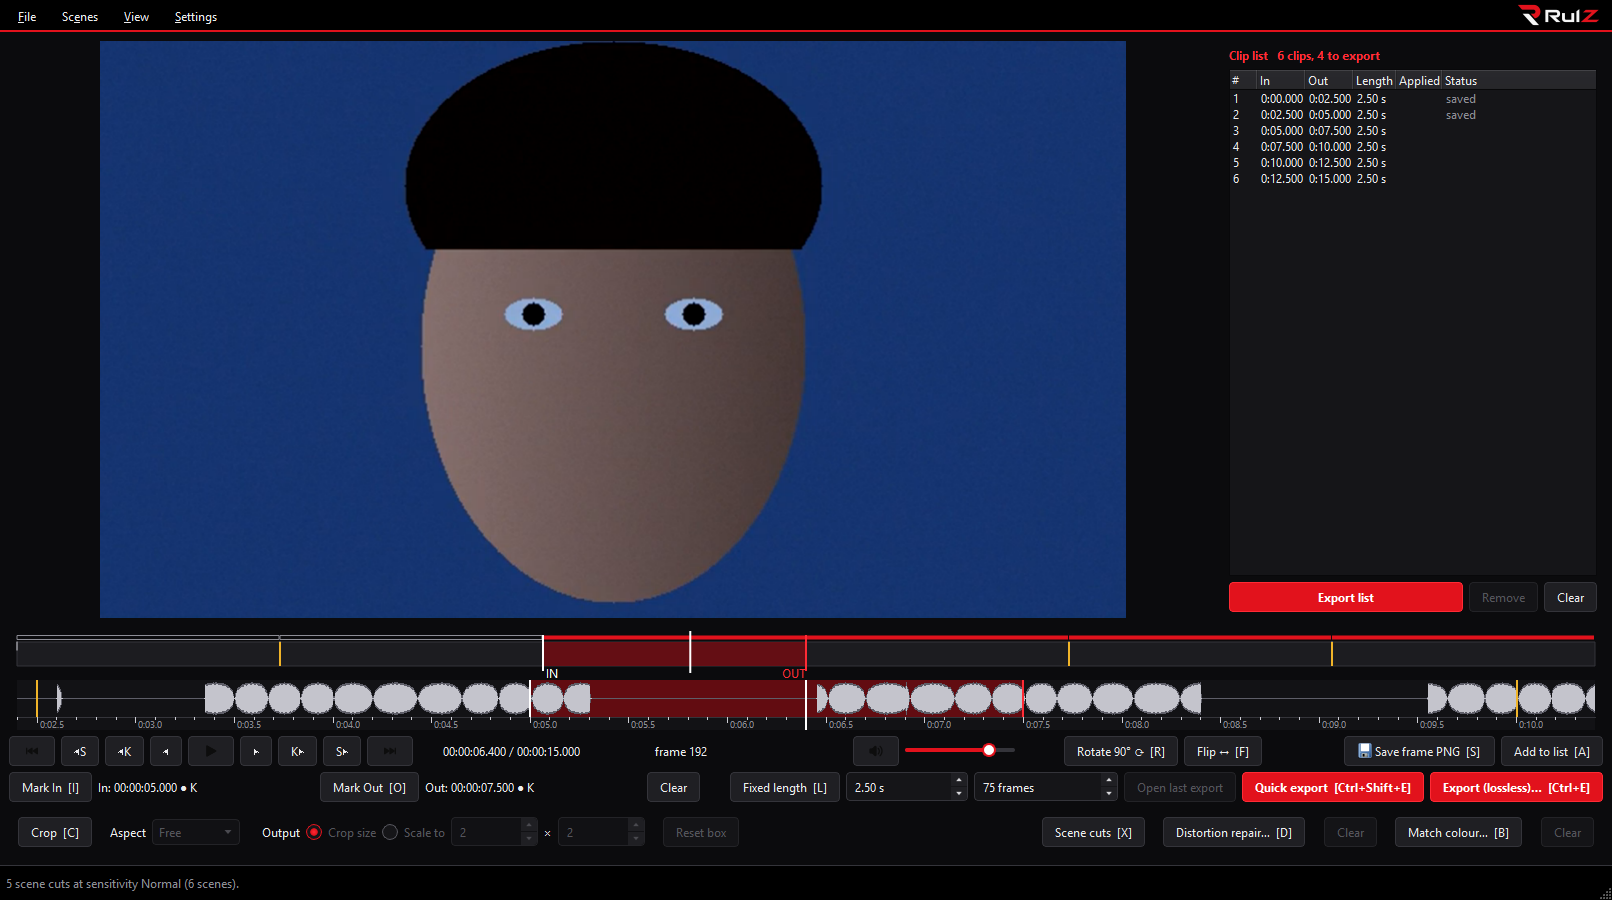
- Open a video and press X (or the Scene cuts button). The video is read once in the background.
- Amber lines appear on the timeline at the first frame of each new scene.
- Page Down / Page Up jump to the next / previous cut. Shift+X marks the scene under the playhead.
- Ctrl+Shift+X puts every scene in the clip list; Ctrl+Shift+A exports them.
All of these are also in the Scenes menu.
Scene cuts (X) reads the whole video once. The status bar shows the progress, with Stop. You can keep working meanwhile: step, mark, add clips, even export.
How long it takes depends on the video. On a fast PC it reads about 600 frames a second of 1080p H.264, so a 10-minute video at 30 fps takes about half a minute. 4K and HEVC take longer.
The result is kept, so the cuts are back at once the next time you open the video, also after restarting the app. Pressing X again only says how many cuts there are.
- The results are stored per user in
%LOCALAPPDATA%\SimpleCut\scene-cuts, beside the clip lists, not next to your videos. - They are not used when the video file has changed since (another size or date); press X to read it again.
- Results for videos that have been gone for 90 days are removed.
| Action | Button | Key | With Fixed length on |
|---|---|---|---|
| Previous scene cut | ◀S | Page Up | Moves the clip box to the previous cut |
| Next scene cut | S▶ | Page Down | Moves the clip box to the next cut |
| Select this scene | Shift+X | Moves the clip box to the start of the scene | |
| Add scenes to clip list | Ctrl+Shift+X | One clip of that length per scene (see below) |
- Previous / next move the playhead to the cut. Before the first cut, Previous goes to the start of the video.
- Select this scene sets In on the first frame of the scene under the playhead and Out where the next scene starts. Out is exclusive, so the clip ends on the scene's last frame. In the last scene, Out is the end of the video.
Add scenes to clip list (Ctrl+Shift+X) adds every scene as a clip. Each one gets the picture settings as they are now (rotation, flip, crop, scale, colour match, distortion repair), as Add to list does.
- With In and/or Out set, only the scenes between them are added, and the first and last are cut to the marks.
- With Fixed length on, it adds one clip of that length at the start of every scene that is long enough for it. Shorter scenes are left out, so no clip runs across a cut. The status bar says how many were left out.
- Pieces shorter than 3 frames are left out.
- Scenes already in the list are not added twice.
- Adding more than 25 at once asks first.
Then press Export list (Ctrl+Shift+A).
Scenes > Sensitivity sets how big a change counts as a cut:
| Sensitivity | Finds |
|---|---|
| Low | Only the clearest cuts |
| Normal | Most cuts (the default) |
| High | Also cuts between shots that look alike: same place, same colours |
A change takes effect at once, without reading the video again. The choice is remembered.
A cut is a frame that differs clearly from the one before it, and still differs a couple of frames later.
- Steady camera movement, such as a pan or a zoom, is not a cut: every frame differs from the last by about the same amount.
- A camera flash or a single bad frame is not a cut: the picture is back two frames later.
- Two cuts less than half a second apart count once (the stronger one stays). There is never a cut in the first or last half second, so a fade-in, a title or a broken last frame is not a scene.
- Slow fades and dissolves have no single frame where the picture changes, and are usually not found.
- Very fast motion or a sudden change of light can be taken for a cut. Jump to it with S▶ and look.
- A cut is usually not on a keyframe, unless the encoder put one there (many encoders do). So a scene clip is often re-encoded with NVENC rather than cut losslessly. See Exporting.
- Clip List: export many clips in one go
- Fixed-Length Clips
- Keyboard Shortcuts