pts insert image
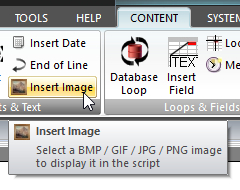 Click Insert Image on the CONTENT ribbon panel to display the Insert Image window. Read more: Command Syntax Click Insert Image on the CONTENT ribbon panel to display the Insert Image window. Read more: Command Syntax
|
|---|
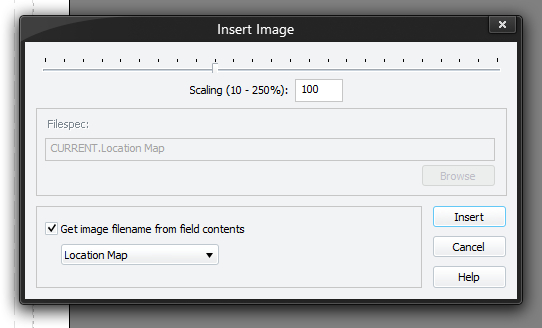
This adds an image into your document. You must press Insert (or Update if editing an existing command) for your changes to be applied to the current script in the editor.
The following image file formats are supported:
- BMP
- GIF
- JPG, JPEG
- PNG
- TIF, TIFF
There are two ways that you can use images in your scripts.
Click the Browse button to display a file window. Navigate to the image and select it. When you select an image the editor will automatically adjust the scale to fit the width of the page if it is too large.
If you are inside a LOOP command, you can set the Get image filename from field contents option to enable the field drop-down list. Select the field that contains the image path and click Insert. More than likely you will want to use the Location Map field as it has been provided for this purpose.
You can also alter the image size by moving the scale indicator or typing in a value. Using a scale under 100% will cause your image to reduce in size from it's original state. Likewise, using a scale greater than 100% will cause it to enlarge. The default is 100%.
 If you use method 2 and have specified a field, then you must remember that all of the images displayed will use the same scale factor. The images are aligned using the current font alignment.
Reports with images can be printed or exported to Microsoft Word. However, please note that the CRS document only references the images and does not embed them. So if you delete the image files or move them then the script will not work correctly.
If you want to send a CRS with one or more image commands to another user you should supply the images too and the other user will have to alter the paths in the editor or else use the same directory structure. Using the images from a directory such as C:\ScriptImages is recommended to make this easier. An alternative is to print the document as PDF (use something like CutePDF) and email that or, as previously mentioned, export it to Microsoft Word.